RemovingtheLiftArms(continued)
4.Whenremovingtherightsideliftarm,carefullyremovethecuttingunithigh
trimheightswitchsensingplatefromtheliftarm.
CAUTION
Eachliftarmweighsapproximately27kg(60lbs).
5.Supporttheliftarmandremovetheliftarmpivotpin.Removetheliftarm
fromthemachine.
6.Checkthepivotpinandliftarmbushingsfordamageorwearandreplace
asnecessary.
7.Continuetodisassembletheliftarmasnecessary.
InstallingtheLiftArms
1.Tightenthebumperpadmountingscrewsuntilthescrewheadisushwith
thesurfaceofthepad.
2.Lightlygreaseandinstallthesphericalbearingandshoulderboltinthefront
liftarmhubifpreviouslyremoved.Tightentheangenutfrom114to135
N·m(84to100ft-lb).
3.Useanarborpresstoinstallnewangebushingsintherearliftarmhub
ifnecessary.
4.Lightlygreasetheliftarmpivotpin.Positiontheliftarminthemachineand
installthepivotpinandpivotpinfasteners.
5.Lightlygreasetheliftcylinderpin.Supporttheliftarmandtheliftcylinderand
installthecylinderpinandcylinderpinfasteners.
6.Wheninstallingtherightsideliftarm,carefullyinstallthecuttingunithigh
trimheightswitchsensingplatetotheliftarm.Checkandadjustthecutting
unithightrimheightswitchclearance;refertoAdjustingtheCuttingUnit
HighTrimHeightSwitch(page6–34).
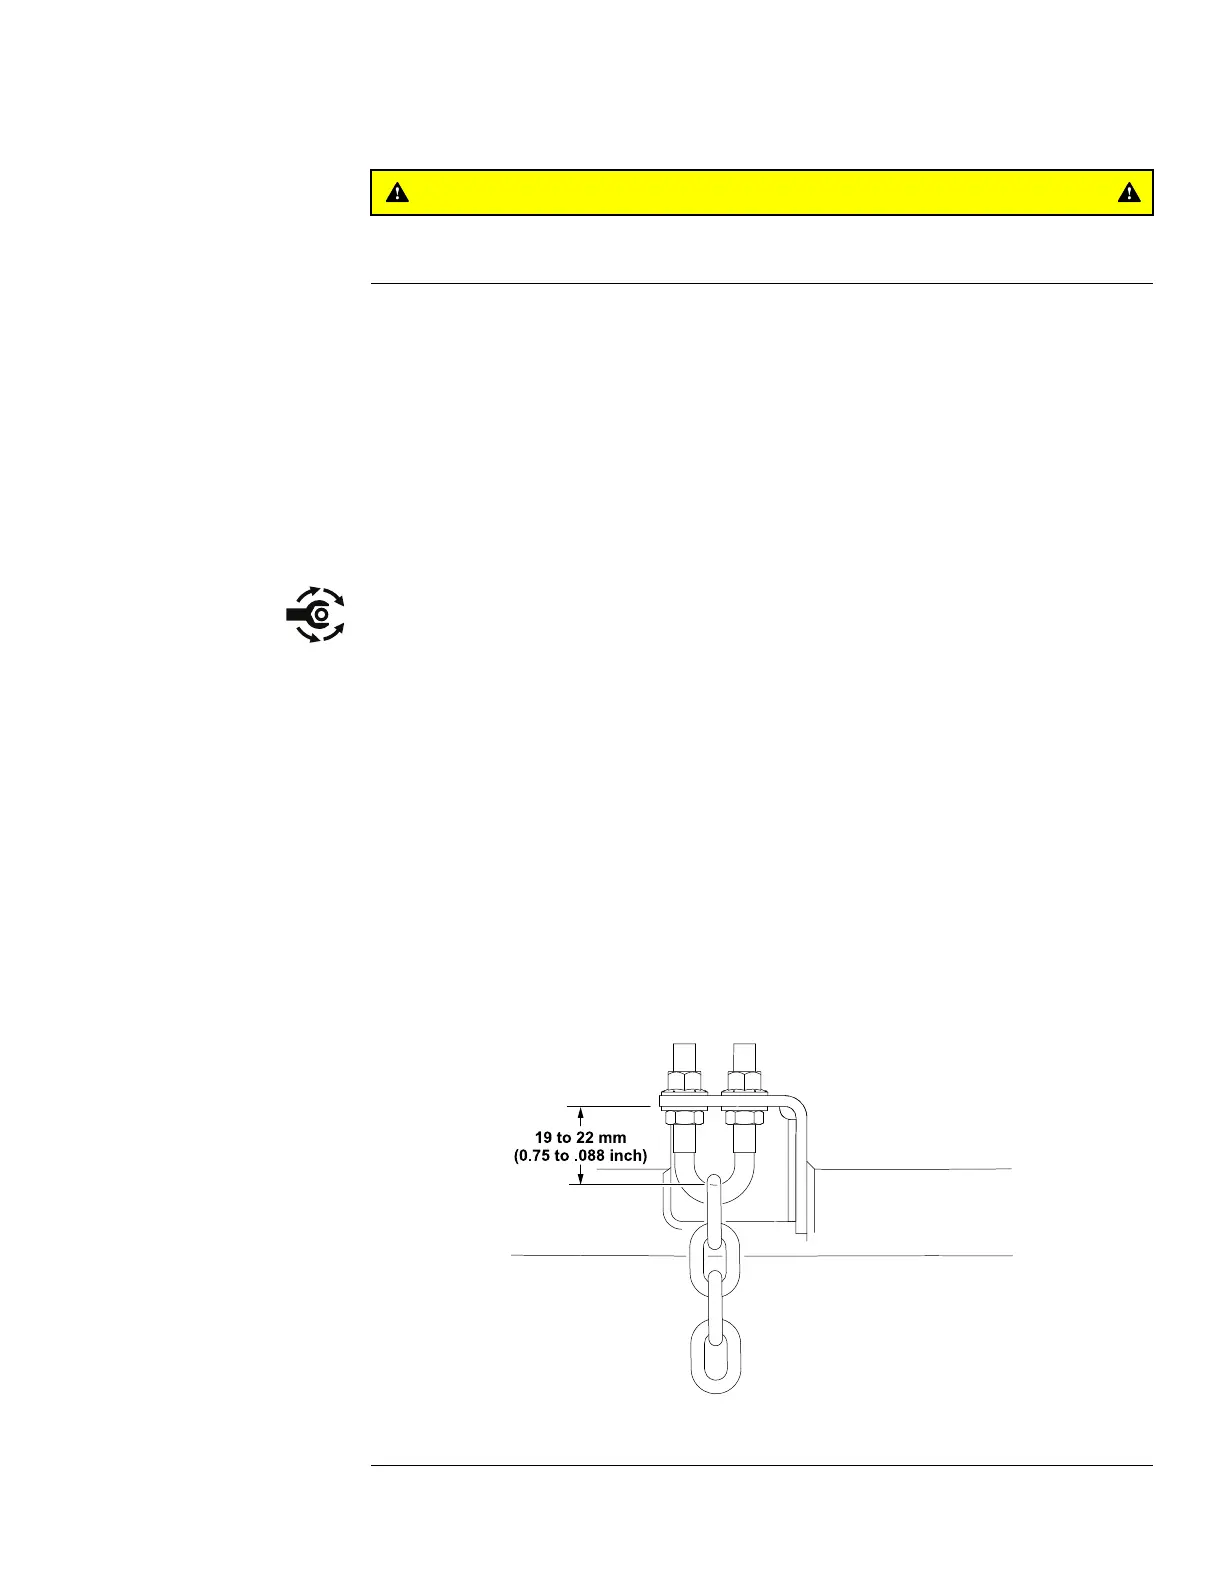
7.Installorcheckandadjusttheheightofcut(HOC)chainU-boltsasshownin
Figure130.
g314384
Figure130
Groundsmaster
®
3200,3300and3310
Page7–31
Chassis:ServiceandRepairs
19240SLRevA