Section 2, Installation - Install the SMIO3
65K510DEP08-1A 2-3
Install the SMIO3
Thissubsectiondetailsthefollowing information:
•SMIO3Description
• InstallationSteps
SMIO3 Description
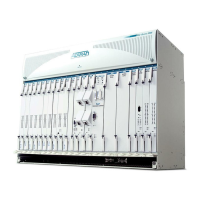
TheSwitchModuleInput/Output3(SMIO3)supportsoneSystemControllerModule(SCM)
andtwoSwitchModules(SM).
TheSMIO3providesthefollowing:
•Physicalinterface(3slots)totheTotalAccess5000backplanefortheSCMandtwoSMs
•PhysicalcommunicationpathsbetweentheSCMandtheSMs
• CommunicationinterfaceportstotheSCM
thatenablemanagementoftheTotalAccess
5000system
•Wire‐wrapterminalsforexternalclocks,alarmI/O,testing,andvoltage
• ControlsignalsandapowerpathtotheFanModule
Installation Steps
TheSMIO3attachestothebackoftheTotalAccess5000chassis.ToinstalltheSMIO3,
completethefollowing:
Ifthechassisisrackmounted,besurethatthechassisissquareandnot
distortedbytherackframebeforeinstallingtheSMIO3.Toaidins tallation,
loosenthechassismountingboltstoallowthechassistobecomesquare.
Beforeinstallingthe chassis,installtheSMIO3.InstallingtheSMIO3ensures
therelayrack,ifnotsquare,will notwarpthechassis .Ifnotdoneproperly,
theSMIO3mountingscrew swillnotmatewi ththechassis. Forinstallation
instructions,refertotheTotalAccess5000SwitchModuleI/O3(SMIO3)JobAid
(P/N61187051L1‐22).
1. AligntheSMIO3acrossslotslabeled
12/SCM,SM A,andSM B(labeledinthefrontofthe
chassis).SeattheSMIO3ontotheinstallationpegsofthechassissothatitrestsfirmly
againstthechassisframe.
2. Attachthemoduletothechassisusingthefourphillipsscrewsandthreestand‐offs
provided(seeFigure2‐1).
3. Usinga#1phillips‐head
screwdriver,attachtheguardtothechassisusingthetwo
screwstosecuretheguard.
 Loading...