Section 2, Installation - Install and Connect the Rear Panel Components
65K510DEP08-1A 2-15
Install the Rear Panels
Toinstallthepush‐throughpanels,completethefollowingprocedure(seeFigure2‐8and
Table2‐2):
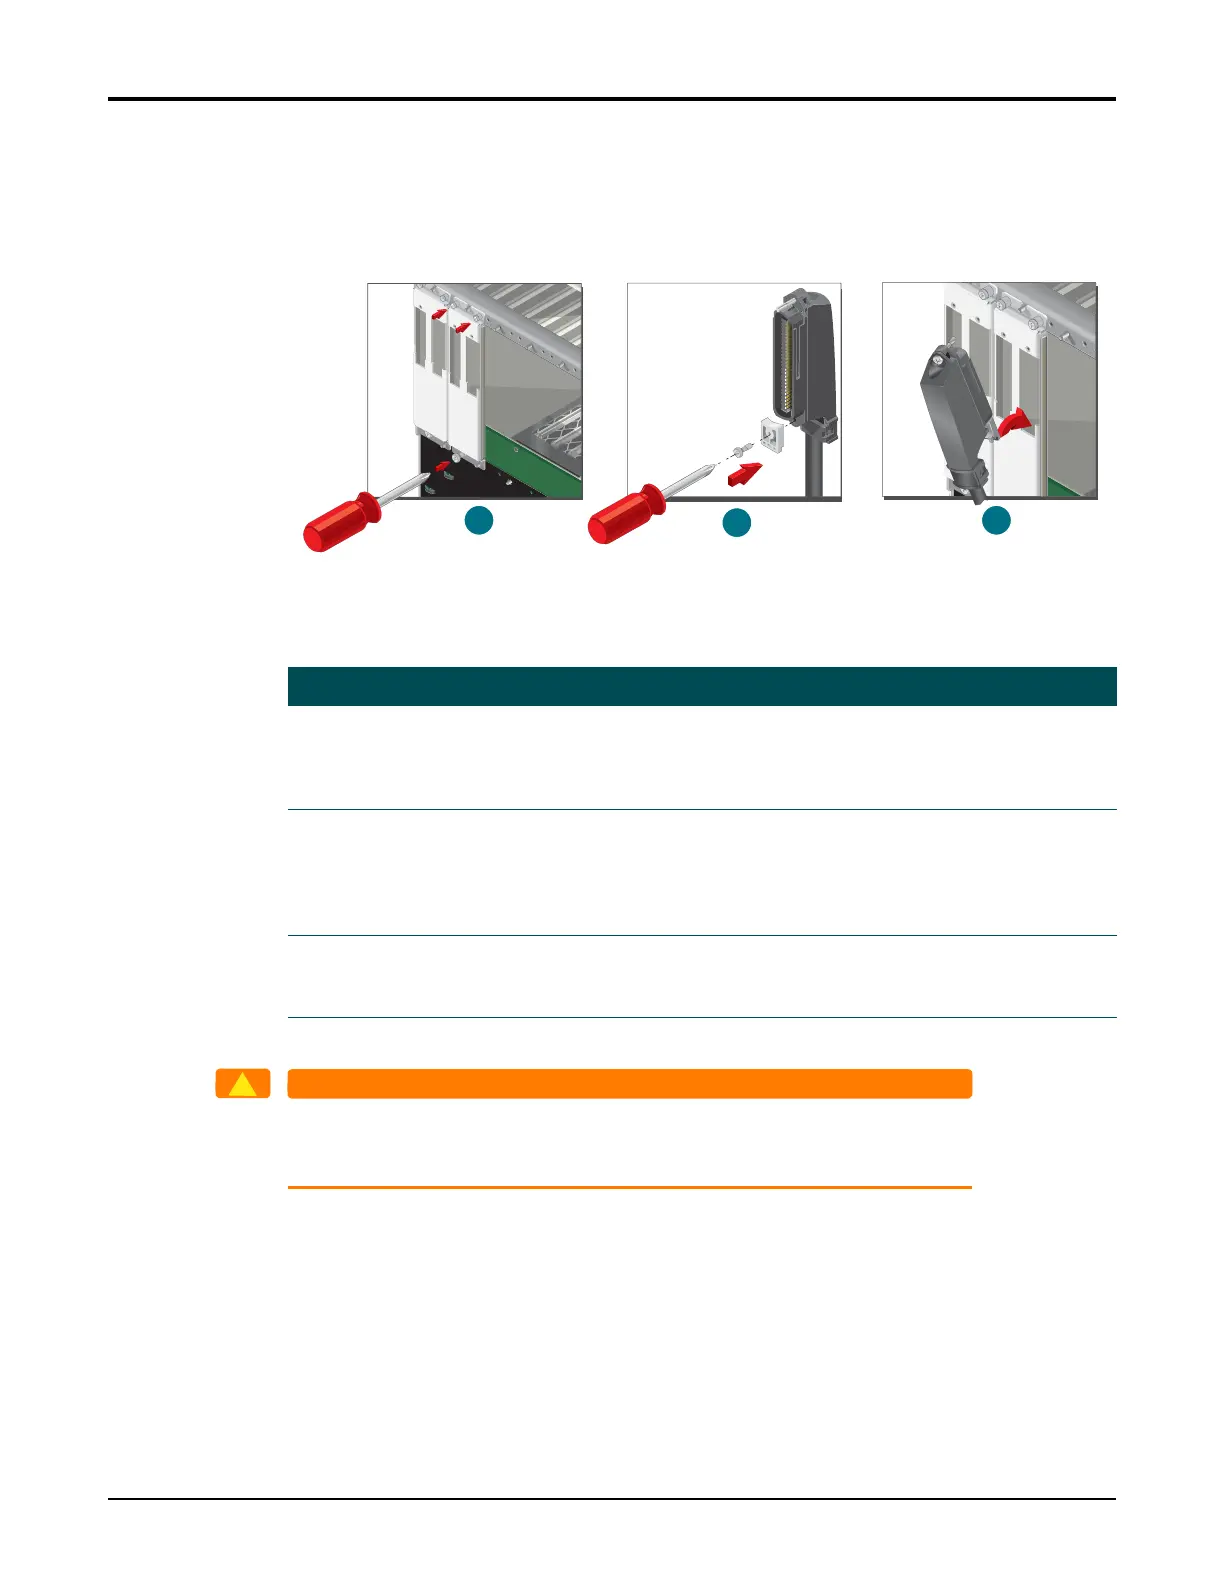
Figure 2-8. Installing the Rear Panels
Tomeet NEBSLevel3andprovide properairflow andfiltration,the
applicablerearpanelmustbeinstalledinanyoccupiedslot,andafrontand
rearblankpanelmustbeinstalledinanyemptyslots.
Table 2-2. Rear Panel Installation Steps
Step Description
1 Positiontherearpanelonthebackofthechassissothatthemiddlenotch onthepanelaligns
withthechassisalignmentpin.Therearpanelisprovidedwithasetofcaptivescrews.
Thesescrewsinsertintothechassis’screwmountingholes.UseaPhillipsscrewdriverto
tightenthecaptivescrews,securingthepaneltothechassis.
2InstalltheChampMountingBrackettothebottomofthe90°malechampconnectorusing
one#4‐40x0.35inchCaptiveScrew.Therearpanelisprovidedwithasetof#4‐40x0.35inch
CaptiveScrewsforinstallationof
twoconnectorstothepanel.Usetwoscrewsforeachcon‐
nector,oneforthemountingbracket,thesecondtosecuretheconnectortothepanel(see
Step3).ReplacetheCaptiveScrewprovidedwiththecableifitisnota0.35inchscrew.
3Installthe90°malechampconnector
totherearpanelbyslidingthemountingbracketdown
intothepanelslot,andsecuringwitha#4‐40x0.35inchCaptiveScrewatthetopofthe
champconnector.
2.
1.
3.
 Loading...