Page 206 – 10. Capture visualiser
TitanUniversal_Man_v10_QU.doc 15 March 2016
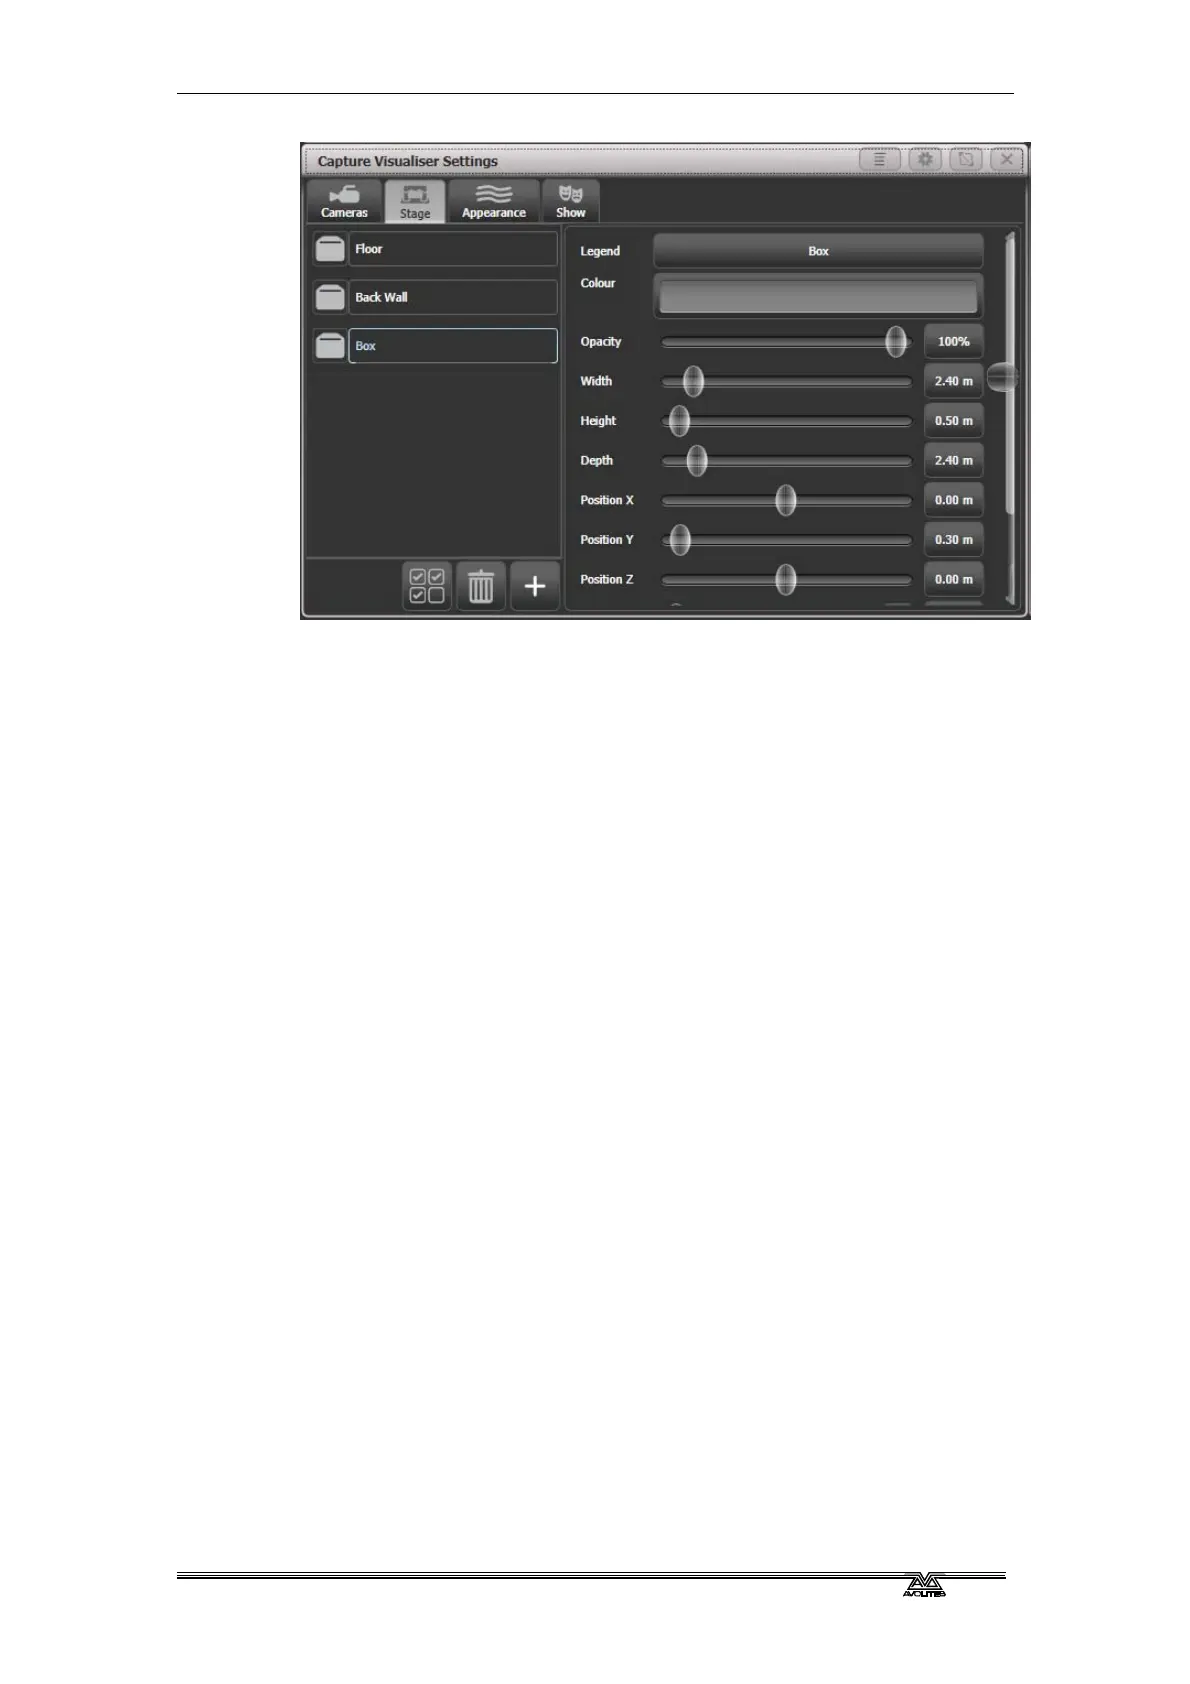
“Floor” and “Back Wall” are provided by default. You can add other
objects by clicking the Plus button at the bottom of the list.
Click on the object in the list on the left hand side to position and
angle the object using the controls on the right. You can either type
exact numbers or use the sliders. You can set a legend and colour for
each object.
10.1.2 Setting up fixtures
Fixtures are automatically placed into the visualiser when they are
patched if the Auto Update switch in the Capture Settings “Show”
window is set to On.
If you load a Titan show from a previous version, or have some
patched fixtures which are not placed in Capture, use the [Edit
Fixtures] [Update Personality] option on the Patch menu to place
missing fixtures into the visualiser.
Fixtures are positioned using the wheels. Select one or more fixtures
using the Fixture select or Group buttons and turn them on by
pressing Locate. Press the [Position – Orientation] context menu
button to switch the wheels to Visualiser mode (or press Softkey G at
the top level menu until the display shows Wheels-Visualiser.)
Select Position attribute, then use the wheels to change the X/Y/Z
position of the fixture(s). If you select multiple fixtures, pressing the
[Scale-Fan] context menu button or the Fan button allows you to
evenly spread out the fixtures. The Fan curve/group/split options also
work.
Touch above or below the wheel value to nudge the setting up or
down by one step. For rotation this will be 45 degrees.
If you are viewing the stage from the front then
X moves left and right
Y moves up and down
Z moves towards and away from you
Press the Position button again to switch the wheels to Orientation
mode. The wheels will now pivot the fixtures in the X/Y/Z axes. Again


 To Next Page