10. Capture visualiser - Page 207
TitanUniversal_Man_v10_QU.doc 15 March 2016
you can use the Fan button to give a spread of angles on multiple
fixtures.
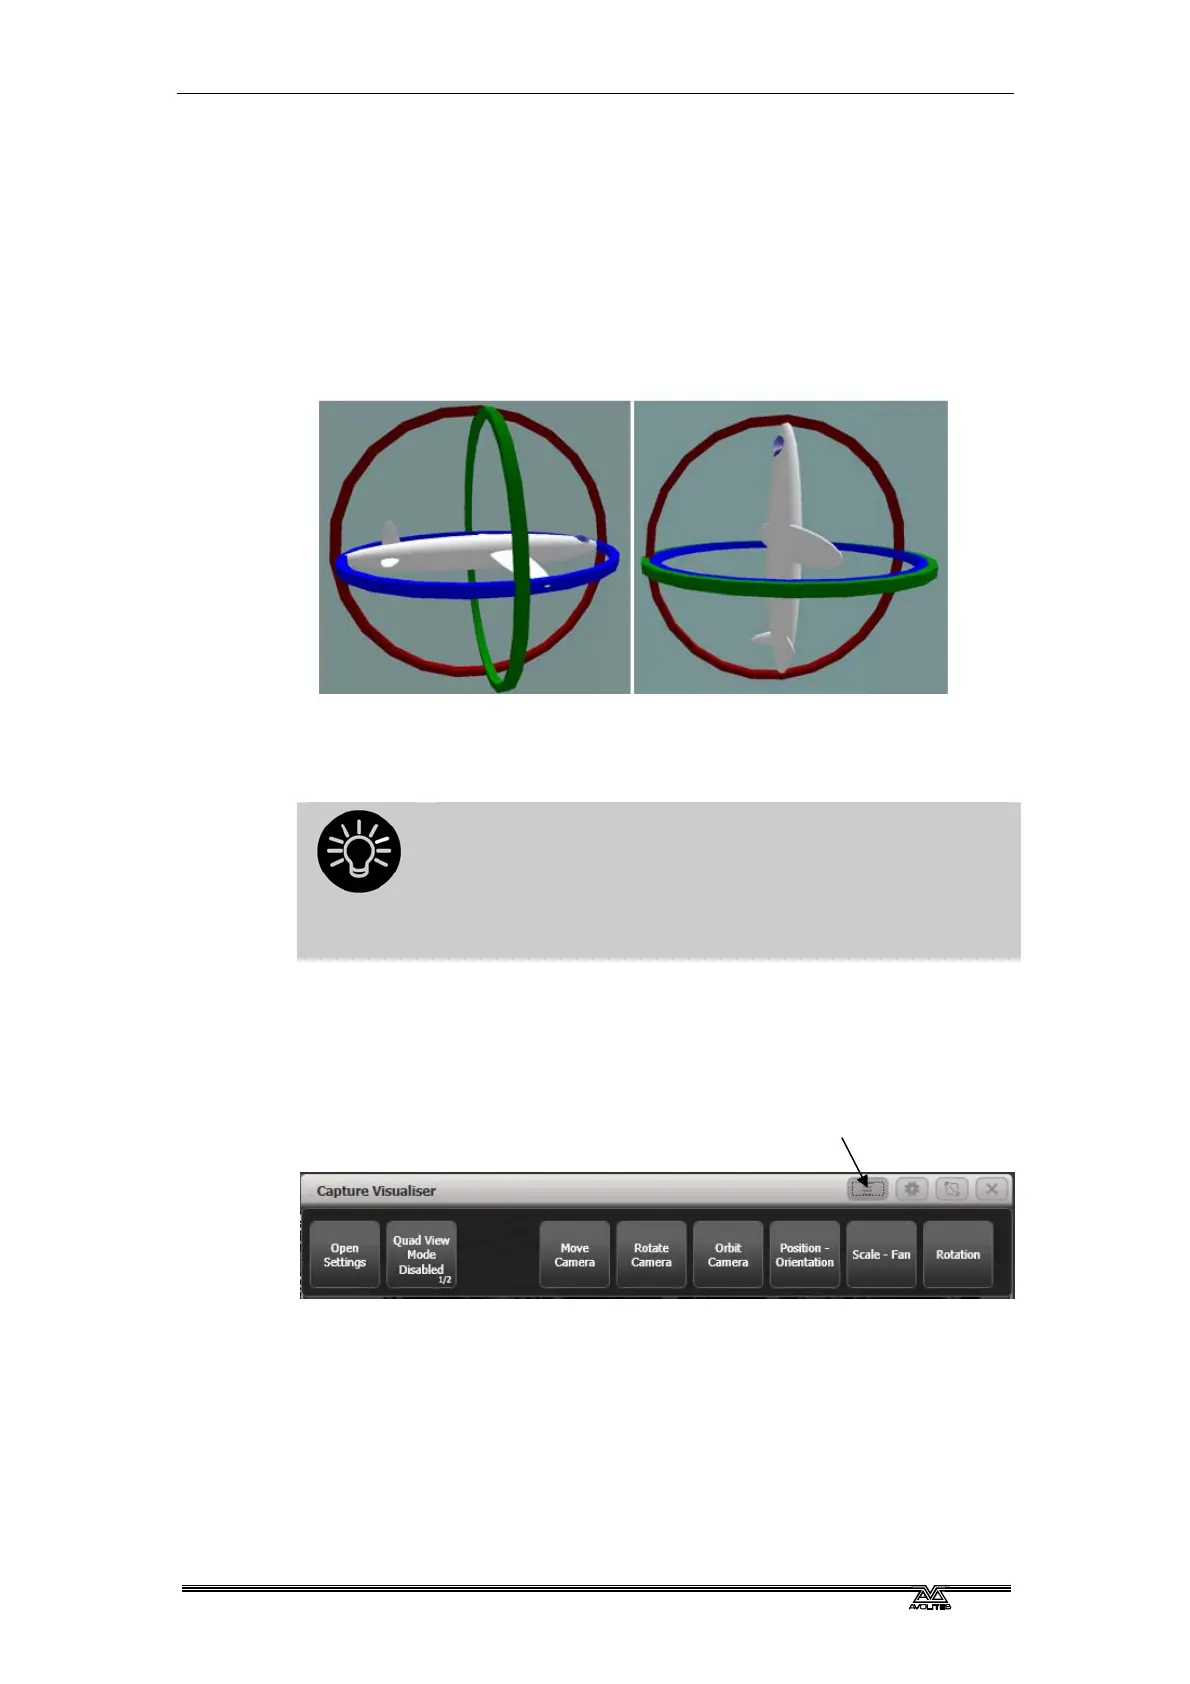
The X/Y/Z rotation operates like a 3-axis camera gimbal – imagine
the fixture within three pivoting rings (see left hand picture below). In
some orientations, the X and Z rotation will seem to do the same
thing and some rotations seem to be impossible to achieve – this is
called gimbal lock and happens when two of the “rings” are lined up
with each other (right hand picture below). Change the Y rotation by
90 degrees to enable you to achieve other angles.
Illustration by MathsPoetry
Press the Position button a third time to switch the wheels to Rotation
mode. This is similar to Orientation but if you have multiple fixtures
selected, the fixtures rotate as a group about the middle fixture.
It’s easier to see what position fixtures are in if you
change the tilt angle so they aren’t pointing straight
down (or up). It’s always useful if you have an actual
fixture of each type connected to help you get them
pointing the right way, but you can change this later if
not.
10.1.3 Setting up cameras (views)
Four cameras (selectable views) are provided by default but you can
add more.
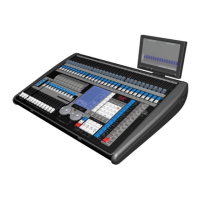
The context menu buttons provide camera options.
Camera controls are in the Capture Visualiser Settings window which
you can open using the [Open Workspace Window] button or using
the [Open Settings] context button.
The view buttons across the top select the four default views. Press
the Plus button at the right hand side to add a new view.
The top button on the left toggles between single view or quad split
mode. If quad split is selected, the other 4 buttons select which view
you are controlling.