3. Patching - Page 57
TitanUniversal_Man_v10_QU.doc 15 March 2016
fixture. Click on a section of the bar to select those fixtures in the grid
below.
The grid area shows details for each patched fixture on the selected
output line. Some parameters are editable by clicking in the grid,
then the softkeys allow you to change the parameter.
You can change parameters for multiple fixtures by
dragging a selection box over the grid, or hold the Ctrl
button on the keyboard and click on the required
fixtures. Then edit the parameter on the softkeys, and
use the [Set] context button or press Enter to update
the selected fixtures.
• You can switch off some of the display columns to make the
Patch View simpler. Press the [Choose Columns] context menu
button and then use the options on the softkeys to turn
columns on and off.
• You can add notes to each fixture in the Patch View. Click on
the Notes field and enter text using the keyboard.
The tabs across the top allow you to switch the window to Personality
List (lists all fixtures available on the console), RDM (allows you to
patch devices using RDM) and Attribute Behaviour (allows you to set
invert, freeze, curve, and limit. See section 3.4.2 and following
sect
ions for Attribute Behaviour.
A context menu option allows you to show or hide parked fixtures. If
you show parked fixtures they will appear greyed out in the position
they were originally patched.
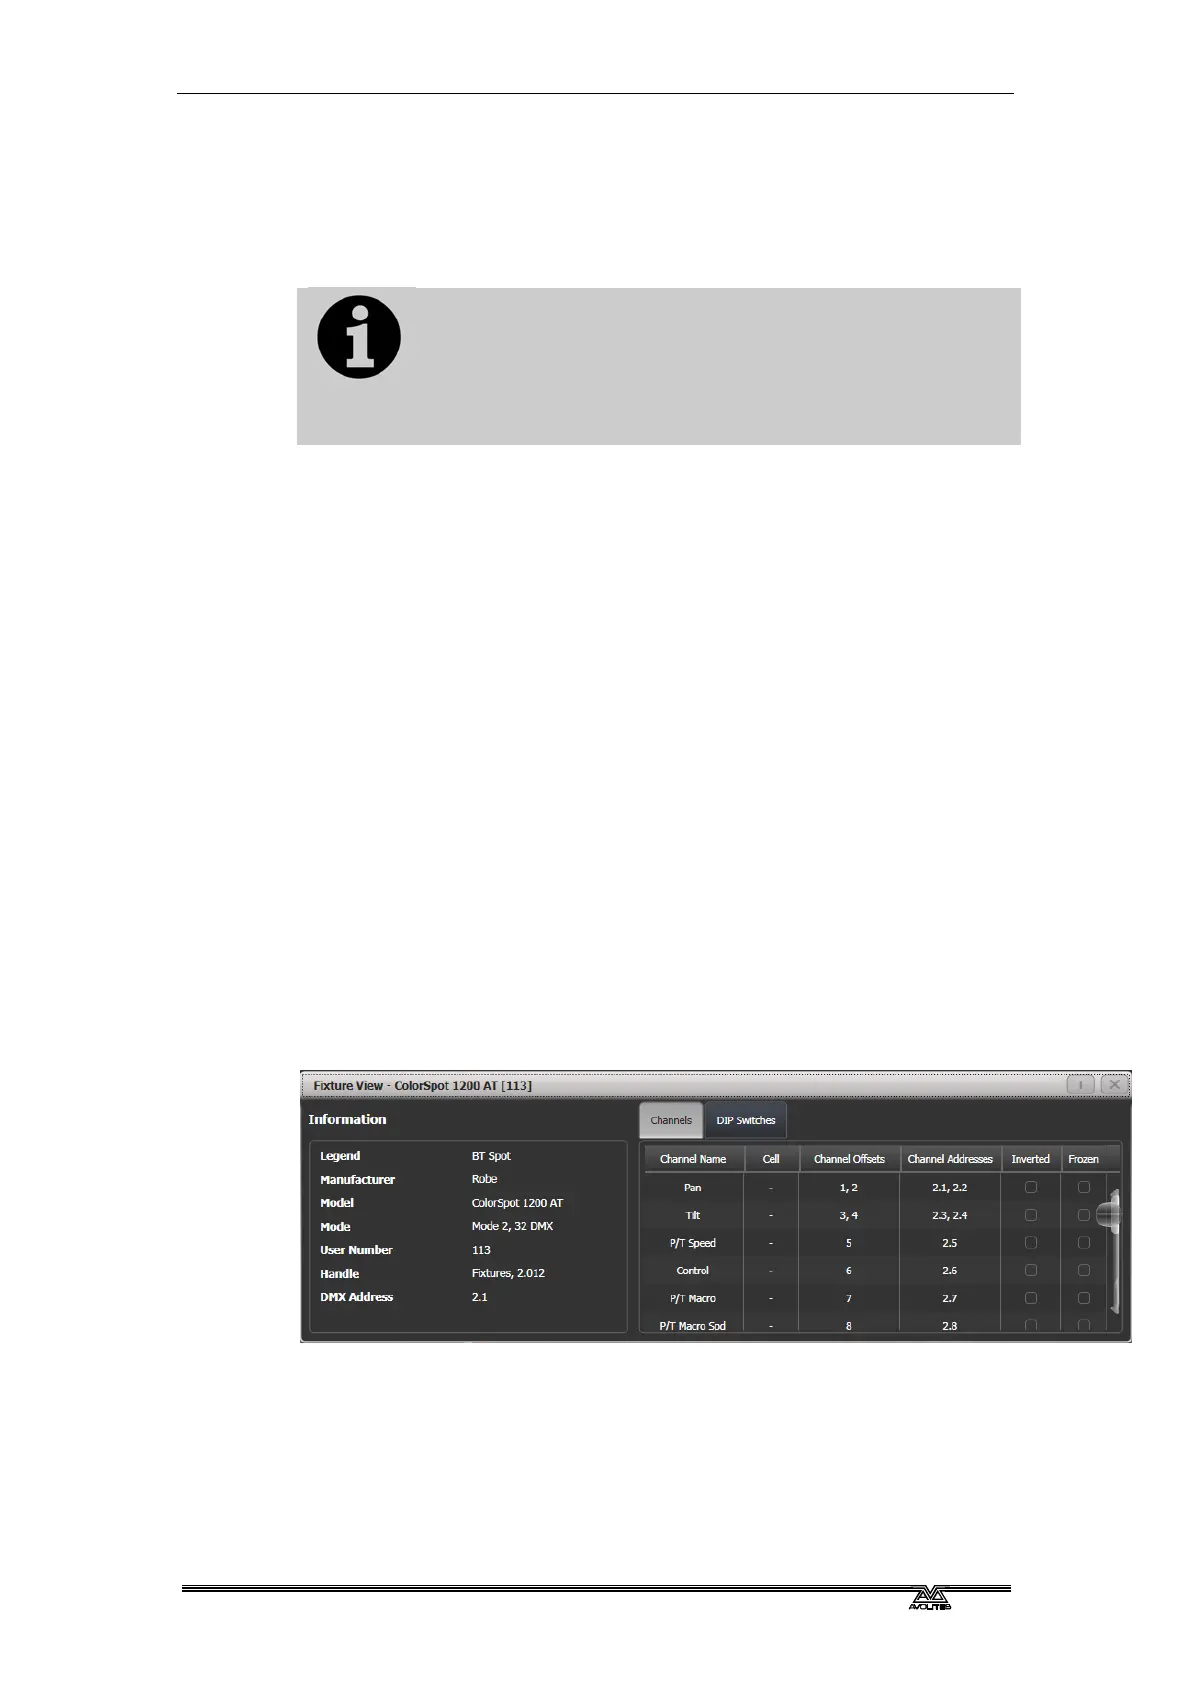
3.2.2 View detailed fixture information
In the Patch View window click on the View button for the fixture you
wish to view, or press Window Open followed by a fixture handle. A
F
ixture View window will open showing details for that fixture,
including the personality and mode used to patch, and the individual
DMX channel addresses for each attribute. Attributes can be inverted
or frozen by clicking on the checkboxes at the right hand side.
If the fixture address is set using DIP switches, the console can show
you how to set the switches by clicking on the DIP Switches tab.
 Loading...