GE HEALTHCARE
DIRECTION 5394152, Revision 5
LOGIQ™ P6/P6 PRO SERVICE MANUAL
Chapter 8 - Page 8-155
8-7-2 Microphone Option fixture Installation
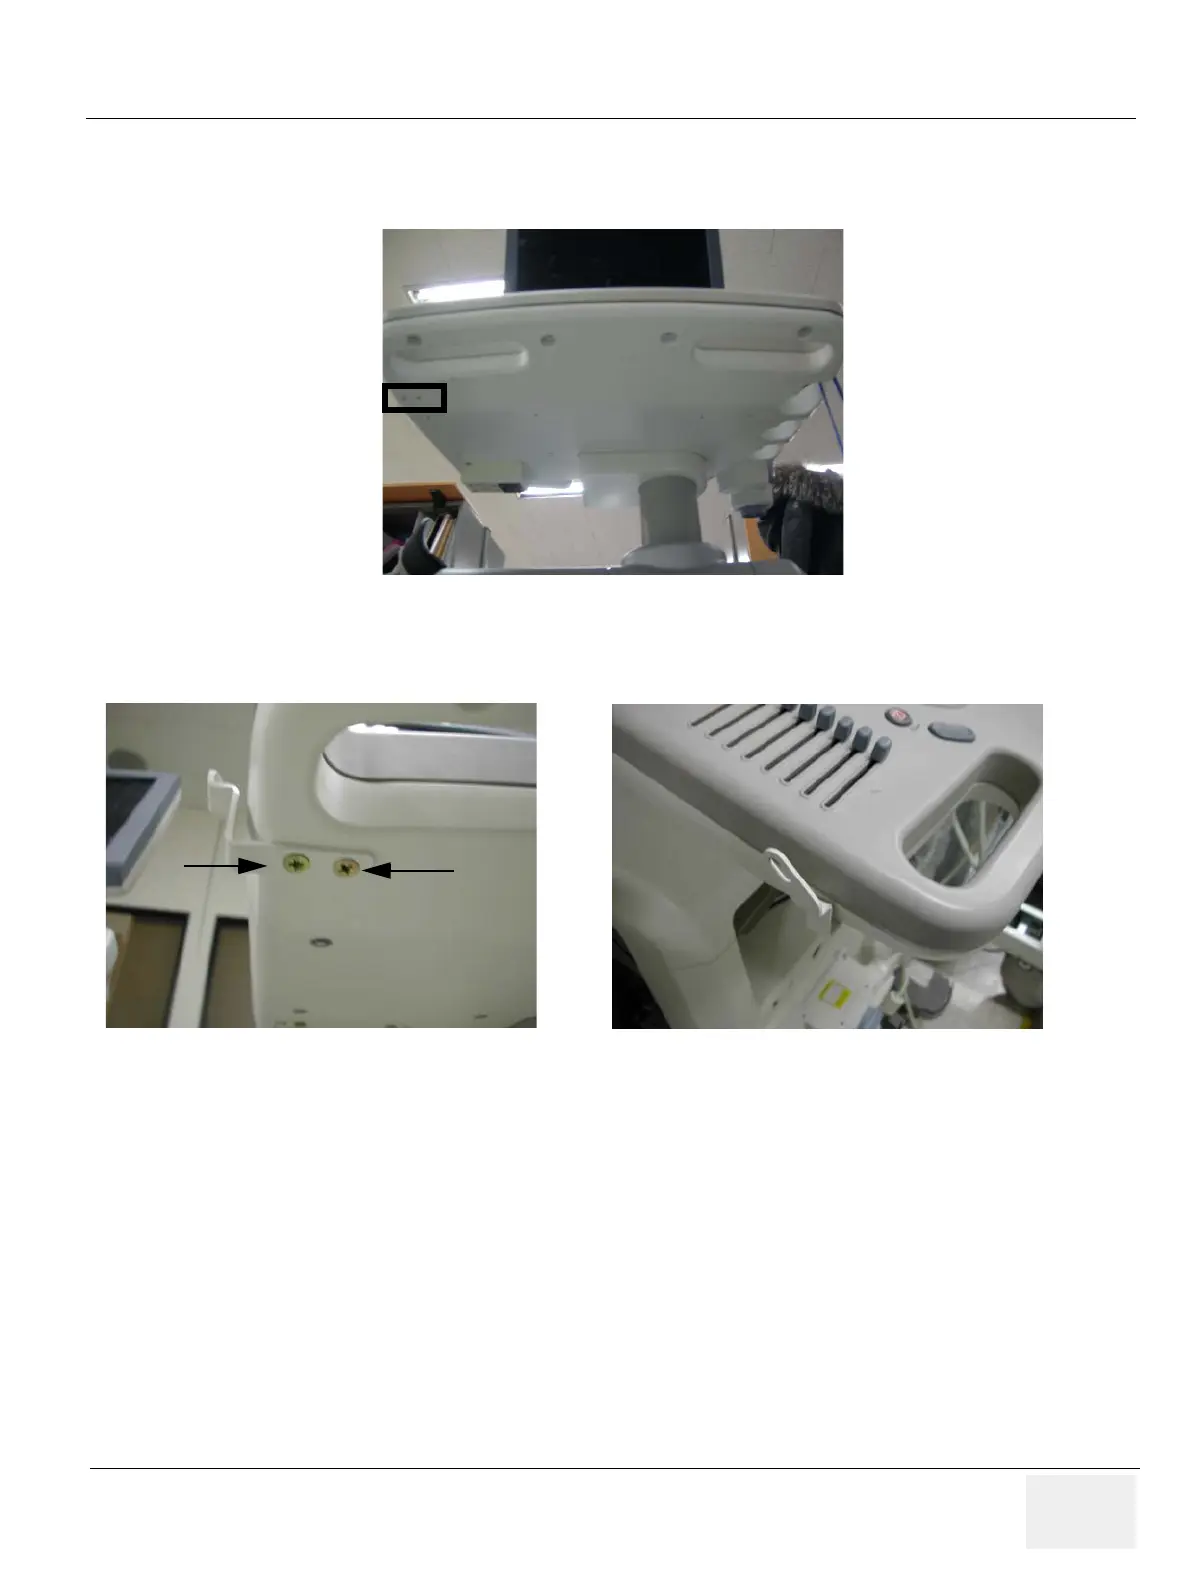
1.) Use 2 holes at the bottom of the keyboard.
2.) Screw 2 screws to fix the Microphone fixture.
Figure 8-232 Microphone option holes
Figure 8-233 installation of Microphone

 Loading...