GE HEALTHCARE
DIRECTION 5394152, Revision 5
LOGIQ™ P6/P6 PRO SERVICE MANUAL
Page 4-40 Section 4-9 - Board Function Checks
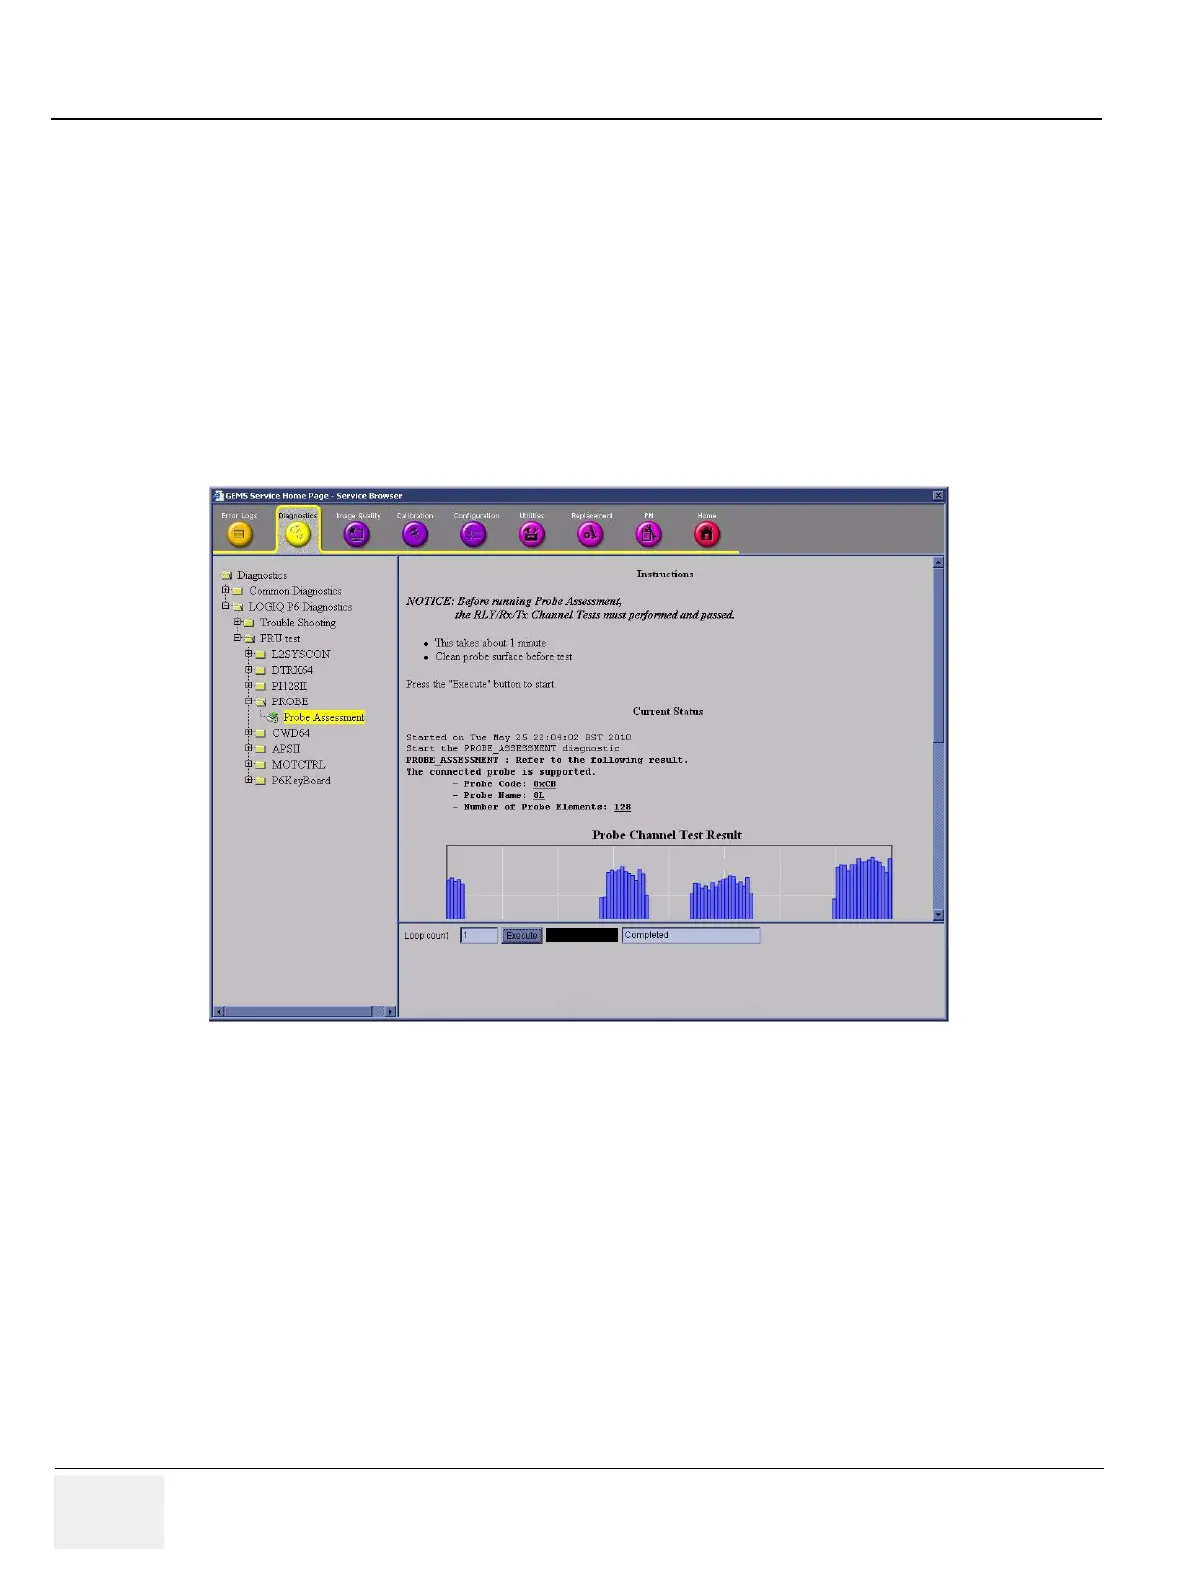
4-9-3 Probe Assessment Diagnostic Test Validation Procedure
NOTE: This diagnostic test does not represent the result as Passed or Failed.
1.) Clean probe surface that you want to assess and connect the probe to the 1st probe slot of the
system.
2.) Turn on the system and check the completion of Echoloader loading.
3.) Do the Service Login.
4.) Select 'Diagnostics' => 'LOGIQ P6 Diagnostics' => 'FRU Test' => 'Probe' => 'Probe Assesement'.
5.) Execute the diagnostic test.
6.) The test shows bar-graph designating the signal strength of each of the testing probe's elements
including the probe code, name and the number of elements.
Figure 4-37 Probe Assessment Diagnostic Test

 Loading...


