GE HEALTHCARE
DIRECTION 5394152, Revision 5
LOGIQ™ P6/P6 PRO SERVICE MANUAL
Page 8-170 Section 8-7 - Mechanical Option Installation instruction
8-7-10 Printer VCR DVD Fixture Top installation - UP23MD Printer (cont’d)
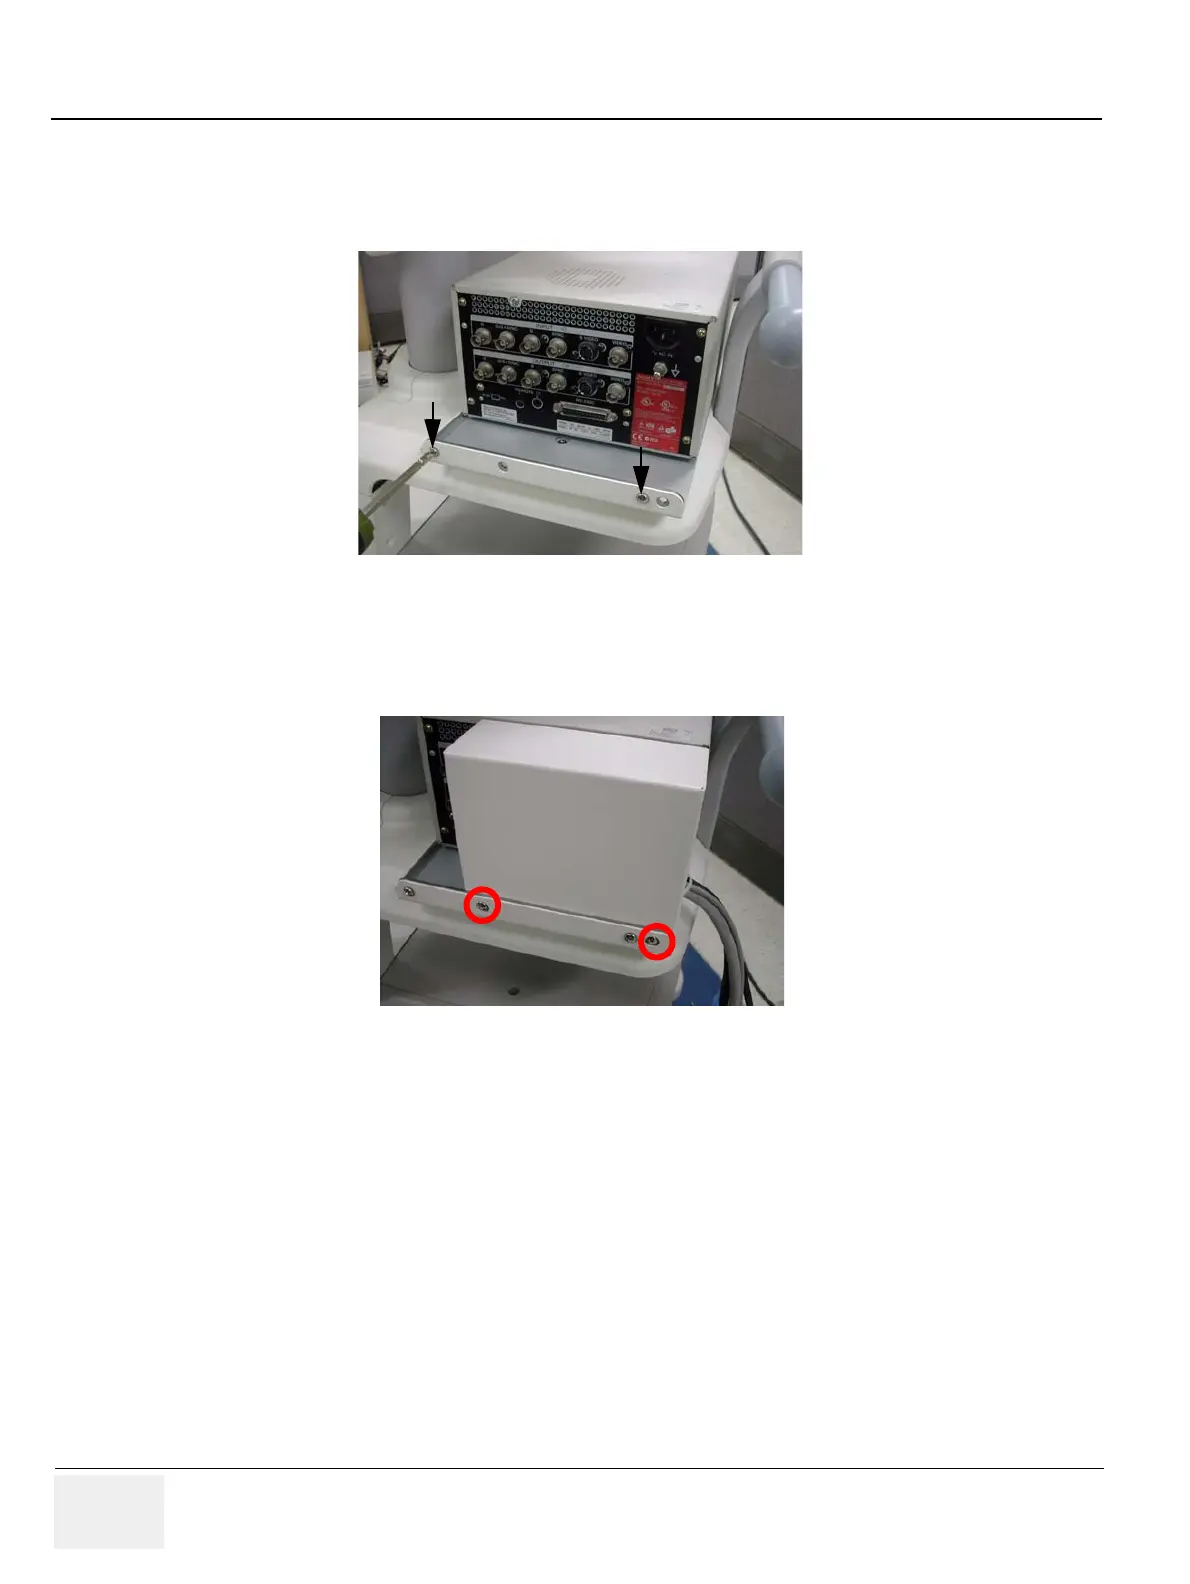
4.) Screw 4 screws(2159633, BH M4x8 WHT) on both sides to fix the color printer and DVD with top
bracket to the color printer top bracket.
5.) Connect the USB cable and Power cable from the color printer and DVD to the system. For more
wiring information, refer to the Basic Service Manual.
6.) Install hide bracket by screwing 2 screws(2159633, BH M4x8 WHT).
7.) Tie the cable properly using the tie wrap.
Figure 8-266 Printer VCR DVD Fixture installation top
Figure
8-267 Printer VCR DVD Fixture installation top

 Loading...


