Home
GE
Medical Equipment
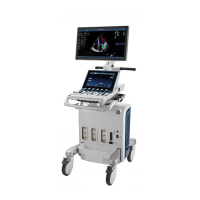
Vivid S60
GE Vivid S60 User Manual
5
of 1
of 1 rating
709 pages
Give review
Manual
Specs
To Next Page
To Next Page
To Previous Page
To Previous Page
Loading...
Control panel
Vivid S70 / S60
–
User Manual
3-41
BC092760-1EN
01
Other feature
Description
Extended On: Display all available controls.
Extended Off: Display only the main controls.
Page
i
ndicator:
Swipe
laterally anywhere
on the
T
ouch
panel
to
toggle display of page
1 and
2.
104
106
Table of Contents
default chapter
5
Certifications
5
Classifications
5
Directives
5
Importer Information
5
Class I Equipment
6
Type BF Applied Part
6
Type CF Applied Part
6
Original Documentation
7
Table of Contents
9
Chapter 1 - Introduction
19
Overview
20
Attention
20
Documentation
21
Conventions Used in this Manual
21
Indications for Use
22
Contraindications
25
Prescription Device
25
Safety
25
Contact Information
26
Contacting GE Ultrasound
26
Manufacturer
32
Safety Precautions
34
Precaution Levels
34
Owner Responsibility
35
Notice against User Modification
35
Acoustic Output
36
Definition of the Acoustic Output Parameters
36
Alara
39
Safety Statement
39
System Controls Affecting Acoustic Output
40
OB Exam
42
Important Safety Considerations
43
Patient Safety
43
Personnel and Equipment Safety
47
Electromagnetic Compatibility (EMC)
51
Environmental Protection
57
Device Labels
58
Symbols
58
For China Only
62
Site Requirements
66
Power Requirements
66
Operating Environment
67
Environmental Requirements
67
Electromagnetic Interferences
67
Connecting the System
68
System Overview
73
Getting to Know the System
73
Removable Media
75
Physiological Traces
78
Peripheral/Accessory Connector Panel
83
Wired Footswitch (Option)
85
Switching On/Off
87
Switch on the System
87
Log in
87
Switch off the System
88
Connect and Disconnect Probes
90
Connect the Probe
90
Activate the Probe
92
Deactivate the Probe
94
Disconnect the Probe
94
Intra Cardiac Ultrasound Catheters
95
The Scanning Screen
96
The Title Bar
97
Parameters Window
98
Clipboard
98
Control Panel
99
Control Panel Overview
99
Trackball Area
101
Touch Panel
102
The Alphanumeric Keyboard (Option)
106
Main Display Adjustment
108
Lock/Unlock the Main Display
108
Image Adjustment
109
Moving and Transporting the System
112
Wheels
112
Moving the System
112
Using Transportation Mode
115
Transporting the System
116
Reinstalling at a New Location
117
Preparing VIVID S70 / S60 for Scanning
117
Starting an Examination
120
Creating a New Patient Record
120
Selecting an Existing Patient Record
121
Ending an Examination
121
Cineloop
124
Cineloop Overview
124
Using Cineloop
125
Zoom
127
Display Zoom
127
To Insert an Annotation
128
Annotations
128
Editing Annotations
130
To Erase Text Annotations
131
Bodymark
131
Annotation and Bodymark Configuration
132
2D-Mode
139
2D-Mode Overview
139
Using 2D-Mode
141
Optimizing 2D
141
M-Mode
143
M-Mode Overview
143
Using M-Mode
145
Optimizing M-Mode
147
Color Mode
148
Color 2D Mode Overview
148
Color M-Mode Overview
150
Using Color Mode
152
Optimizing Color Mode
152
PW and CW Doppler
155
PW and CW Doppler Overview
155
Using PW/CW Doppler Modes
157
Optimizing PW/CW Doppler Modes
157
Tissue Velocity Imaging (TVI)
159
TVI Overview
159
Using TVI
161
Optimizing TVI
161
Tissue Tracking
162
Tissue Tracking Overview
162
Using Tissue Tracking
164
Optimizing Tissue Tracking
164
Strain Rate
165
Strain Rate Overview
165
Using Strain Rate
167
Optimizing Strain Rate
167
Strain
168
Strain Overview
168
Using Strain
170
Optimizing Strain
170
Tissue Synchronization Imaging (TSI)
171
TSI Overview
171
Using TSI
173
Contrast Imaging
175
Data Acquisition
175
Quantification
180
Contrast Echocardiography Box
181
Additional Scanning Features
182
Logiqview
182
Compound
183
Virtual Convex
183
B-Flow
183
Blood Flow Imaging
184
Image Controls
185
Control Panel
185
Touch Panel and Rotaries
185
Scan Assist Pro
195
Scan Assist Pro Overview
195
Setting up Scan Assist Pro
197
Using Scan Assist Pro
199
Mode
202
Real-Time, Single Beat 4D Imaging
202
Real-Time, Multi Beat 4D Imaging
202
4D-Mode
203
4D Color Flow Mode
214
Flexi-Slice
218
Basic Operations
220
4D-Mode Controls
228
Multi-Plane Mode
235
Bi-Plane Mode Screen
235
Tri-Plane Mode Screen
237
Using Multi-Plane Mode
239
Bi-Plane Prepare
239
Basic Operations
241
Multi-Plane Mode Controls
243
Introduction
250
Selection of a Stress Test Protocol Template
251
Image Acquisition
252
Starting Acquisition
253
Continuous Capture Mode
257
Stress Echo Analysis
264
Image Selection for Analysis
264
Wall Motion Scoring
266
Quantitative TVI Stress Echo Analysis
268
Accessing QTVI Stress Analysis Tools
270
Vpeak Measurement
270
Tissue Tracking
273
Quantitative Analysis
273
References
273
Editing/Creating a Stress Echo Protocol Template
274
Entering the Template Editor Screen
274
Editing/Creating a Template
275
Introduction
281
General Recommendations about Measurements
282
About Measurement Results Display
282
Assign and Measure Modality
284
Measure and Assign Modality
286
Measurements on Volume Renderings
287
Measurements on Protocol Images
288
Example Results
288
Advanced Cardiac Measurements and Analysis
289
Event Timing Measurements
289
TSI Measurements
290
Automated Function Imaging
296
Cardiac Autodoppler
324
Pediatric Z-Score Measurements
327
4D/Multi-Plane LV
328
4D/Multi-Plane LV Analysis Tools
328
4D Auto LVQ
328
Manual Left Ventricular Volume Measurements
338
TSI Surface Model
343
4D Auto MVQ
345
Requirements
345
Starting 4D Auto MVQ
346
Align Views
347
Set Landmarks
348
Review
350
Results
351
Approval
353
4D Auto AVQ
354
Requirements
354
Starting the 4D Auto AVQ Tool
355
Slice Alignment
356
LVOT Segmentation
356
Measurements
358
Approval
359
Advanced Vascular Measurements and Analysis
360
Intima-Media Thickness
360
Vascular Autodoppler
363
OB Measurements
365
OB Graphs
365
Measurement Result Table
371
Minimizing the Measurement Result Table
371
Moving the Measurement Result Table
371
Deleting Measurements
371
Overview
372
Using the Worksheet
373
Measurement Accuracy
375
General
375
Sources of Error
375
Optimizing Measurement Accuracy
377
Measurement Uncertainties
377
Q Analysis Overview
385
Starting Q Analysis
385
Q Analysis Screen
386
Using Q Analysis
391
Generation of a Trace
391
Saving/Retrieving Q Analysis
395
Frame Disabling
395
Optimization
397
Switching Modes or Traces
401
Anatomical M-Mode
402
The Dataflow Concept
405
Dataflows Available
405
Storing Images and Cineloops
409
Storing an Image
409
Storing a Cineloop
410
Saving Images and Cineloops to a Standard Format
411
EZ DICOM CD Viewer
413
Retrieving and Editing Archived Information
416
Searching for a Patient Record
416
Editing Data in the Archive
419
Deleting Archived Information
427
Moving Examinations
429
Review Images in Archive
431
Review the Images from a Selected Examination
431
Review Images from a Selected Patient Record
433
The Dataflow Concept
438
Connectivity
438
Dataflow Selection
441
Transfer of Patient Records/Examinations
442
Transfer Patient Records/Examinations between Archives
442
Transferring Patient Records/Examinations
443
Disk Management
450
Configuring the Disk Management Function
451
Running the Disk Management Function
454
Data Backup and Restore
458
Backup Procedure
459
Restore Procedure
463
To Register a Tricefy Account
466
Tricefy
466
Configuration of Tricefy Storage
467
Tricefypatientshare
468
Storing an Exam in Tricefy
470
Configuration of Tricefy QR
472
Data Streaming
473
Streaming in Process
473
Creating a Report
477
Working with the Report Function
478
To Open a Report
478
To Choose Another Report Template
480
To Change Patient Information
480
Images in the Report
480
To Print a Report
481
To Store a Report
481
Retrieving an Archived Report
482
Deleting an Archived Report
482
Structured Findings
483
Prerequisite
483
Starting Structured Findings
484
Using Structured Findings
486
Structured Findings Configuration
488
Direct Report
499
Creating Comments
499
Creating Pre-Defined Text Inputs
500
Report Designer
501
Accessing the Report Designer
501
Report Designer Overview
502
Designing a Report Template
504
Saving the Report Template
516
To Exit the Report Designer
516
Report Templates Management
517
Configuration of the Template Selection Menu
518
Export/Import of Report Templates
519
Customize System Settings
522
About System Configuration
522
General System Settings
524
Touch Panel
526
Users and Security
528
Local System Users
528
User Policies
531
Ldap
532
System Password
534
Storage Encryption
535
Global Imaging Settings
537
Measurement Package
539
Measurement Package Configuration - Example
541
User-Defined Formulas
543
Advanced Settings
551
Normal Values
558
Transfer of User-Defined Measurements Transfer in DICOM SR
559
Advanced Quantification
560
Connectivity Configuration
562
System in a Network Environment
562
System in a Network Environment with a DICOM Server
563
Wireless Network Configuration
574
Data Streaming
580
Configuration of the Archiving Functions
584
TCP/IP Configuration
585
Dataflow
585
Default Remote Path Setting
590
XML Export Configuration
591
Patient ID
592
Other
593
Scan Assist Pro Creator
596
Overview
596
Protocol Export from VIVID S70 / S60 and Off-System Installation of the Scan Assist Pro Creator
596
Starting Scan Assist Pro Creator
598
File Handling
599
Creating New Protocols
600
Saving Protocols
601
Step Attributes
604
Stress Echo
609
Application Presets List
610
Generating a New Preset
611
Deleting an Application Preset
614
6VT-D TEE Probe
615
Probe Overview
618
Probe Presets
622
Maximum Probe Temperature
624
Probe Orientation
625
Probe Labeling
626
Intracardiac Ultrasound Catheters
627
Care and Maintenance
631
Planned Maintenance
631
Inspecting the Probe
631
Cleaning and Disinfecting Probes
633
Coupling Gels
658
Probe Safety
659
Electrical Hazards
659
Mechanical Hazards
659
Biological Hazards
660
Biopsy Capability for Probes
662
Precaution Concerning the Use of Biopsy Procedures
663
Preparing the Biopsy Guide Attachment - Convex, Sector and Linear Probes
663
Preparing the Biopsy Guide Attachment - Endocavity Probe
667
Displaying the Guide Zone
668
Biopsy Needle Path Verification
669
Starting the Biopsy Procedure
669
Cleaning, Disinfection and Disposal
669
To Print an Image
674
Printing
674
Printing Configuration
675
P1 Button Configuration
675
Printer Setup
676
External Monitor Configuration
678
Flexible Video out
679
Connect External Monitor
679
Select Region to Show on the External Monitor
680
Full Screen Video out Region
681
Image Video out Region
681
View-X
683
TCP/IP Configuration for View-X
684
View-X Direct
686
Adjust Cropping of the Video Stream
688
Cartosound/Soundstar
690
Cartosound
690
Chapter 15 - Maintenance System Care and Maintenance
692
Expected Service Life Description
692
Inspecting the System
692
Disinfection
693
Cleaning the System
693
Cleaning the Probes
697
Prevention of Static Electricity Interference
697
System Self-Test
698
System Malfunction
698
Software Update
700
Software Download and Installation
700
Save TCP/IP Settings
703
Other manuals for GE Vivid S60
Technical Publication
127 pages
Quick Card User Guide
5 pages
5
Based on 1 rating
Ask a question
Give review
Questions and Answers:
Need help?
Do you have a question about the GE Vivid S60 and is the answer not in the manual?
Ask a question
GE Vivid S60 Specifications
General
Brand
GE
Model
Vivid S60
Category
Medical Equipment
Language
English
Related product manuals
GE Vivid S6
690 pages
GE Vivid S60N
478 pages
GE Vivid S6 N
834 pages
GE Vivid S5
690 pages
GE Vivid S70
709 pages
GE Vivid S70N
478 pages
GE Vivid S5 N
834 pages
GE Vivid E9
802 pages
GE Vivid T8
349 pages
GE Vivid E90
382 pages
GE Vivid E9 Series
35 pages
GE Vivid 4 BT03 RFI
594 pages