Operation – Monitoring and Diagnosis
User Manual corpuls
3
118 ENG - Version 2.1 – P/N 04130.2
6.5.3 Performing Oximetry Measurement
Oximetry measurement begins automatically after the sensor has been
attached.
1. If necessary, select the curve field for displaying course of SpO
2
measurement (pleth) and open the curve context menu.
2. Assign the plethysmogram to the selected curve field.
3. If necessary, select the parameter field for displaying oximetry values and
open the parameter context menus.
4. Assign SpO
2
-, SpMet- or SpCO monitoring or, depending on the sensor
used, SpHb monitoring to the selected parameter field.
5. If necessary, select in the main menu “Oximetry”►”Settings” and adjust
further oximetry configurations.
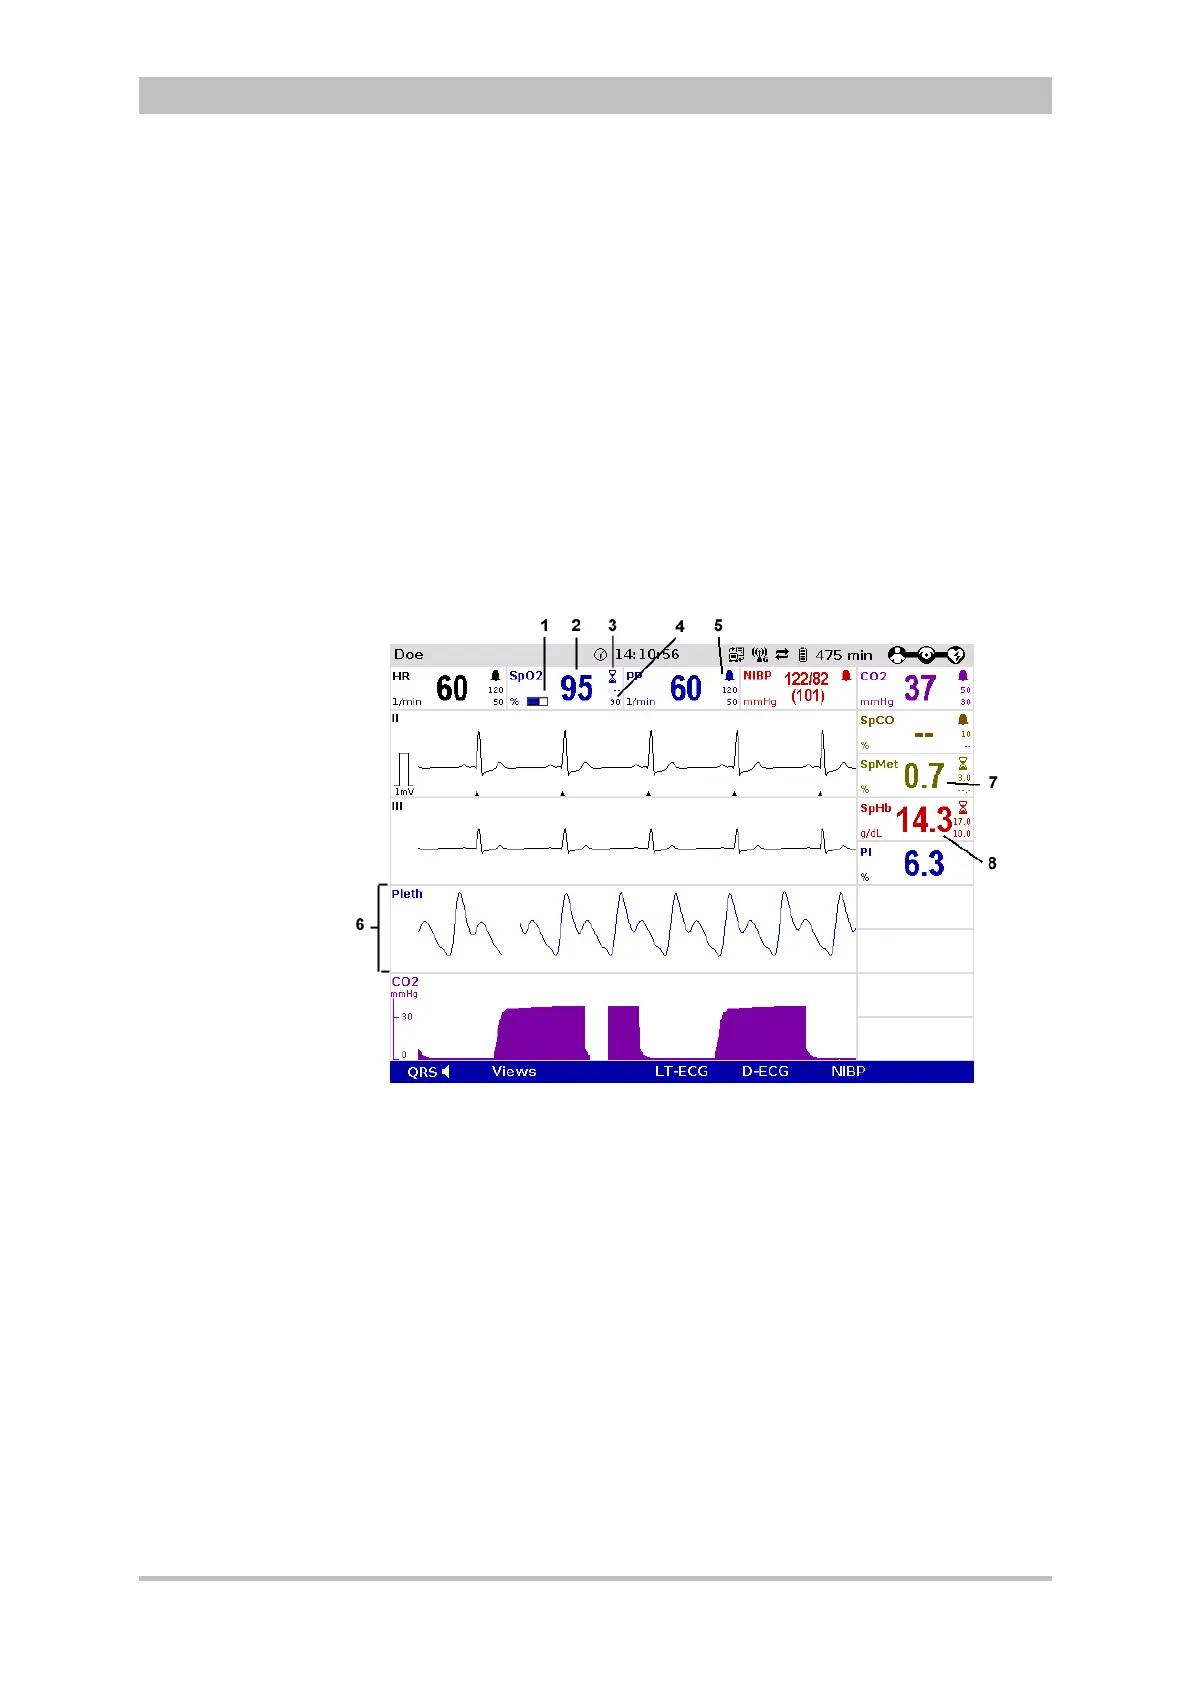
Fig. 6-19 Oximetry monitoring, configured screen
1 Bar for display of the signal intensity
2 Current SpO
2
value in percent
3 Hourglass symbol
4 Lower alarm limit
5 Symbol for switched-on alarms
6 Pleth curve (plethysmogram)
7 Current SpMet value in percent
8 Current SpHb value in g/dl
6. Check if the wave form of the pleth curve is displayed without artefacts.
7. Correct positioning of the oximetry sensor on the finger if artefacts or a low
signal intensity are displayed. See chapter 10 Procedure in Case of
Malfunctions, page 233 for information on improving the signal.