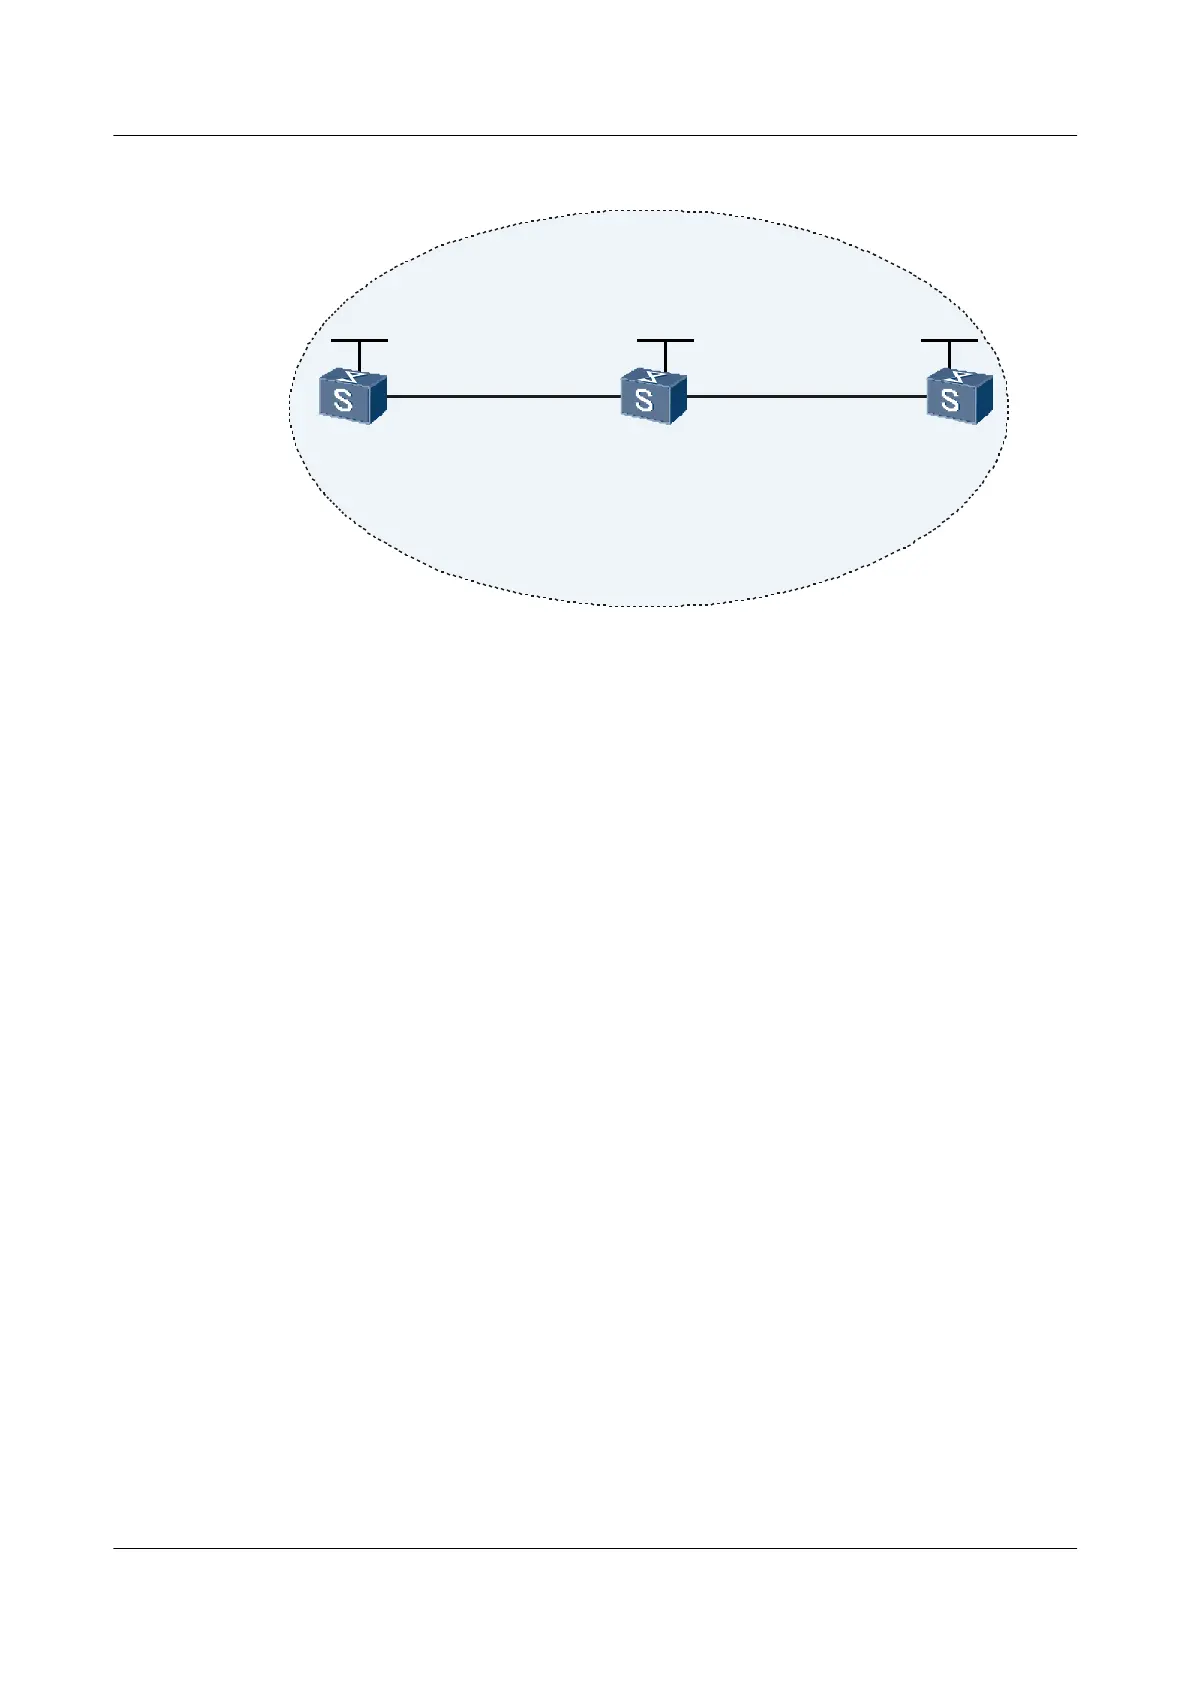
Figure 6-16 Networking diagram of a LSP jitter test
VLANIF110
10.2.1.1/24
GE2/0/0
SwitchA
GE1/0/0
VLANIF100
10.1.1.1/24
GE1/0/0
VLANIF100
10.1.1.2/24
area 0
Loopback1
1.1.1.9/32
Loopback1
2.2.2.9/32
Loopback1
3.3.3.9/32
GE1/0/0
VLANIF110
10.2.1.2/24
SwitchB
SwitchC
Configuration Roadmap
The configuration roadmap is as follows:
1. Configure Switch A as an NQA client.
2. Create an LSP Jitter test on Switch A.
Data Preparation
To complete the configuration, you need the number of the MPLS TE tunnel interface.
Procedure
Step 1 Configure routes between Switch A, Switch B, and Switch C. (The detailed procedure is not
mentioned here.)
Step 2 Configure MPLS RSVP-TE on Switch A, Switch B, and Switch C. (The detailed procedure is
not mentioned here.)
For the configuration of MPLS RSVP-TE, refer to the Quidway S9300 Terabit Routing Switch
Configuration Guide - MPLS.
Step 3 Set up a TE tunnel from Switch A to Switch C. (The detailed procedure is not mentioned here.)
Step 4 Create an NQA test on Switch A.
# Enable the NQA client and create an LSP Jitter test for the TE tunnel.
<SwitchA> system-view
[SwitchA] nqa test-instance admin lspjitter
[SwitchA-nqa-admin-lspjitter] test-type lsptrace
[SwitchA-nqa-admin-lspjitter] lsp-type te
[SwitchA-nqa-admin-lspjitter] lsp-tetunnel tunnel 1/0/0
Step 5 Start the test.
6 NQA Configuration
Quidway S9300 Terabit Routing Switch
Configuration Guide - Network Management
6-172 Huawei Proprietary and Confidential
Copyright © Huawei Technologies Co., Ltd.
Issue 03 (2010-09-20)

 Loading...