Creating a Leader Line 149
User Guide v 2.3 — September 2015 Mold Picture View
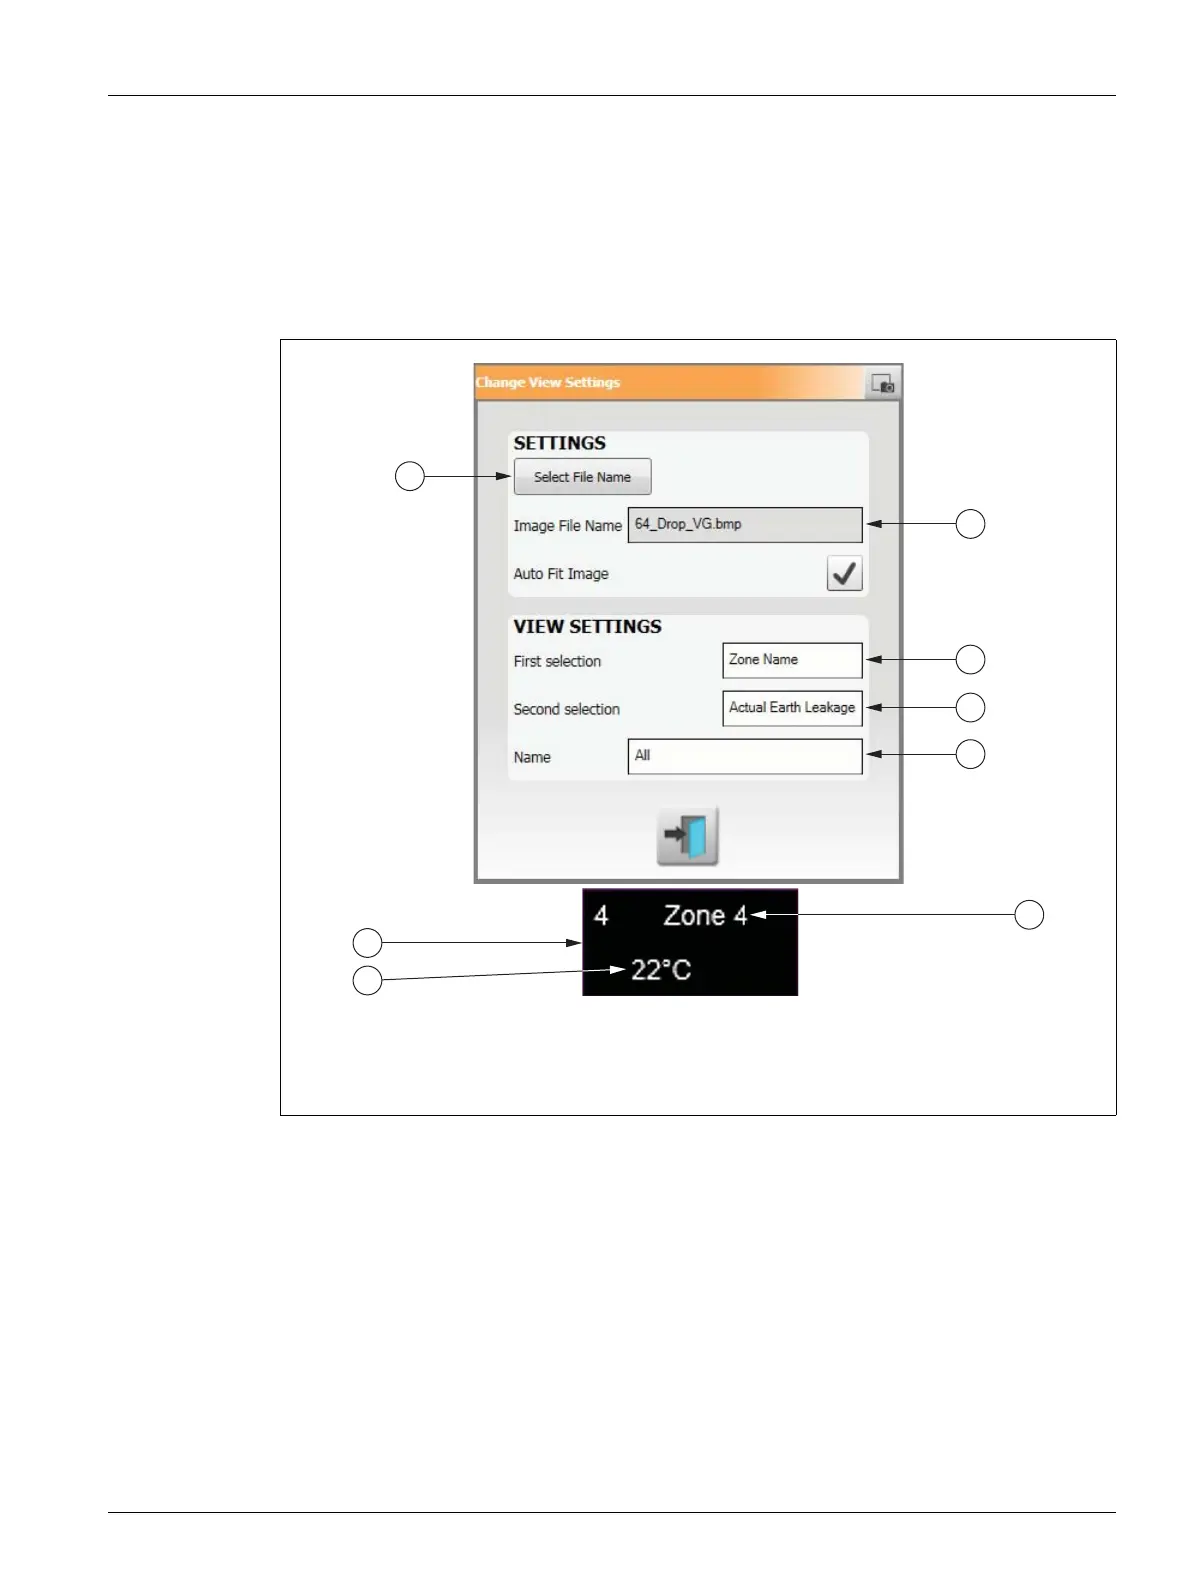
4. To configure the content of the Zone Information Panel, do the following:
• To change the first selection displayed on the Zone Information Panel, touch the
First Selection field and select one of the following: Current Setpoint, Actual
Temperature, Actual Power, Actual Current, Zone Name, or Actual Earth Leakage.
• To change the second selection displayed on the Zone Information Panel, touch
the Second Selection field and select one of the following: Current Setpoint, Actual
Temperature, Actual Power, Actual Current, Zone Name, or Actual Earth Leakage.
5. Touch the Accept button.
11.3.2.4 Creating a Leader Line
Create leader lines to clarify the connection between a Zone Information Panel and the
associated heat zone. Create a Zone Information Panel before creating a Leader Line.
To create a Leader Line, do the following:
1. Make sure Mold Picture View is in Edit mode.
2. Touch the desired Zone Information Panel.
3. Touch and drag the Flag button to the desired location on the mold picture view
graphic. A Leader Line appears between the flag and the Zone Information Panel.
Figure 11-9 Change View Settings Dialog Box
1. Select File Name Button 2. Image File Name Field 3. First Selection Field 4. Second
Selection Field 5. Views Button Name 6. Zone Information Panel
1