Creating video motion windows using the mouse
• Shift-click with your mouse into the live image. A little yellow square [OBJEKT]
appears where you clicked. This is the first corner of the new video motion
window.
• Now click again with your mouse into the live image
(do not keep the Shift key pressed). This is the sec-
ond corner of the new video motion window. The
camera displays the new window with a yellow frame in the live image. You
can repeat the procedure (Shift-click, then click) until you have positioned the
yellow frame at the desired position.
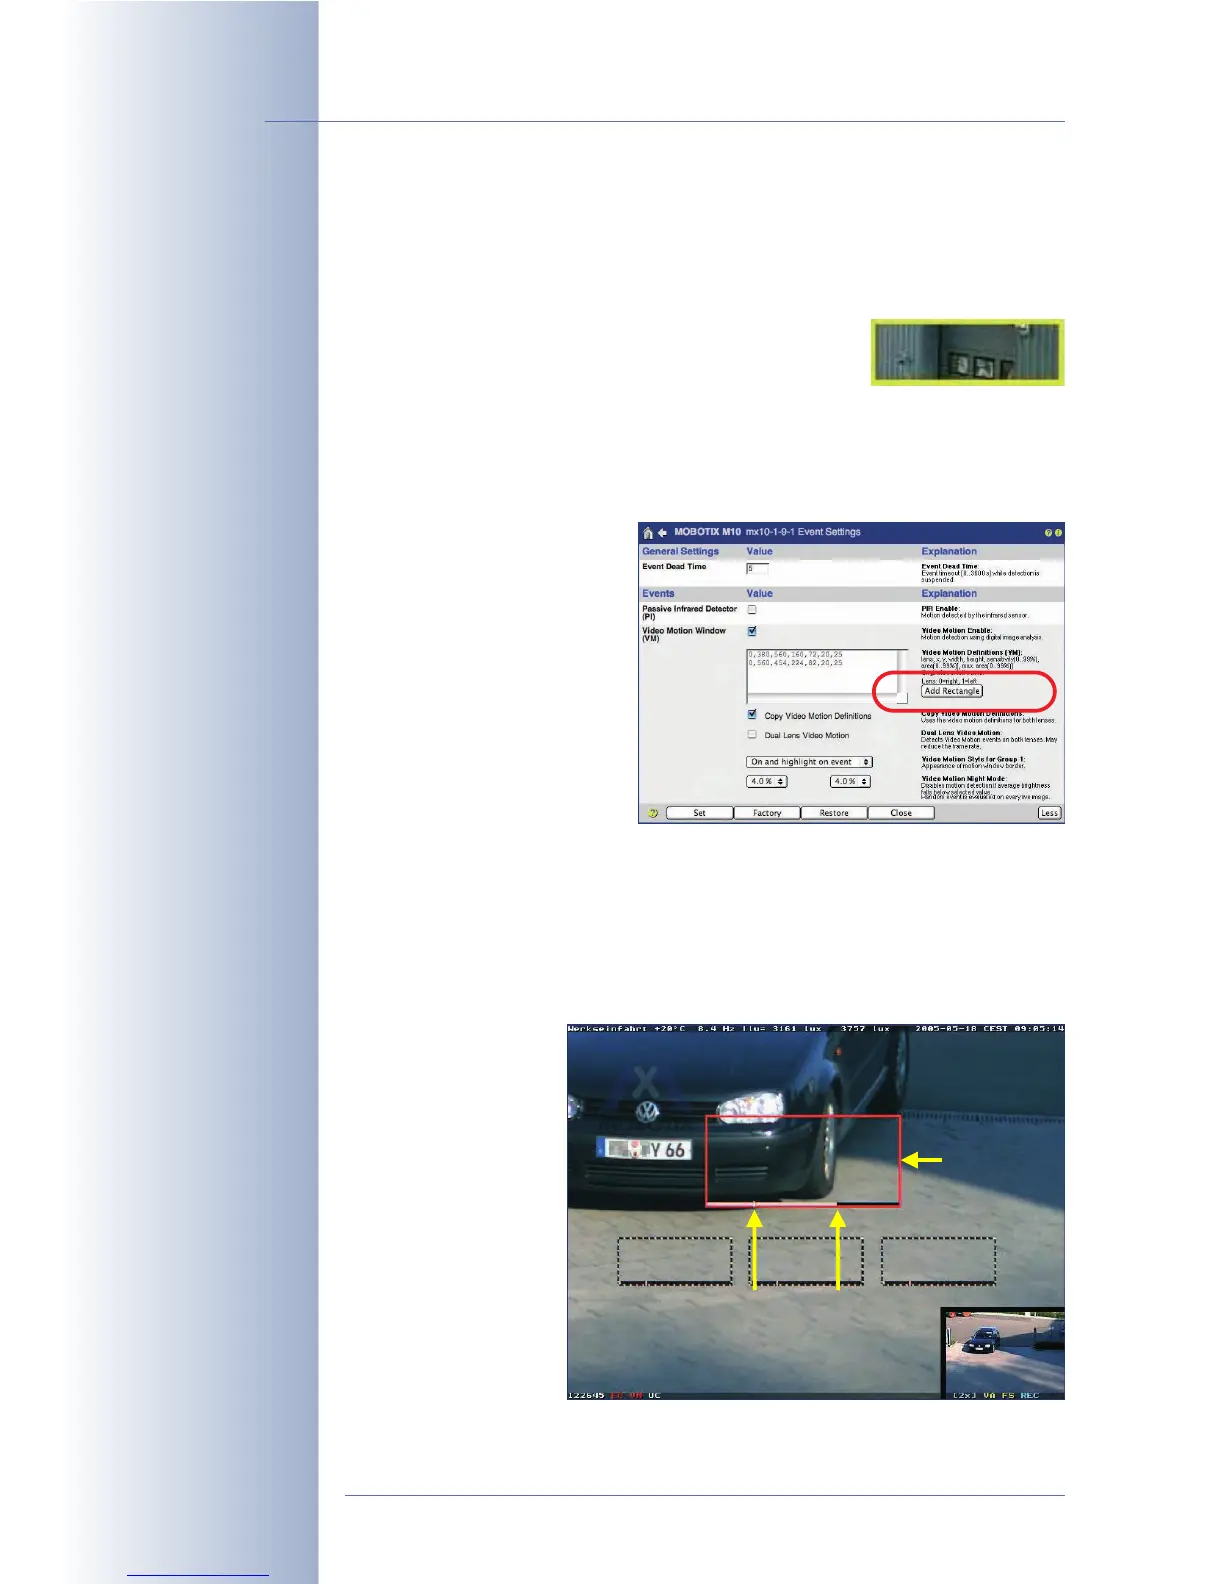
•In Setup Menu > Event Settings, click on the Add Rectangle button within
60 seconds to add a new
line with the new video
motion window's defini-
tion to the list of defined
windows in the Video
Motion Windows (VM)
field.
• Store the entire configu-
ration permanently by
clicking on the Set button
(the page refreshes), then
on the Close button.
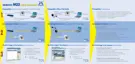
Changing the video motion windows' appearance
By factory default, the video motion windows are shown as dotted frames in the
Live screen. If the camera detects movement, the frame of the triggering VM win-
dow will turn bright red (factory default).
The white bar at the
lower border of the win-
dow shows the current
percentage of pixels
that have been identi-
fied as having changed
(
level
). The small vertical
line shows the
trigger
value
for the
Area
parameter. For addi-
tional information on
this topic, see the fol-
lowing section.
© MOBOTIX AG • Security-Vision-Systems • Made in Germany
www.mobotix.com • sales@mobotix.com • 10.10.2006
160/288
Software Camera Manual Part 2
Defining video motion
windows:
Shift-click, then click in
live image
VM Function: On and
highlight on event
Video motion windows with
level meter and trigger
for
area
parameter
Triggering
window
LevelTrigger