4.10.3 Browser
The MxPEG ActiveX Plug-in allows transmitting the MxPEG video sequences inclu-
ding the audio channel of the camera when using Internet Explorer on Windows
computers (see also section 4.3,
The Live Screen in the Browser
). If you intend to al-
ways use the MxPEG ActiveX plug-in, set the Admin Menu > Language and Entry
Page > Display Method parameter accordingly.
In order to install the plug-in, start Internet Explorer and enter the IP address of a
MOBOTIX camera. Installing the ActiveX plug-in is only required when starting the
plug-in for the first time on the corresponding computer and may also be the case
after updating the camera's system software, if it contains a new version of the
plug-in.
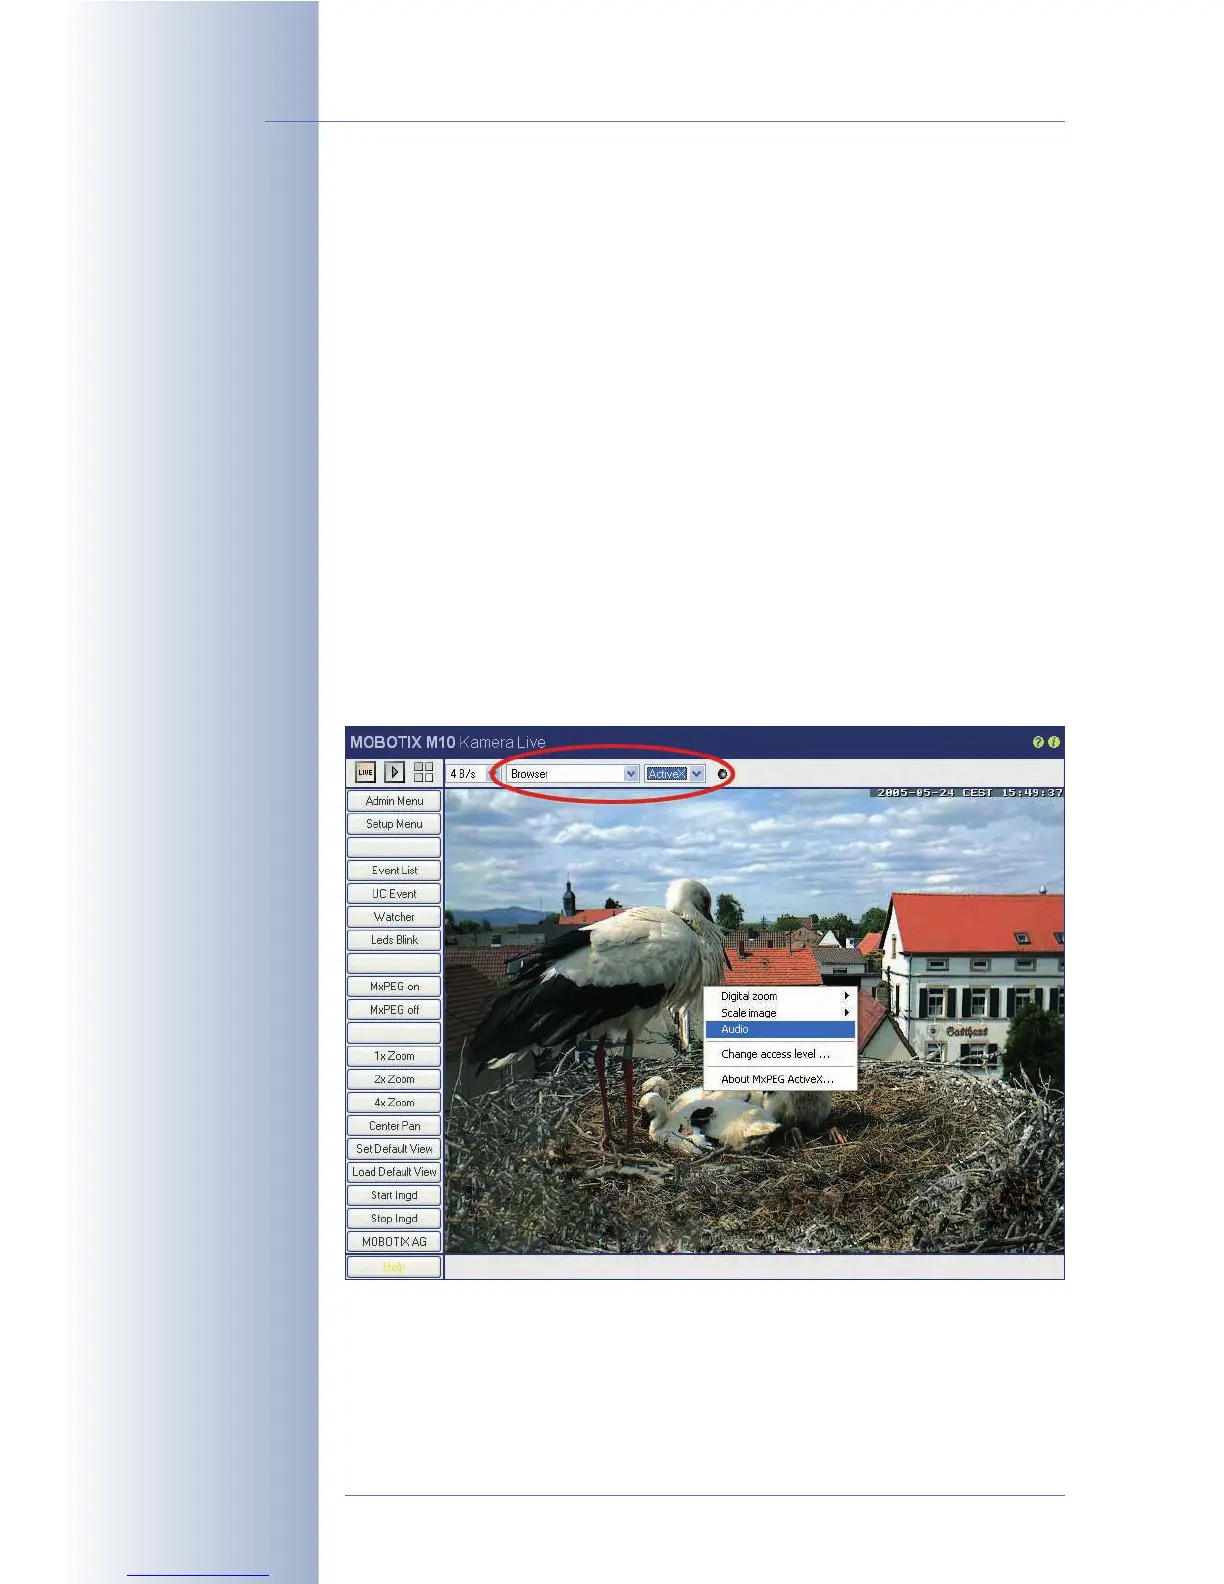
Open the Quick Control Browser > ActiveX to start the plug-in. If the current
MxPEG ActiveX plug-in has already been installed, the camera will briefly show
a MOBOTIX logo before displaying the live image. To check if the plug-in has been
installed properly, right-click directly into the live image. This should display the
context menu of the ActiveX plug-in (see figure). If the MxPEG ActiveX plug-in has
not been installed or if a newer version is available on the camera, the camera
will not come up with the MOBOTIX logo; instead, the browser will prompt you to
install the new ActiveX plug-in. Follow the instructions to complete the installation.
For further information on the MxPEG ActiveX plug-in, see
The Live Screen of the
MOBOTIX Camera
in the camera help.
For more information on how to integrate the MxPEG ActiveX plug-in into your own
applications, read section 11.4,
Video Streaming
.
© MOBOTIX AG • Security-Vision-Systems • Made in Germany
www.mobotix.com • sales@mobotix.com • 10.10.2006
52/288
Software Camera Manual Part 2
Quickly installed
Right-click in live image