Gearbox(continued)
3.Usea3/8inchor1/2inchdriveratchetorbreakerbarintheidlearmto
releasethedrivebelttension.
4.Slipthedrivebeltoffthegearboxpulleythenunloadtheidlerspringtension.
5.RemovethePTOguardfromthegearbox.
6.Removethe4fastenersthatsecurethegearboxassemblytothecuttingunit
andremovethegearboxassembly.
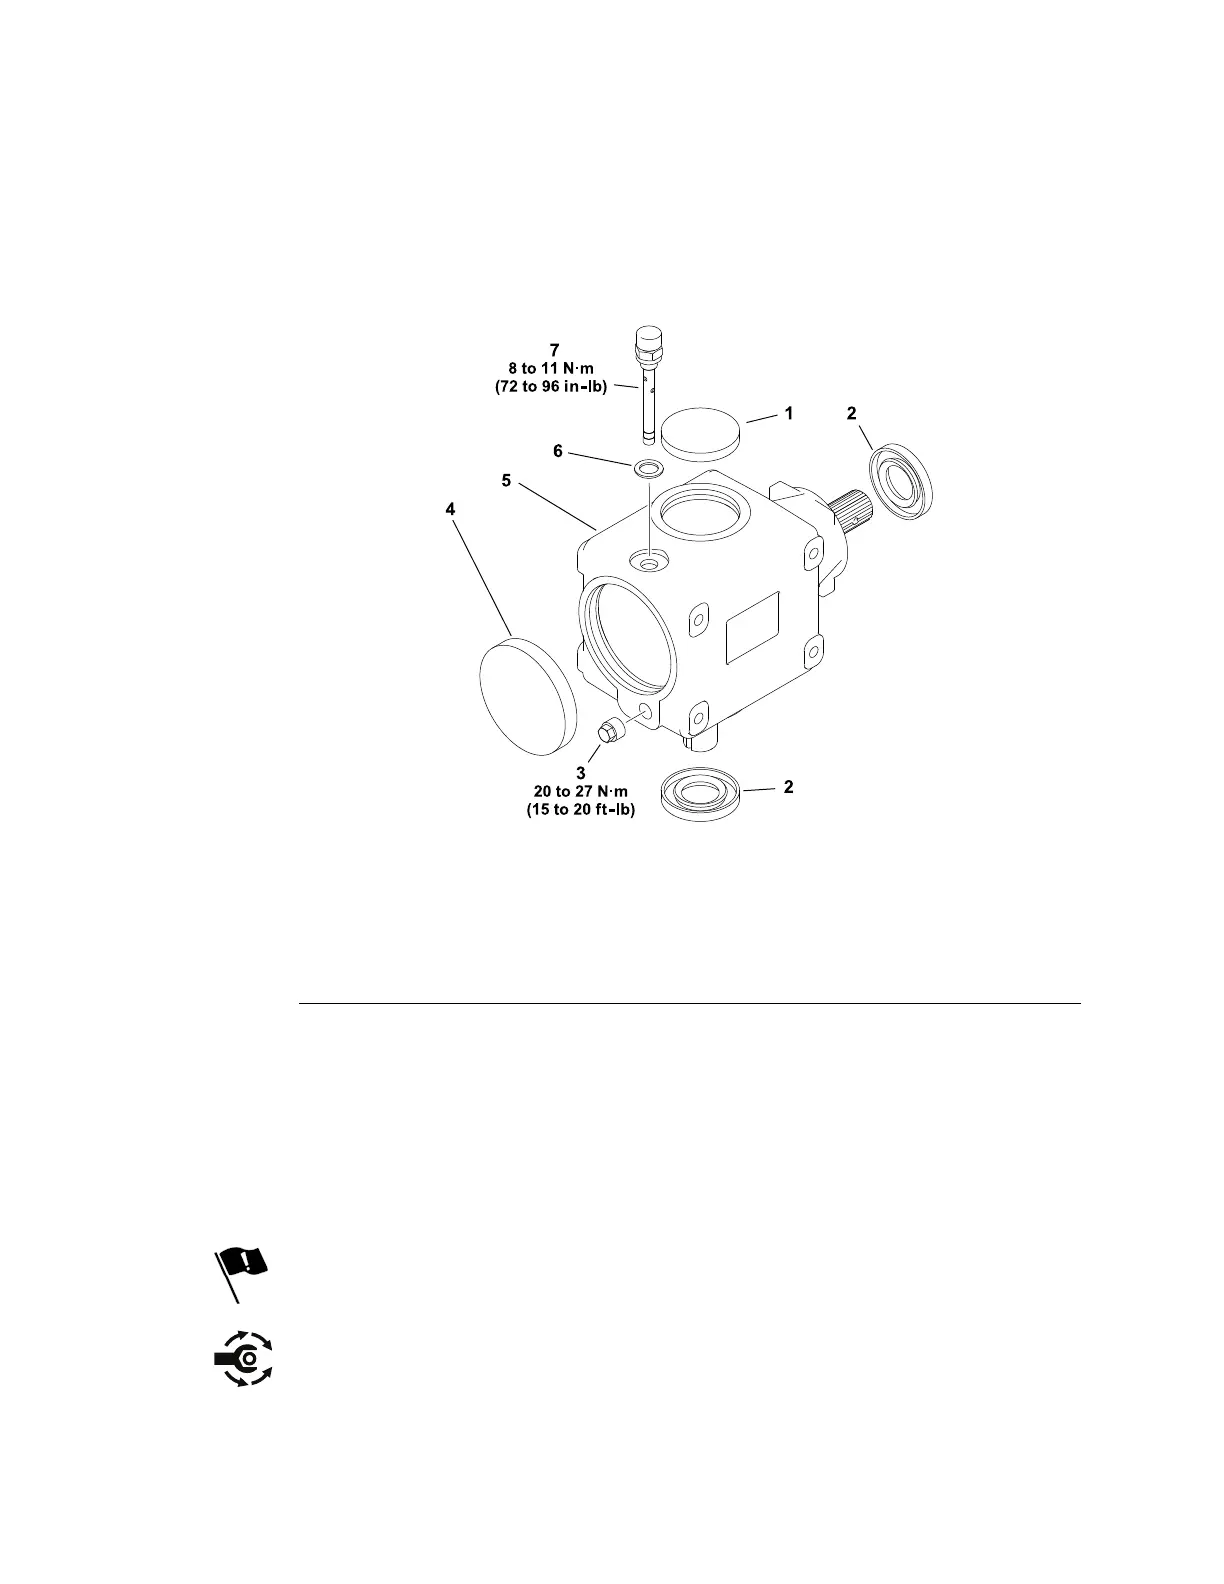
ServicingtheGearbox
g315462
Figure143
1.Oilcap–2.0inch5.Gearbox
2.Seal(2each)6.Copperwasher
3.Plug
7.Dipstick/breather
4.Oilcap–3.1inch
1.Dismantlethegearboxassemblyasnecessary.
2.Ifnecessary,removeandreplacethegearboxdipstick/breathercopper
washer,oilseals,andoilcaps.
Note:Ifinternalgearboxwearordamageoccurs,gearboxreplacementis
necessary.Theinternalgearboxcomponentsarenotavailable.
InstallingtheGearbox
RefertoFigure142forthisprocedure.
1.Payattentiontotheleftandrightgearboxbracketorientationandsecurethe
bracketstothegearboxifpreviouslyremoved.
2.Tightenthegearboxbracketfastenersfrom31to39N·m(23to29ft-lb).
3.Cleanthegearboxoutputshaft,squarekey,andtheinsideofthepulleyhub.
4.Applyathincoatingofanti-seizelubricanttotheoutputshaftandinstall
thesquarekey.
CuttingUnits:ServiceandRepairs
Page8–18
Groundsmaster
®
3200,3300and3310
19240SLRevA
 Loading...


