Service Parts Disassembly 8-39
Internal Hard Drive
Caution
The internal hard drive is susceptible to ESD damage. Observe proper ESD
precautions.
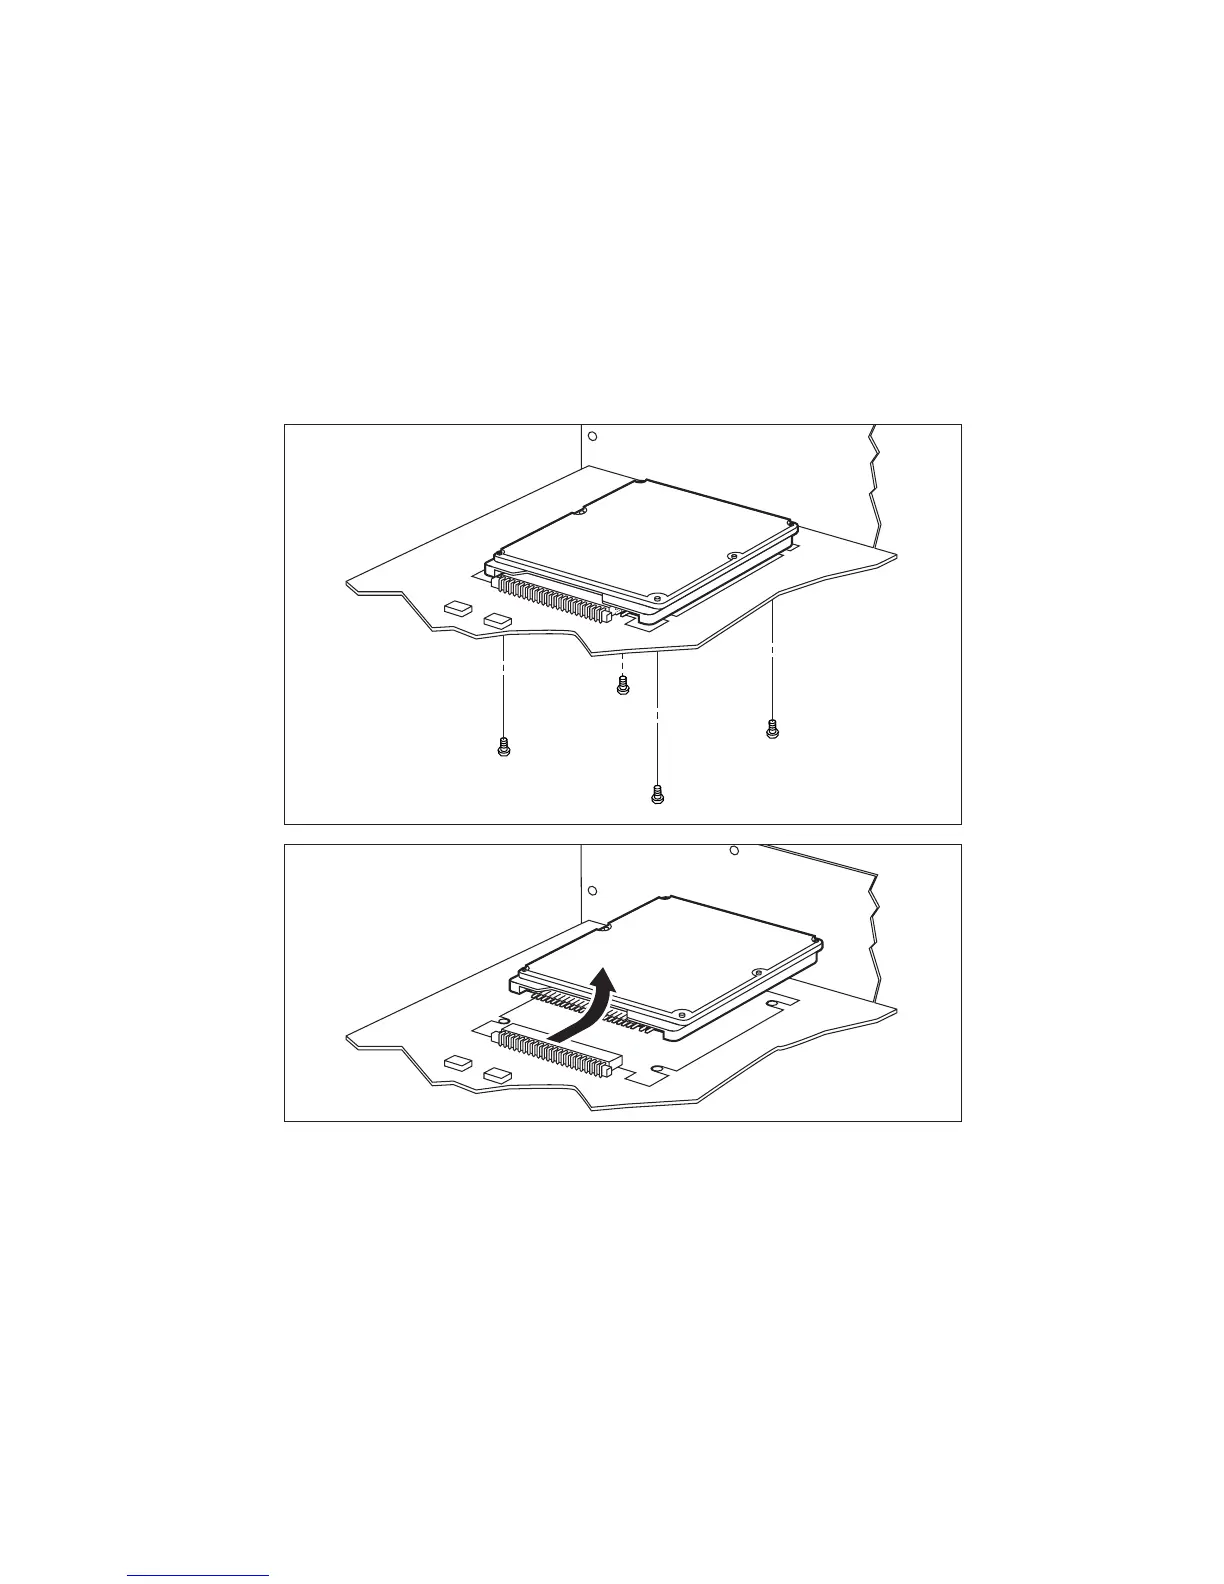
1. Remove the image processor board.
2. Using a T-10 torx bit, remove 4 screws from the bottom side of the image
processor board holding the Internal Hard Drive.
3. Slide the internal hard drive away from the connector.
Replacement Procedures
Caution
It is possible to mis-align the pins when seating the new internal hard drive.
Note
If you replace the internal hard drive, you must enter Service Diagnostics
Mode and run the “Store NVRAM” test.
Fig. 1
Fig. 2
7750-235
 Loading...


