3. Patching - Page 53
TitanUniversal_Man_v10_QU.doc 15 March 2016
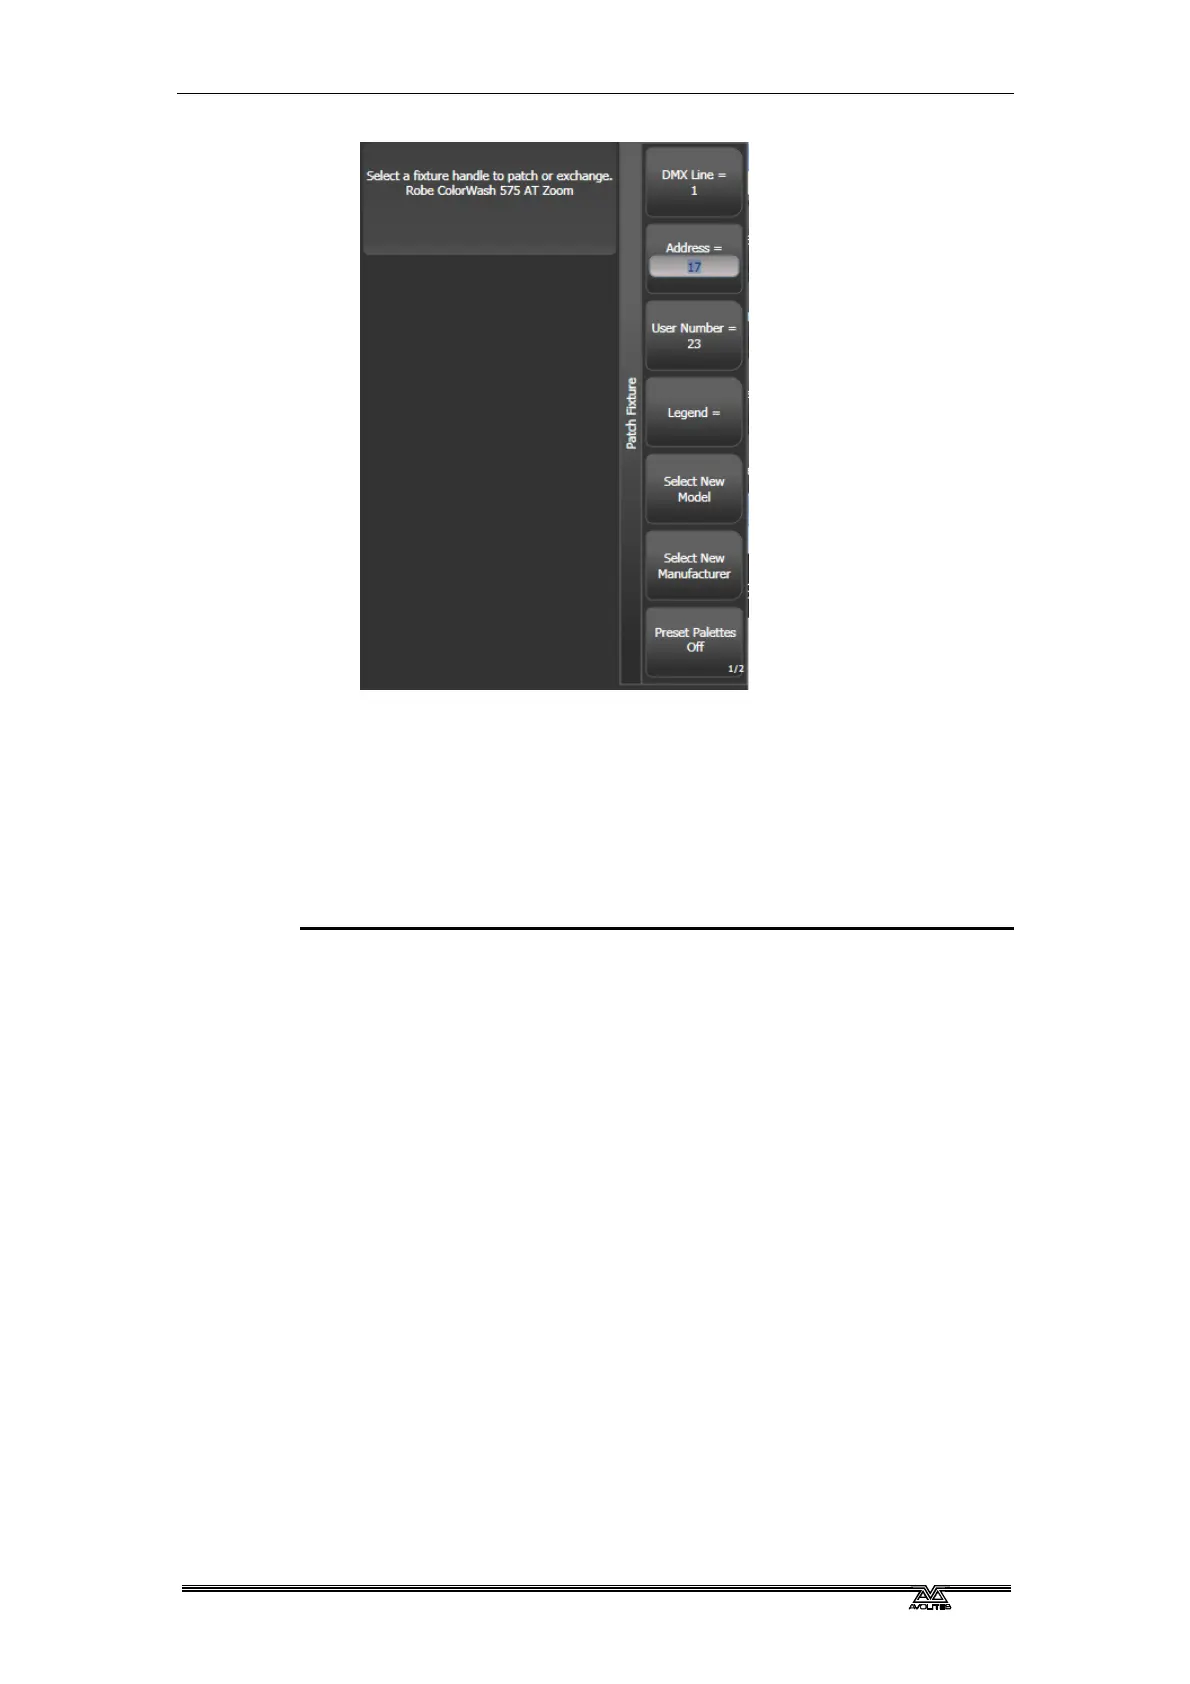
7> Patch the fixture by pressing a Fixture touch button, a
Macro/Executor button or the blue Select button of a fader
handle.
8> A fixture touch button turns dark blue and shows fixture details
when it is patched. If you patch to a fader handle the select
button will light up dimly.
9> Repeat from 7 to patch more of the same fixture type. The DMX
address automatically updates so you can just keep patching by
pressing Select buttons.
• To patch multiples of the same fixture, use the [Quantity]
option. Or you can run your finger or draw a selection box
round the touch buttons, or for physical buttons hold down the
first button in the range and press the last button in the range.
The fixtures will be patched to sequential blocks of DMX
addresses.
• [Options], [Offset] allows you to leave gaps in the DMX
channels between fixtures when patching multiple fixtures,
which is useful if you are planning a show which may involve
exchanging fixtures. The Offset number is the size of the block
which will be allocated to the fixture, for example if you want to
allow 32 channels for each fixture you would set Offset to 32.
• You cannot patch more than one fixture onto a handle. If the
handle is already used, the patch will fail.
• If you are patching a fixture which uses a separate dimmer
channel, such as a VL5, you can patch the dimmer channel onto
the same handle as the moving light part of the fixture so you
can control it all together. This is called a Pending Dimmer (in
the Patch View window this is indicated with a flash symbol
behind the user number).
• [Options], [Preset Palettes] sets whether the console will create
default colour, gobo and position palettes for the new fixture.


 To Next Page