10. Card Cage
10.11 Replacing the Deinterlacing module
This procedure assumes that the Input & Communication unit is already removed from the projector.
Necessary tools
• T10 Torx driver.
• 5.5mm nut driver.
How to replace the Deinterlacing module?
1. R emov e the complete PMP board assembly from the Input & Comm unication unit. See first steps of the service procedure
"Replacing the PMP board", page 156.
2. R emov e the Warp m odule from the PM P board assembly. Se e "Replacing the Warp module", page 159.
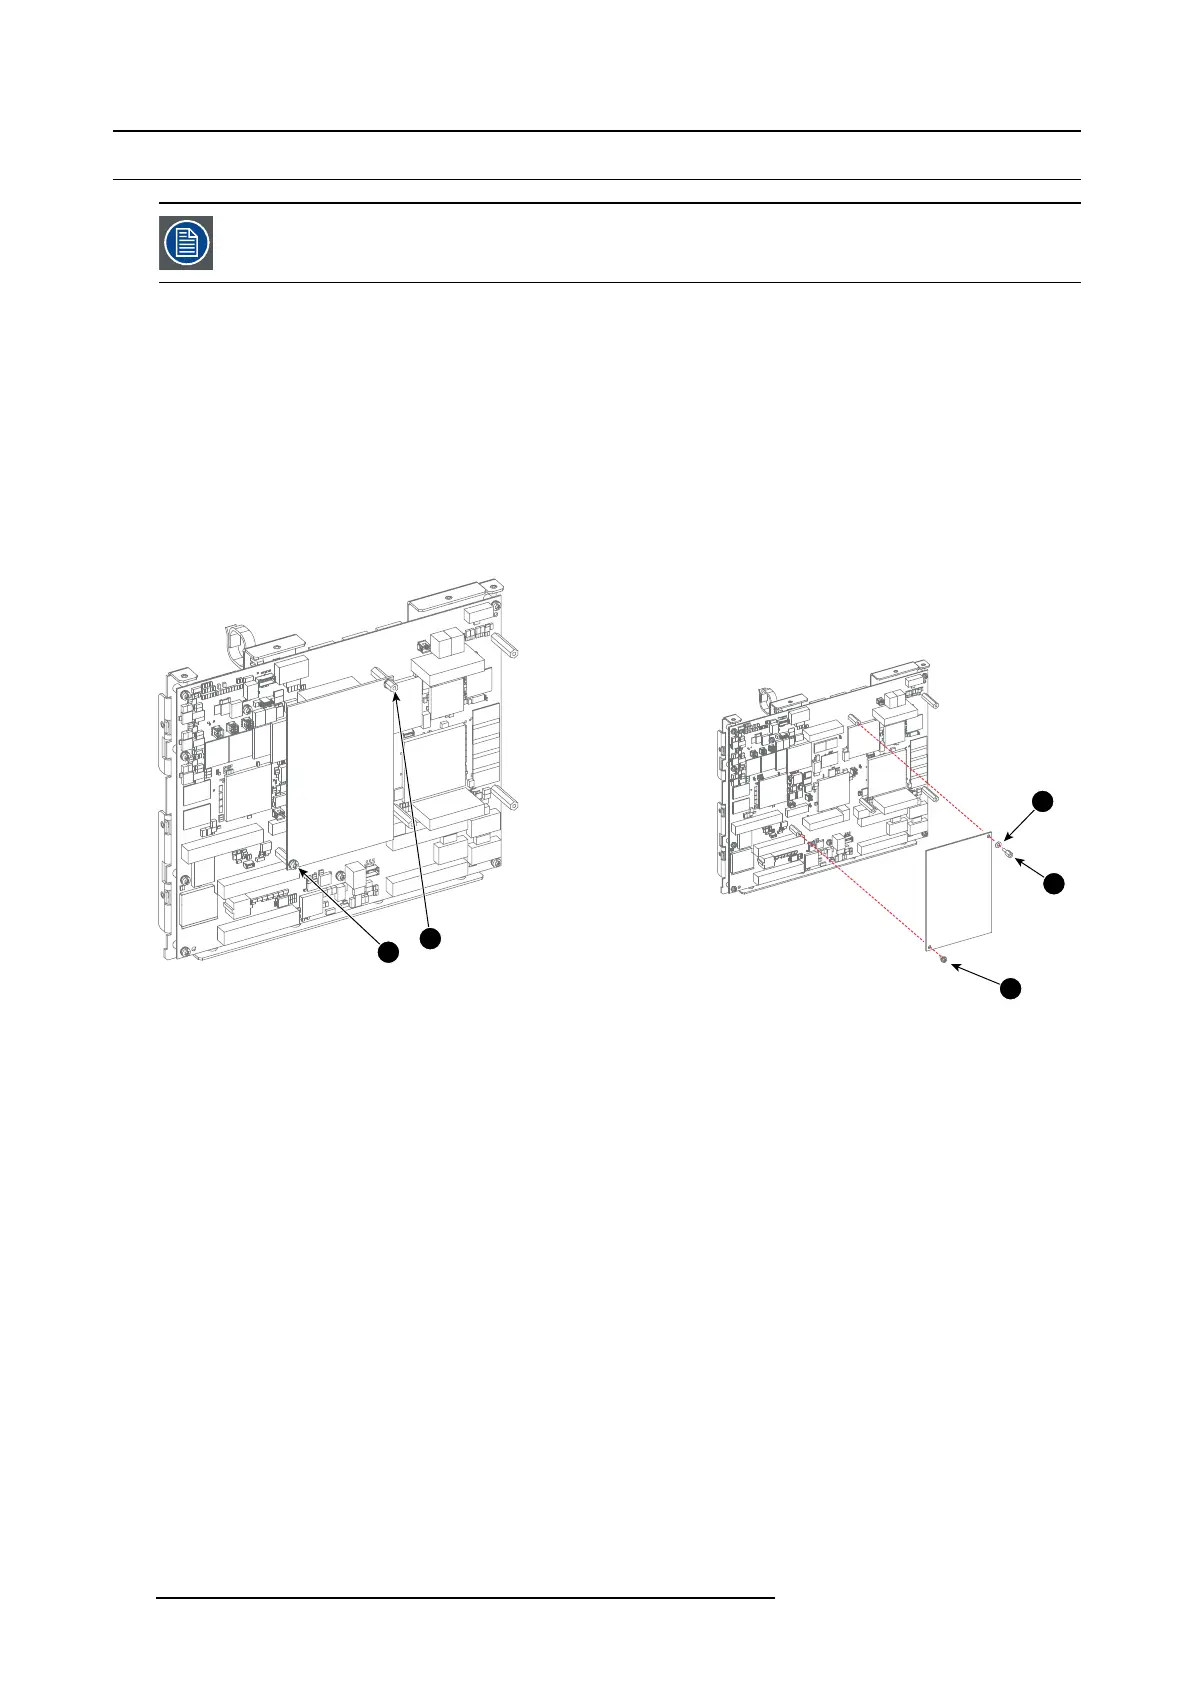
3. R eplace the Deinterlacing module from the PMP board assembly. Use a T10 Torx driver to loosen/fasten the screws (reference
5) and use a 5.5mm nut driver to loosen/fasten the spacer (reference 6). Note that the spacer c ontains a plain washer (reference
7).
6
5
6
7
5
Image 10-28
4. R einstall the Warp m odule. See "Replacing th
e Warp module", page 159.
5. Install the complete PMP board a ssem bly bac k on the Input & Communication unit. S ee ser vice procedure "Replacing the PMP
board", page 15 6.
160
R5905312 HDF W SERIES 24/01/2013

 Loading...


