10. Card Cage
10.12 Replacing the LCD Display Interface
This procedure assumes that the Input & Communication unit is already removed from the projector.
Necessary tools
• T10 Torx driver.
•Smallflat screwdriver.
How to replace the LCD Display Interface?
1. R emov e the complete PMP board assembly from the Input & Comm unication unit. See first steps of the service procedure
"Replacing the PMP board", page 156.
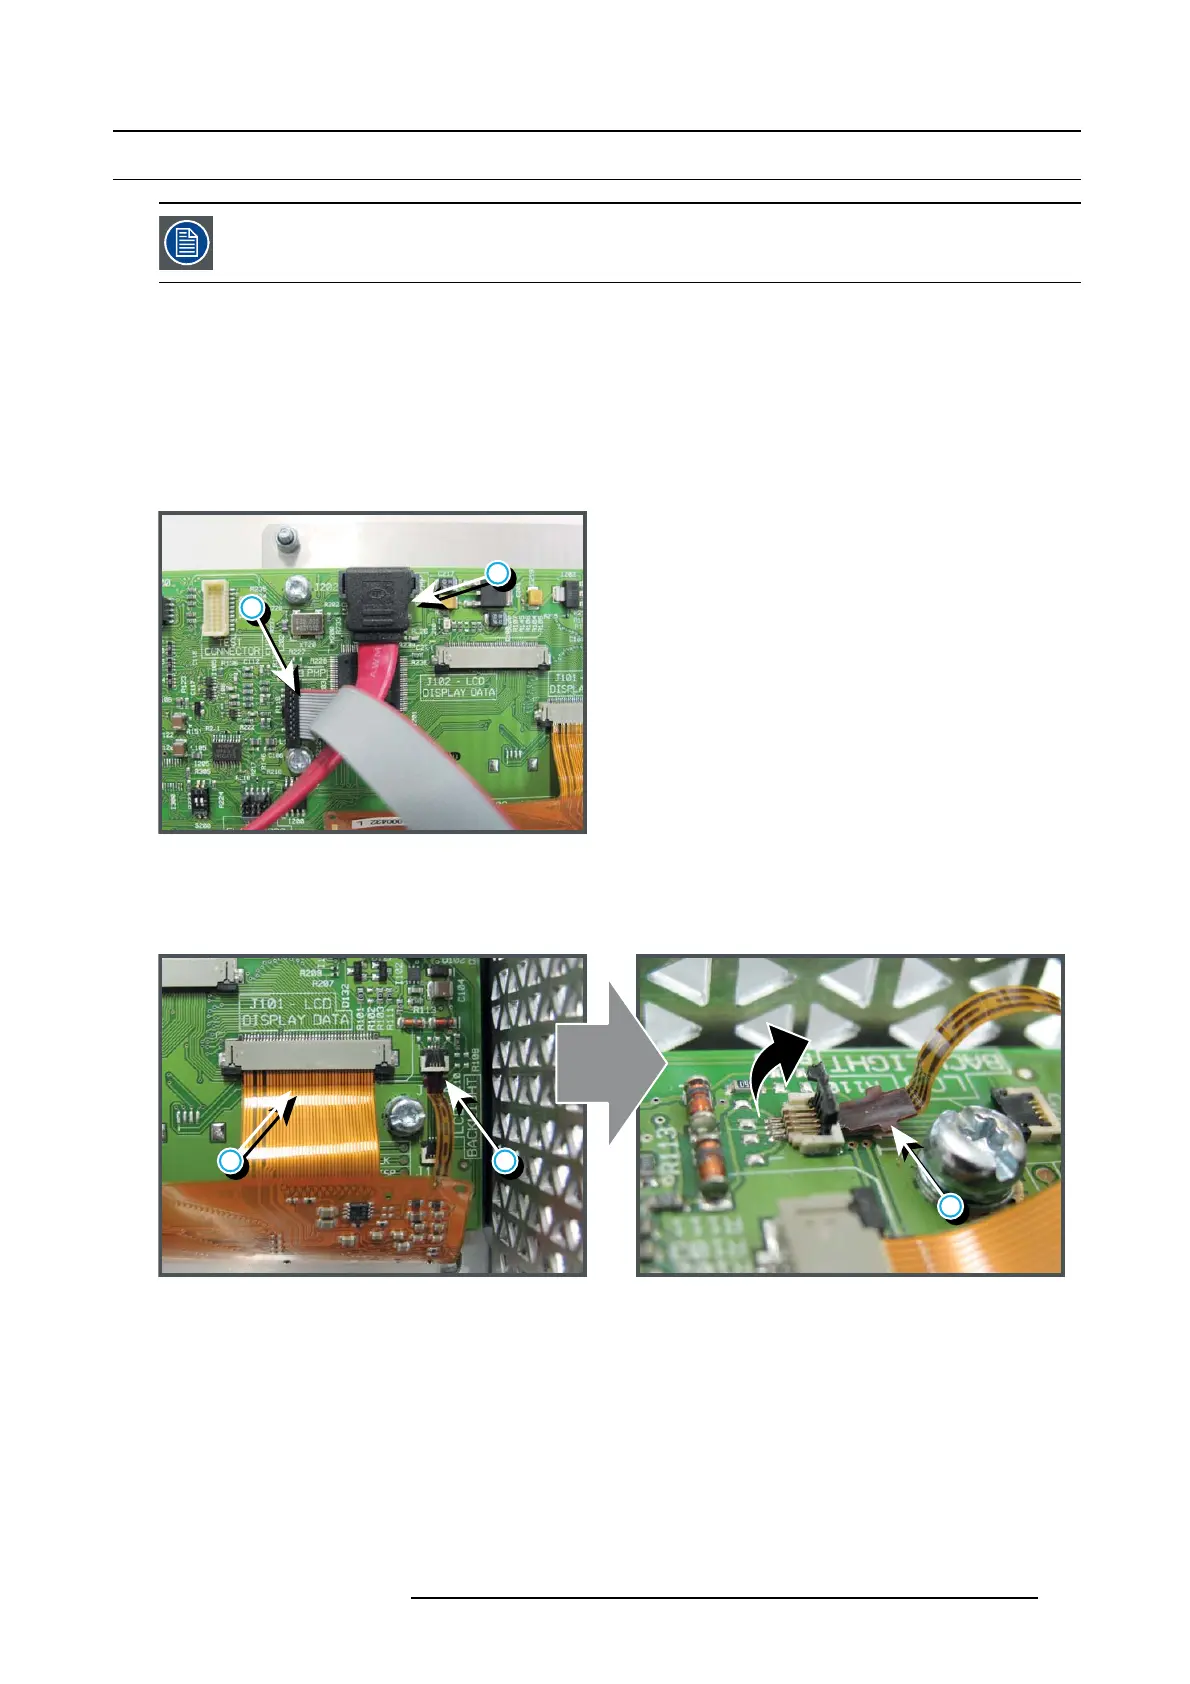
2. D isconnect the gray (reference 4 image 10-29) and the red c able ( reference 5 image 10-29) from the LCD Display Interface.
4
5
Image 10-29
3. D isconnect the sm all flex cable (reference 1 image 10-30) of the LCD Display from the LCD Display Interface board. Ensu re to
disconnect the sm all flex prior to dis connect the large flex (reference 2 image 10-30).
Caution: Open the latch of the socket prior to pu ll out the fl ex cables. No te that the latch of the smallest socket (reference 1
image 10-30) pivots up wards!
2 1
1
Image 10-30
4. D isconnect the large flex (reference 2 im age 10-31) of the LCD Display from the LCD Display Interface board. Unlock the latch
of the cable socket before pulling out th e flex cable.
R5905312 HDF W SERIES 24/01/2013 161

 Loading...


