13. HDF Light Processor
13.3 Removing the Light Processor
WARNING: Disconnect the power cord from the projector and wait a few minutes (to discharge the capacitors)
prior to start with this procedure.
Necessary tools
7mm flat scre w d rive r
How to remove
1. R emov e t he Input & Com munic ation unit from the projector. See "Removal of the Input & Communication Unit", page 144.
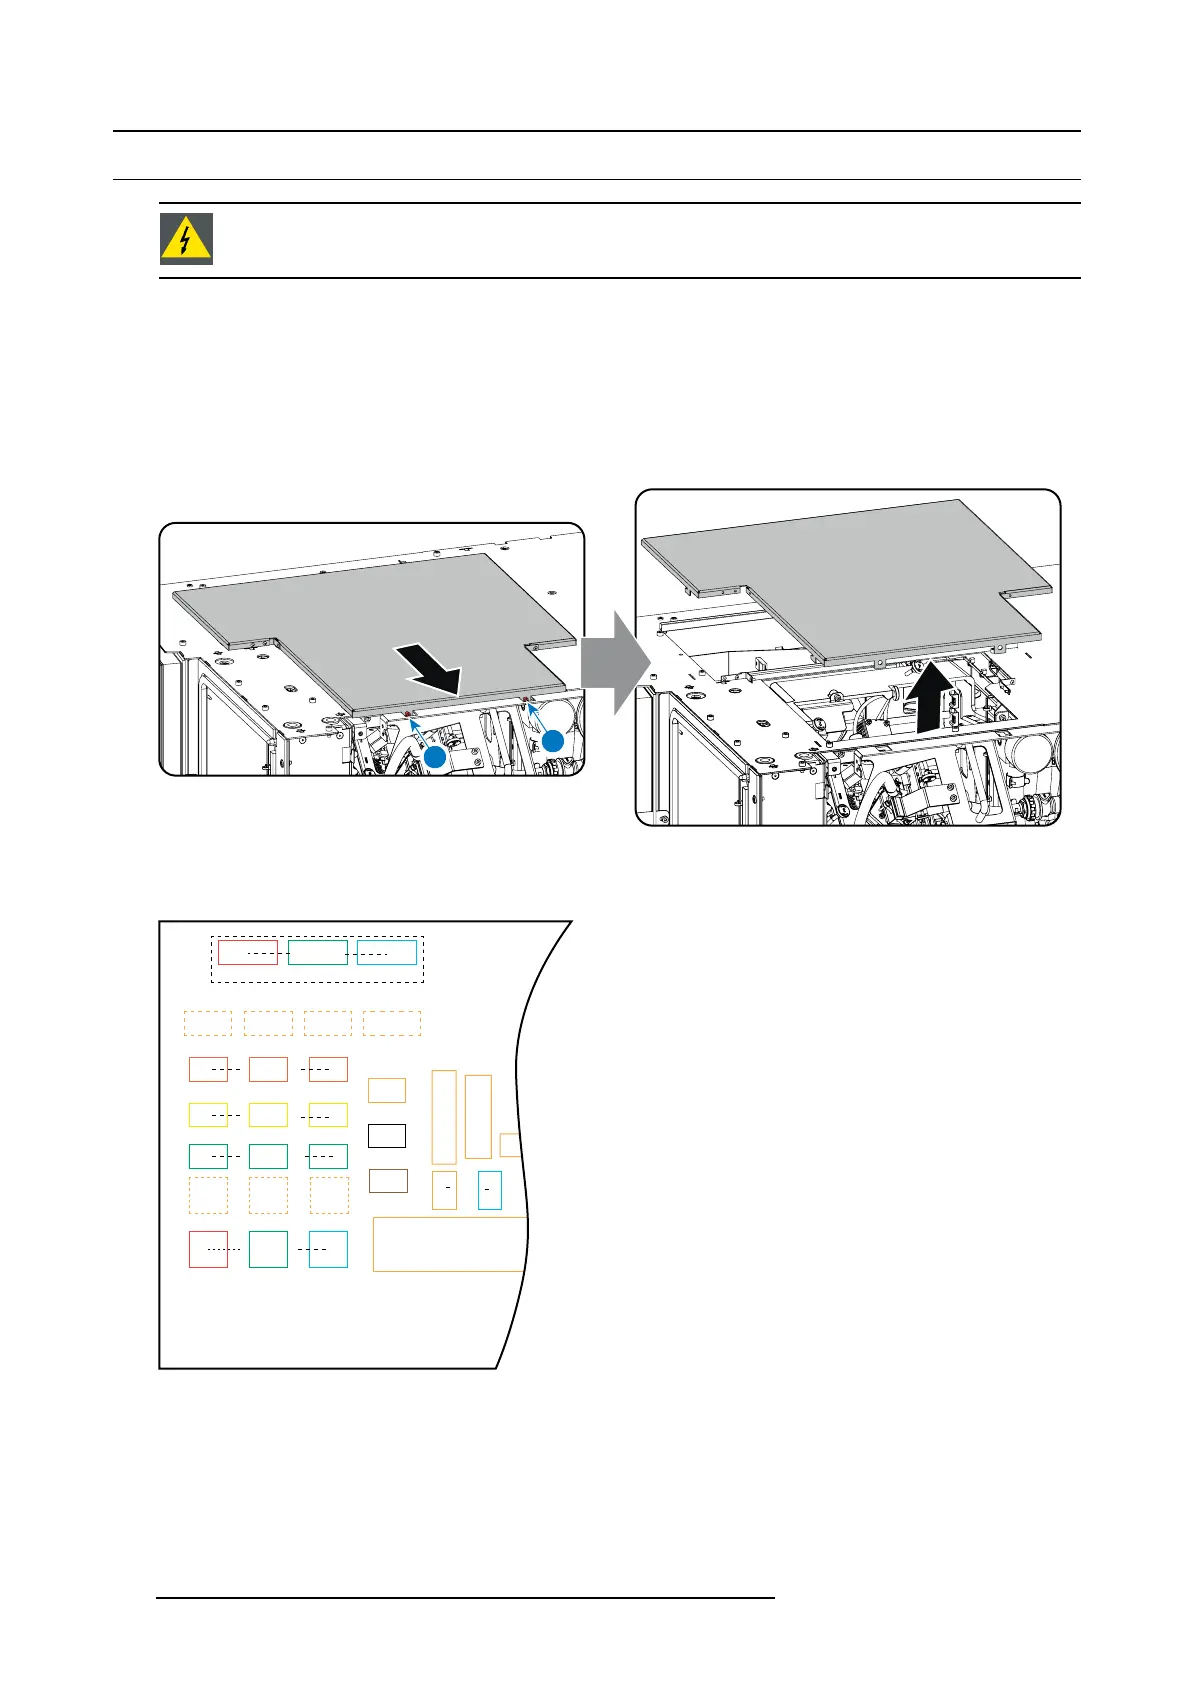
2. R emov e the light processor cover plate.
Turn out both fixation screws (1 & 2), slide the plate to the side of the projector and take off the plate.
1
1
2
Image 13-2
Convergence cover
3. D isconnect the formatter cables, DMD temperature se nsor cabl
es, prism, etc as indicated on the drawing from the power distri-
bution board.
Fans chassis
White plug, multi color wires
Formatter
DMD back
DMD front
DMD block
TEC back
Shutter
Pump
Lightpipe
Engine air
Front block
Prism
Image 13-3
4. R elease both captive screws at the base of the light processor (1 and 2). Use a 7 mm flat s crew drive r or a 10 mm nut driver.
192
R5905312 HDF W SERIES 24/01/2013

 Loading...


