Chapter 7: Maintenance
Parts Replacement
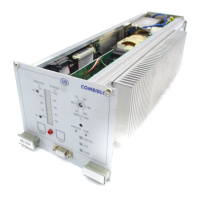
7-54 011-003-991 EN
7.7.3 Power Switch and Lamp
The Power Switch with its integral lamp is a field-replaceable component. It uses a 5-conductor wiring har-
ness. The switch leads are depicted, by color code, in Figure 7.4, Front Panel, Exploded Parts View, looking
at the bottom of the switch. To replace the switch, disconnect power and push the switch out from the rear
of the front bezel assembly. Disconnect the wires and, in reverse order, reinstall the new switch with the
integral lamp toward the top side.
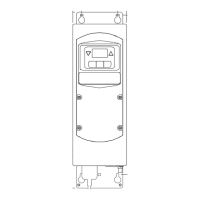
7.7.4 Front Panel Membrane and VFD Display
The Front Panel Membrane and Bezel are supplied as a single assembly.
The VFD Display is removable from the back of the Bezel/Membrane unit and can be replaced separately.
You remove the Front Bezel by removing the four screws from the Bezel Support, and then lifting the Bezel
up and out.
To remove the VFD Display, take the following steps:
Table 7.12 Removing the VFD Display
Step Action
1 Turn off the Power Supply.
Unplug the main power.
2
Using a #2 Philips screwdriver, remove 7 screws from the 2000X cover (3 on each side,
1 on the rear). Remove the cover.
Allow at least two minutes for capacitor discharge.
3
Using a #1 Philips screwdriver, loosen, from inside the unit, the 4 screws on the Front
Bezel Support.
4 Using a #1 Philips screwdriver, remove 5 screws from the Front Bezel (bottom front).
5 Disconnect the membrane connectors from the System Controller Board.
6 Disconnect the cable clamps.
7 Disconnect the leads from the Power Switch Assembly.
8 Disconnect J36 on the System Controller Board.
9 Disconnect the VFD ground strap.
10 Lift the front panel up and out.
11 Tip the Front Bezel forward.
12 Disconnect the cable from the VFD board.
13 Remove 4 screws from the VFD board.
14 Remove the VFD board.