Chapter 7: Maintenance
Parts Replacement
7-58 011-003-991 EN
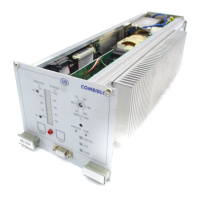
7.7.9 System Controller Board
To remove the System Controller Board, take the following steps:
To reinstall the System Controller Board, reverse the removal procedures and per-
form a Cold Start.
If this is a board upgrade, make certain to use the appropriate longer length standoffs to pre-
clude interference problems.
You can verify the software version of your power supply either viewing it in the System Infor-
mation menu, or by removing the power supply cover and reading the version number on the
flash (IC’s U53, U54, U55 and U56) located on the Controller Board.
Table 7.17 Removing the System Controller Board
Step Action
1 Print out or record all parameters from your weld setup.
2
Turn the Power Supply off. Disconnect it from Main power.
Wait at least two minutes.
3
Using a #2 Philips screwdriver, remove 7 screws from the 2000X cover (3 on
each side, 1 on the rear).
4 Observe all ESD precautions (grounding strap).
5 Remove the User I/O board. See 7.7.7 User I/O Board.
6
Remove all cables connected to the system controller. Note the path of the cable
routing, and be careful that you do not cross the flexible transparent cable.
7
Remove all screws and standoffs that hold the System Controller in the chassis,
including the 2 (M3) screws in the back panel.
Do not remove the 2 screws that secure the back panel plate to the D shell con-
nector. If this is a board upgrade, the new level designation is located on the
replacement assembly. If there still exists a need to remove the connector, do
not apply a torque greater than 4 in/lbs to the screws when reassembling.
8 Remove the System Controller Board.