Chapter 4: Installation and Setup
Assemble the Acoustic Stack
4-38 011-003-991 EN
4.9 Assemble the Acoustic Stack
The following procedure must be performed by a setup person. If necessary, secure the
largest portion of a square or rectangular horn in a soft jawed vise. NEVER attempt to assem-
ble or remove a horn by holding the converter housing or the booster clamp ring in a vise.
Do not use silicone grease with Mylar washers. Use only 1 (one) Mylar washer of the correct
inside and outside diameters at each interface.
Table 4.10 Tools
2
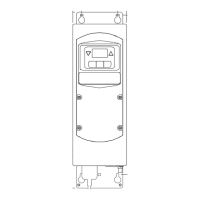
From the front corners of the Power Supply, remove the corner trim pieces by removing
the two Phillips screws. Save the screws.
3
Noting that one side of each bracket is countersunk to accept the provided flathead
screws, assemble the Rack Mount Handles as shown in Figure 4.17. (This shows only the
Right bracket and handle; the left side is a mirror-image.) Tighten the screws securely and
so they are flush.
4
Re-using the screws you removed in Step 2, install the assembled Handle in place of the
Front Corner pieces.
5
Save the removed hardware corner pieces.
6
When you are ready to install the unit, use the hardware from your Rack Mounting system
to locate the Power Supply.
Tool EDP Number
15, 20, and 30kHz Torque Wrench Kit 101-063-787
40 kHz Torque Wrench 101-063-618
20 kHz Spanner Wrench 201-118-019
30 kHz Spanner Wrench 201-118-033
40 kHz Spanner Wrench 201-118-024
Silicone Grease 101-053-002
Step Procedure