3-70
Confidential
(6) Similarly, remove the intermediate joint of two Valve ASSYs in the Supply valve ASSY at
the ink flow channel side, and cover the intermediate joint of the upper Valve ASSY with a
cloth, etc. to prevent it from getting dirty due to the ink leakage.
(7) Remove the Tube at the lower side of the lower Valve ASSY in the Supply valve ASSY at
the ink flow channel side from the joint of the Sub tank and remove the lower Valve ASSY.
Cover the end of the Tube at the lower side of the lower Valve ASSY with a cloth, etc. to
prevent it from getting dirty due to the ink leakage.
(8) Remove the Tube at the upper side of upper Valve ASSY in the Supply valve ASSY at the
ink flow channel side from the L joint of the Tube coming from the Ink refill unit and
remove the upper Valve ASSY.
(9) Tighten the four Taptite cup S M3 x 6 SR screws in the Supply pump ASSY.
(1) Loosen the four Taptite cup S M3 x 6 SR screws in the Supply pump ASSY.
(2) Insert the Valve ASSY at the lower side of the Supply valve ASSY into the Sub tank of the
Sub tank ASSY.
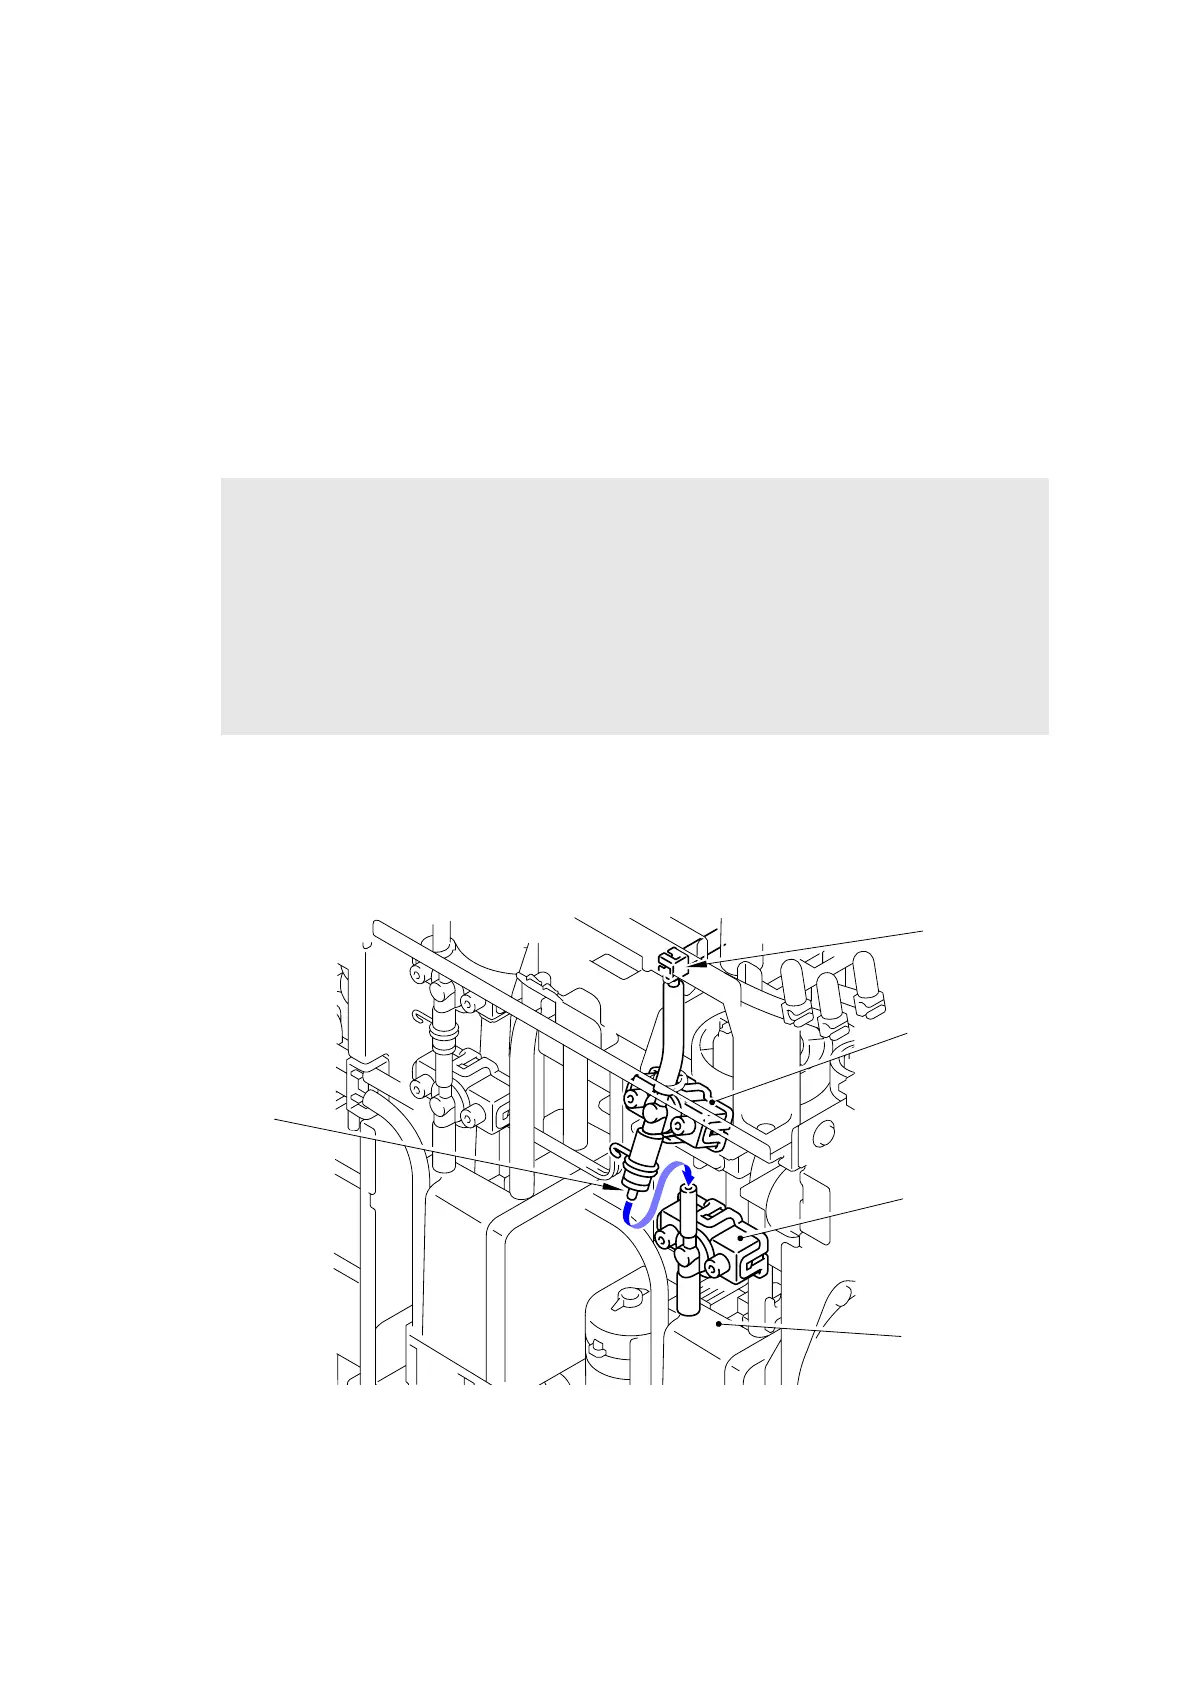
Fig. 3-70
Assembling Note:
- When assembling the Supply valve ASSY, be sure to thoroughly clean the L joint of the
Tube from the Ink refill unit and the joint of the Sub tank before assembling it.
- When the Supply valve ASSY has only one Valve ASSY, replace it with the one having
two Valve ASSYs. In this case, the length of the Tube to connect the Supply pump and
Supply valve ASSY is different, and therefore be sure to replace the Tube with a new
appropriate one.
- When assembling the Supply valve ASSY with two Valve ASSYs, be sure to follow the
procedures given below:
Valve ASSY
Valve ASSY
L joint
Joint
Sub tank
(upper side)
(lower side)

 Loading...


