© AGRGS 2016 | Data subject to change without notice
67385867493098462 | en, eu, V5, 07. Oct 2016, page 58
In the Control Program, go to Doors tab and select a controller you want from the list, click
Settings, and check Display settings > Common box. Reduce the value of Max waiting time for
guard to make a decision to allow or deny access parameter to the lowest possible.
Then switch to Clamps reassignment (Terminal reassignment) tab and add a string with the
following values:
● Function «Seize card» line for «Outside» direction (Capture the card in OUT direction),
Door (access point) "1", Clamp (terminal) "O1, normally not active".
Switch to Port readers reassignment (Reader port reassignment) tab add the
string:
● Access point "1", Port reader type (reader port type) Extended for exit (Additional
for OUT direction), Port number "3".
Click OK and Apply.
Mode settings (Rules):
For visitor passes that have to be captured at the exit, on Main tab you have to create the mode
with the following settings:
● Affected Staff select all visitor passes.
● Affected doors (access points) select all access po
● When connecting PERCo-IC03 CCR as an accessory in addition to the main reader, on
Special Rules tab enable Outside direction additional reader as card collector (Allow
passage in OUT direction only by additional card capture reader) option from the drop-
down menu and Require guard approval for passing in «outside» direction.
● When connecting PERCo-IC03 CCR as the sole reader at access point or when connecting
PERCo-TBC01 turnstiles, on Special Rules tab enable only Require guard approval for
passing in «outside» direction option.
Add a day or days according to working schedule and adjust them as necessary.
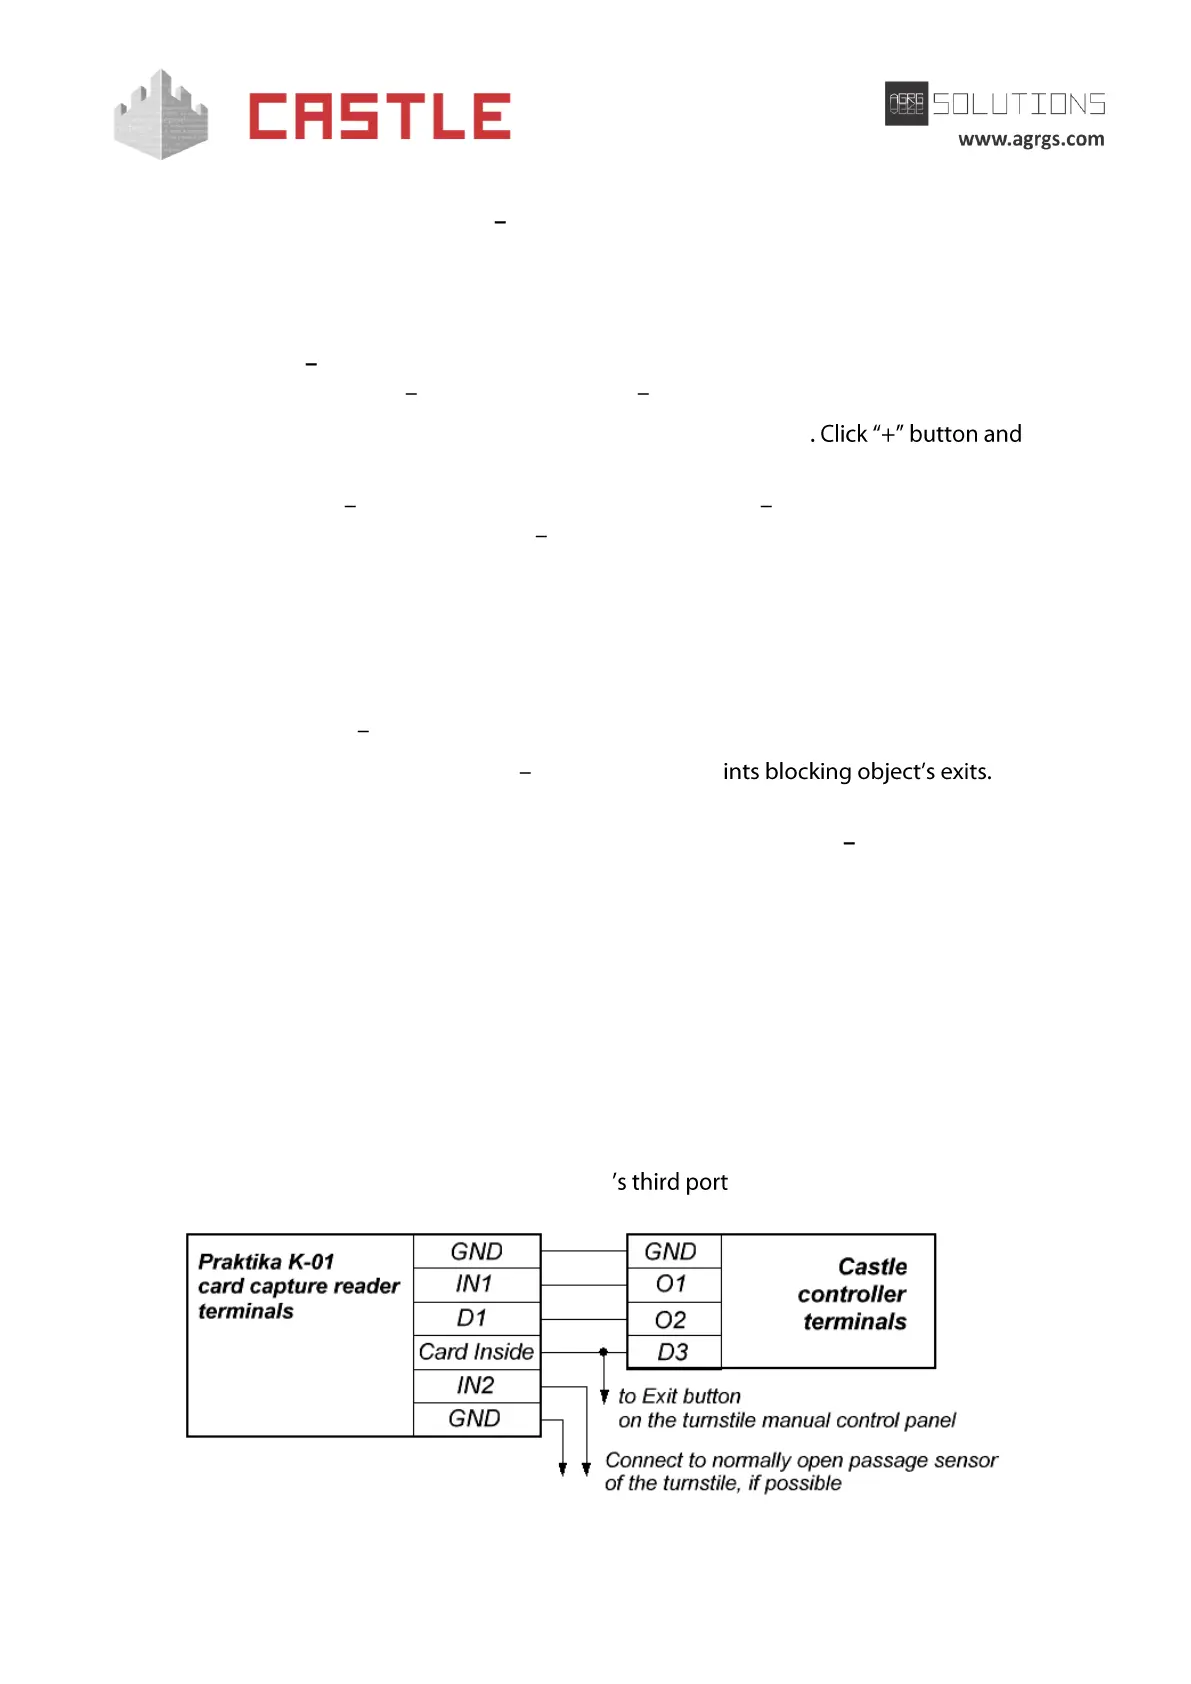
9.5.7 Connecting Praktika K-01 card capture reader
To connect Praktika K-01 CCR, it is necessary to join controller terminals to CCR terminals, and the
built-in reader is to be connected to the controller .
Pic 37. Example of connecting Praktika K-01 CCR in OUT direction