CONSOLE AI | Adding Partitions, Channels, and GPIO Settings (CP2) | 158
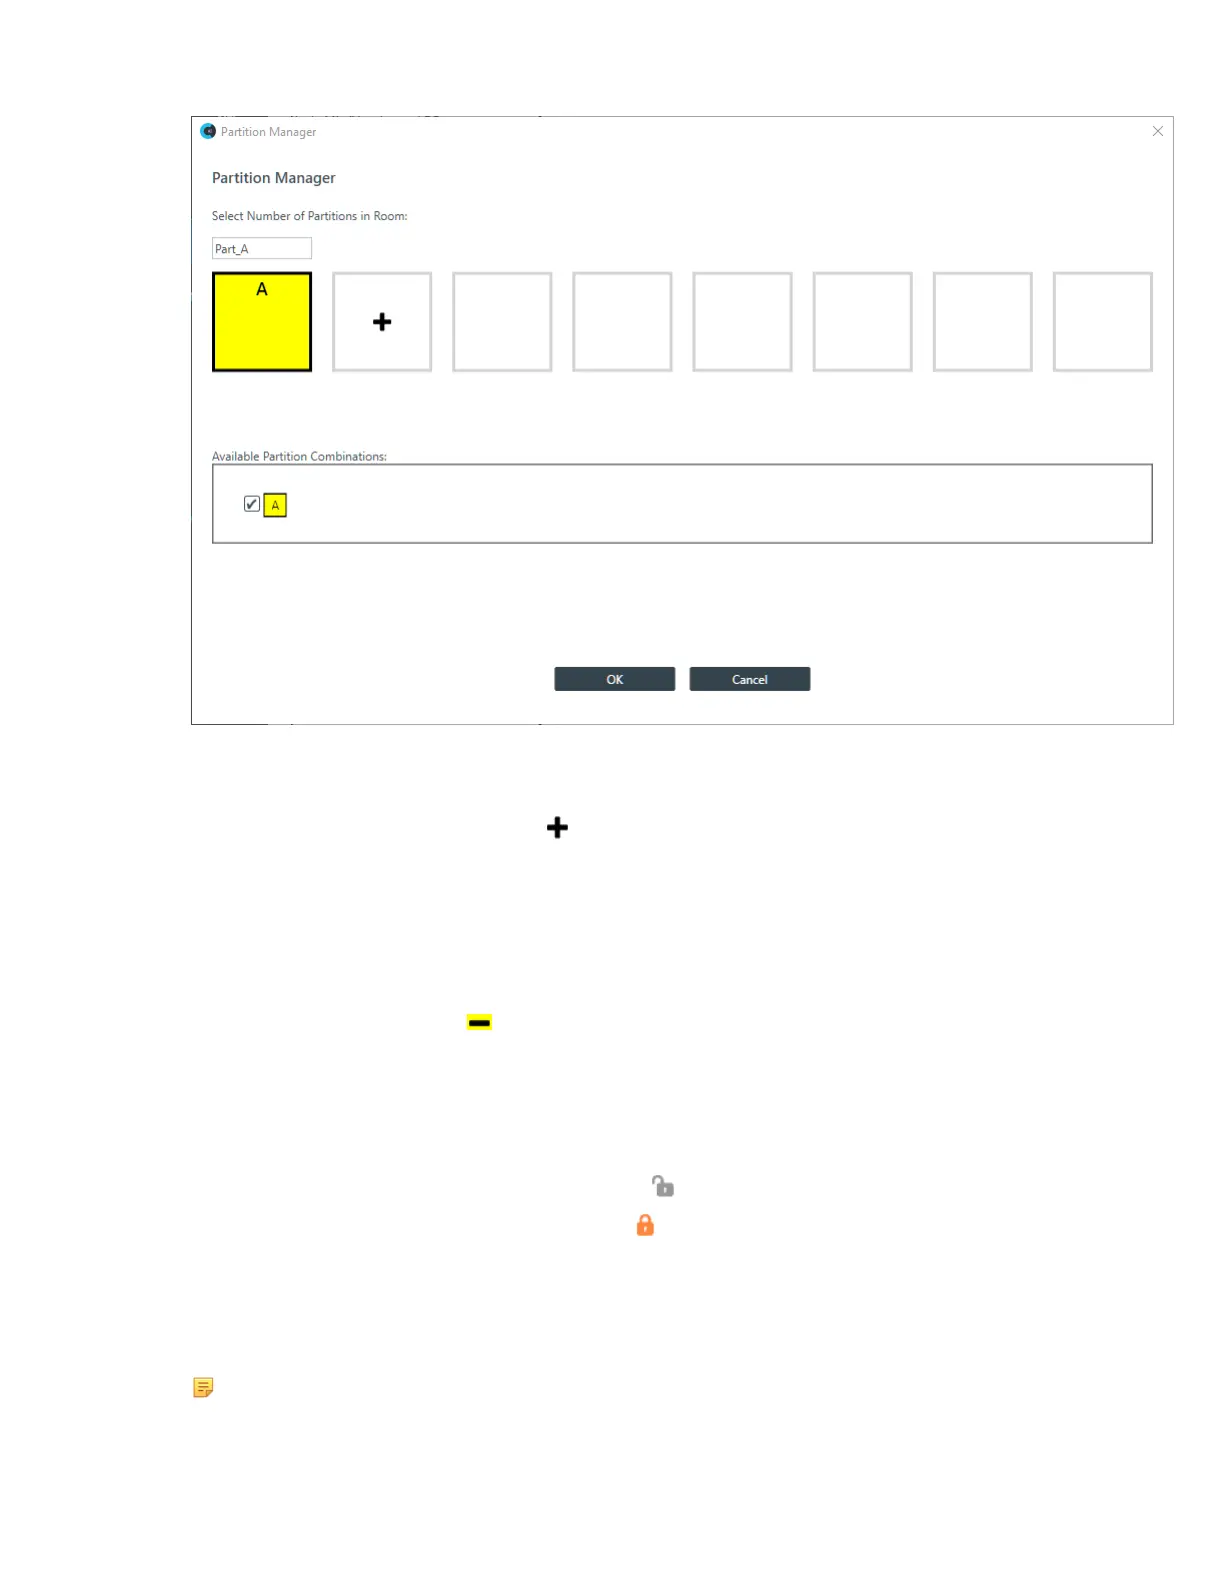
If you have just turned on Advanced Room, there will be only one partition: A.
Adding Partitions
5.
To add a partition, click the box with the in it to the right of an existing partition.
A new partition is added, using the next available letter.
6. (Optional) Partitions are automatically named, but if you wish, you can change the names by typing a
new name in the text box above the partition.
7. Repeat steps 5-6 to create the number of partitions you want (up to eight).
Removing Partitions
8.
To remove a partition, click the on a partition.
You can remove only one partition at a time, starting with the one you created last.
9. Repeat step 8 to remove more partitions.
Locking and Unlocking Dividers
10.Each time you create a partition, a divider is created between the previous partition and the one you just
created. To lock a divider in a closed state, click the at the bottom of the divider.
11.
To unlock a divider that has been locked, click the .
Changing Available Partition Combinations
12.Be default, all available partition combinations that can be created are made available. Locking a divider
makes some partition combinations unavailable. For the rest that are possible, you can manually make
some of them unavailable by deselecting the check box next to that partition combination.
Note:
Removing partition combinations that you can’t use or don’t intend to use can significantly speed
up the time it takes to load a project to a device or stack.
CONSOLE AI User Manual