CONSOLE AI | Adding Partitions, Channels, and GPIO Settings (CP2) | 159
13.When you are done making changes to partitions, click OK.
The partitions you have created become available for selection in the Partition drop-down list. When you
have chosen an option from that drop-down list, changes you make apply only to the chosen partition
and your partition selection is reflected in the symbols that appear to the right of the Partition drop-down
list.
Adding Channels to a Project
Before you can configure any audio channels, you must add them to a project. You can create multiple
presets and add specific channels for different presets. See About Presets and Adding or Modifying
Presets (CP2) for more information about presets. If you are using the Advanced Room operation mode,
you add channels to a room partition. See About Room Partitions and Using Partition Manager (CP2) for
more information about room partitions. See Releasing Channels from a Project for information about
releasing assets after they have been added.
To add channels:
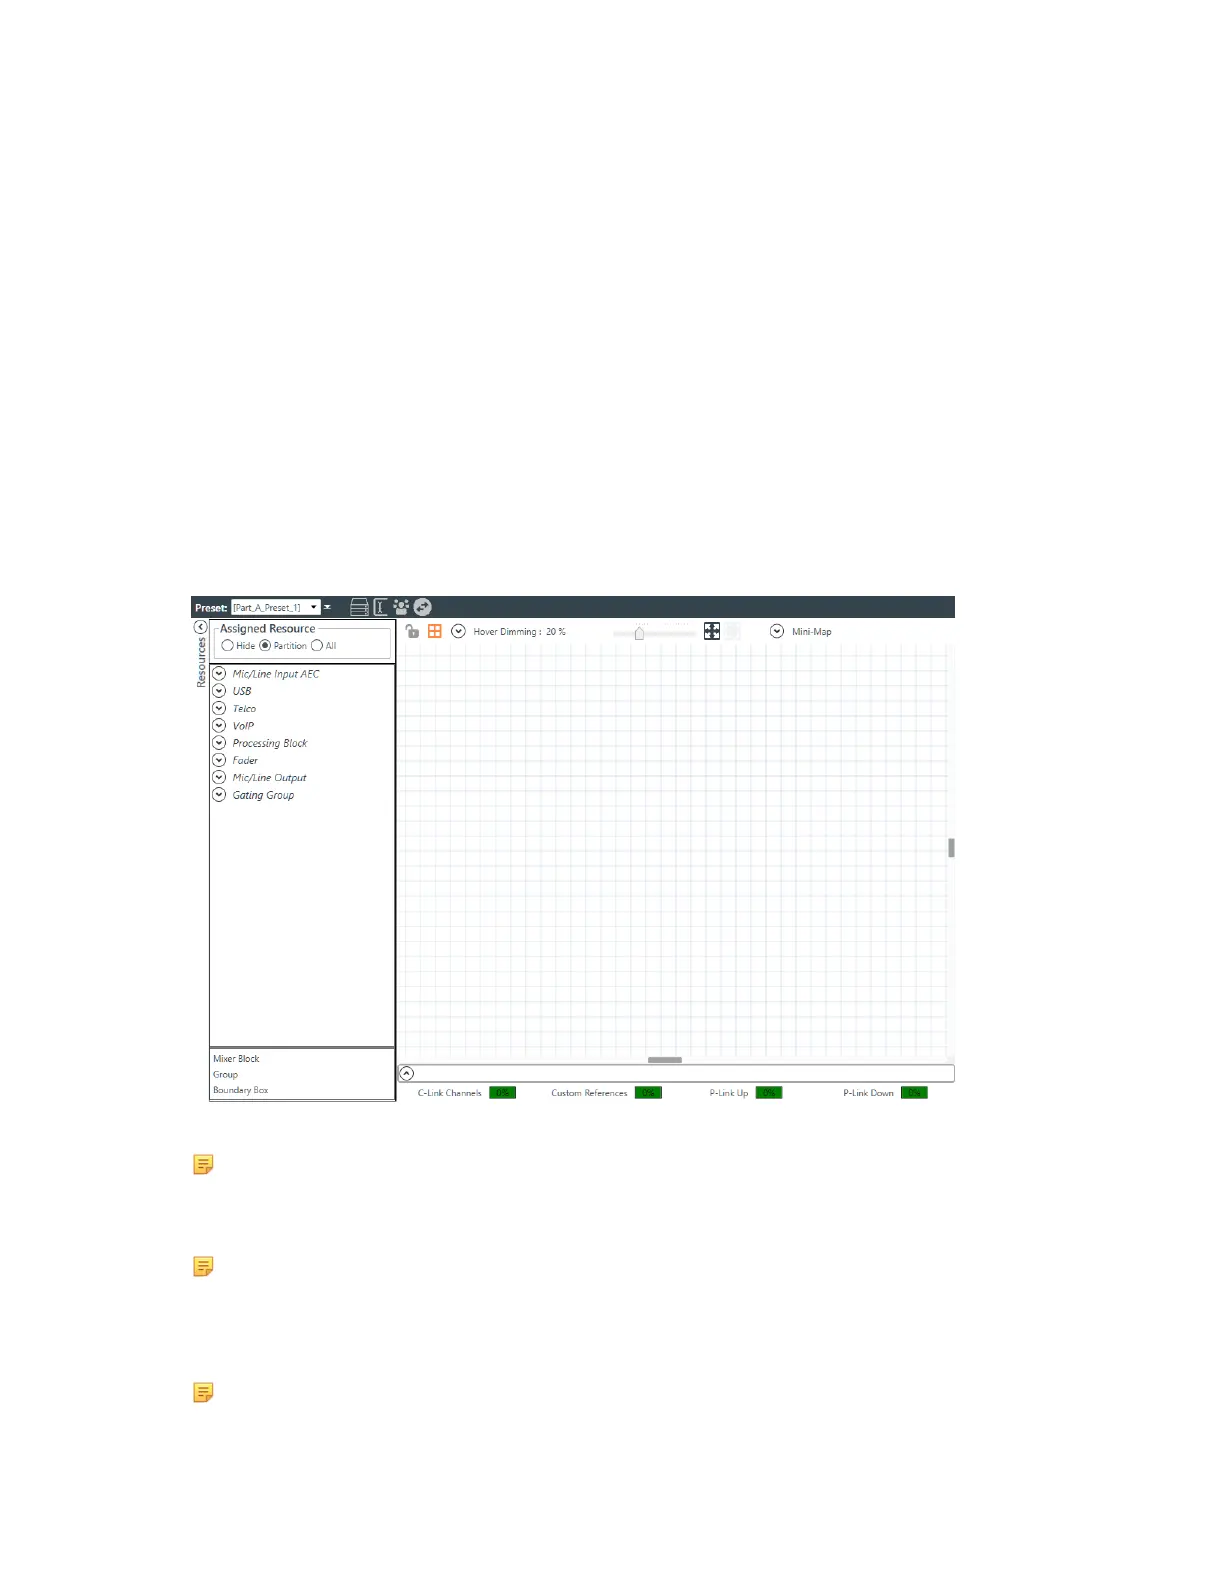
1. In the Navigation Panel, select FlowView
™
.
The FlowView screen appears:
2. If you’re using presets, select a preset from the Preset drop-down menu.
Note:
For information about creating and managing presets, see Adding or Modifying Presets (CP2).
3. If you’re using the Advanced Room mode, choose a partition from the Partition drop-down list.
Note:
If you’re using the Simple Room operation mode, there is no Partition drop-down menu.
4. Resource channels appear at the left side of the FlowView screen, divided up by channel type. To see
individual resources, click a type to open it.
Note:
CONSOLE AI User Manual