S0605050K
Page 22
Air Conditioner
Return to Master Table of Contents
2. Check system for vacuum leak.
Allow system to sit for 10 minutes and
check whether the system is holding the
pressure. If the pressure has dropped, it
must be repaired before proceeding to the
next step.
3. Vacuuming Procedure.
If the system is holding the pressure and it
has not changed for 10 minutes, vacuum
out the system for an additional 20
minutes.
A. Turn on the vacuum pump and slowly
open both valves.
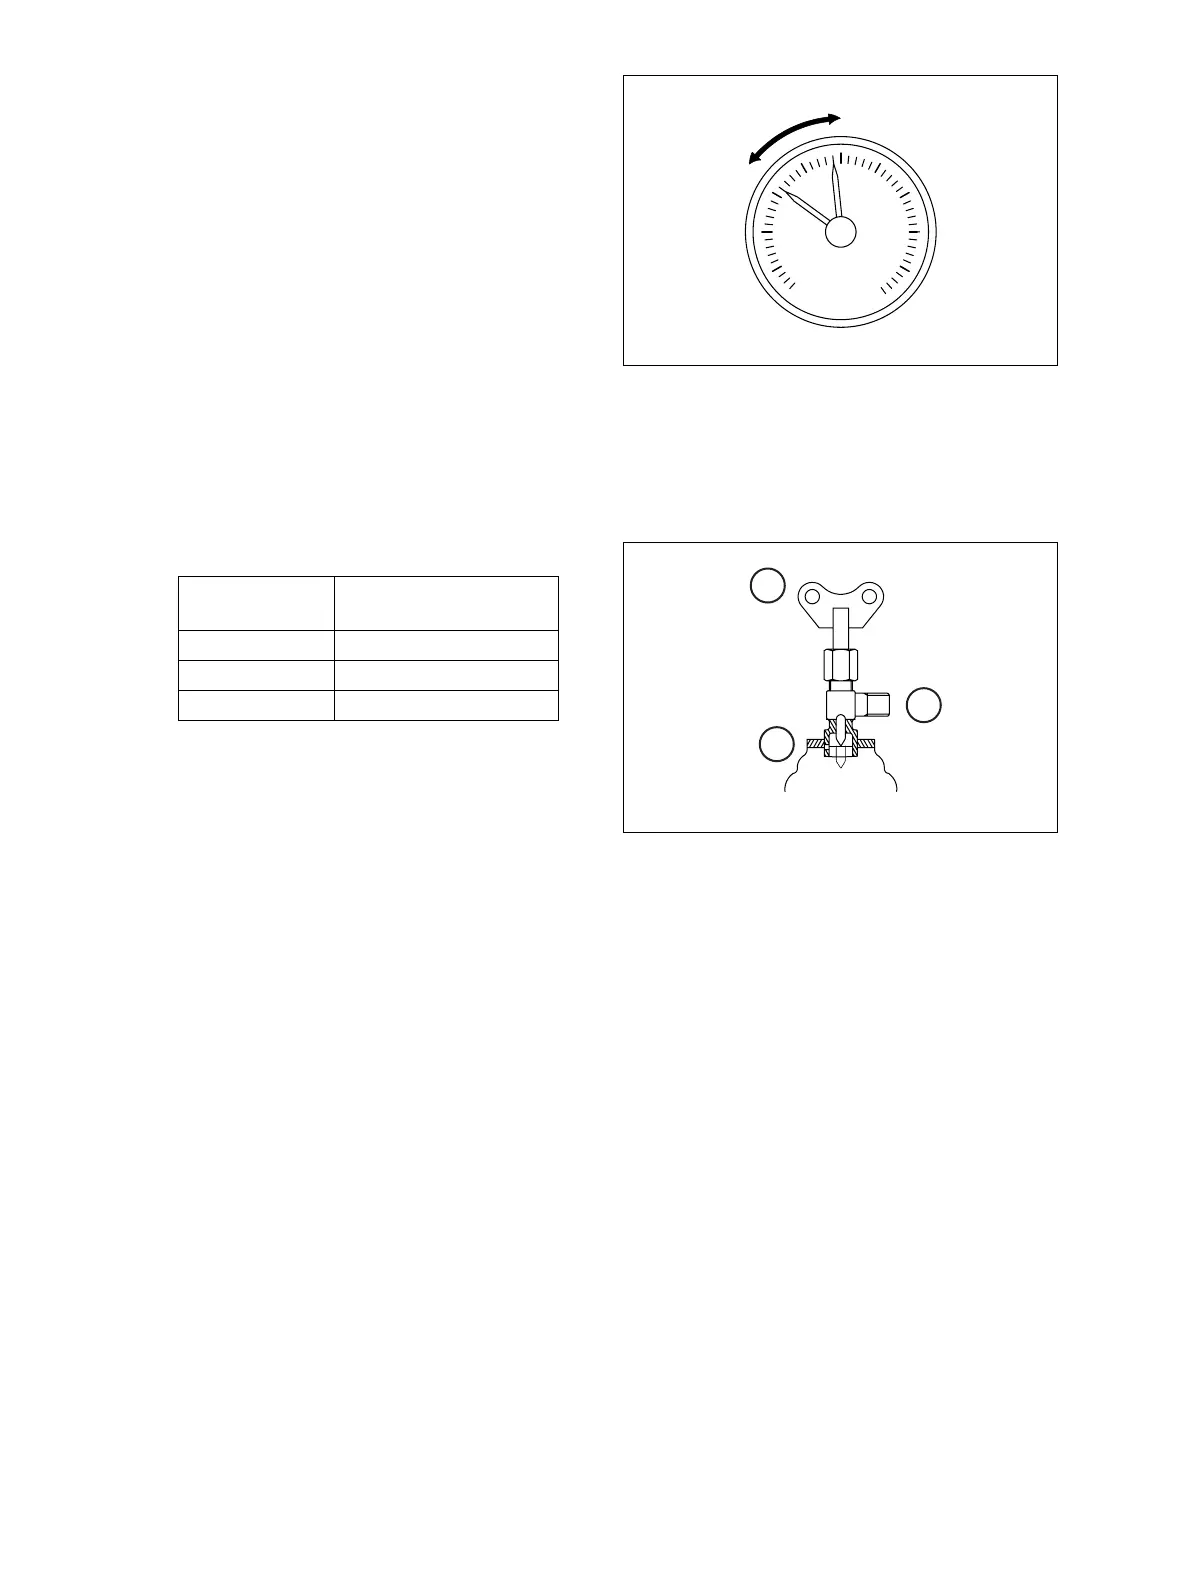
B. Allow vacuum pump to run for additional 20 minutes until the low pressure gauge dial reads
approximately 750 mmHg.
C. Close both valves and stop the vacuum pump.
4. Installation Of Refrigerant Container.
A. Before mounting valve on the
container, make sure the handle is in
the counterclockwise most position,
with the puncture pin retracted and
the mounting disk is in the raised
position.
B. Attach the manifold gauge center
hose to the valve assembly.
C. Turn the disc in the clockwise direction and securely mount valve onto refrigerant container.
D. Turn the valve handle in the clockwise direction and puncture the container seal with the pin.
E. Once the can has been punctured, turn the handle in the counter clockwise direction so the
refrigerant can flow into the manifold gauge center hose. At this time, do not open the low and
high pressure valves of the manifold gauge.
F. Press the manifold gauge low side valve to eliminate the trapped air in the hose.
LEAKAGE CHECK
NOTE:
Perform the leakage check after completing vacuuming process.
1. After attaching the manifold gauge, open the high side valve.
2. Charge system until the low side gauge dial indicates a pressure of 1 kg/cm
2
(14 psi) and close the
high side valve.
Reference
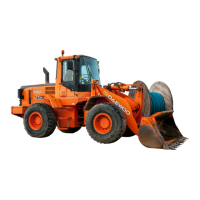
Number
Description
1 Handle
2 Hose Connection
3 Mounting Disk
HDA6069L
Figure 18
1
2
3
HDA6070L
Figure 19