S0708470K
Page 19
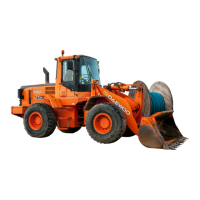
Steering and Brake Pump (Denison T67DB Series)
NOTE:
Always replace old seals with new seals when overhauling a unit. If a cartridge kit needs
replacement, new cartridge seals are included as part of the kit.
NOTE:
Apply a light film of hydraulic oil to all component parts except seals and back-up rings to
facilitate assembly and provide initial lubrication. Use small amounts of petroleum jelly to
hold O-rings in place during assembly. Install parts in reverse order of disassembly
NOTE:
To reverse direction of a new cartridge kit, simply reverse location of the inlet and outlet
support plated, and realign the cartridge with cover.
CARTRIDGE ASSEMBLY
1. The direction of rotation is as viewed from shaft end, right-hand rotation is clockwise, left-hand
rotation is counterclockwise.
NOTE:
If locating pins were removed from the inlet support plate, install new pins with locking
flutes within inlet support plate. Drive new pins into support plate with a soft tip hammer.
Reference
Number
Description
1 Body
2 Seal; Secondary
3 Seal; Primary
4 Washer
5 Shaft
6 Bearing
7 Ring; Retaining
8 Ring; Lock
9 Ring; Backup
10 O-ring
11 Ring; Seal
12 O-ring
13 Plate; Outlet Support
14 Pack; Seal
15 Plate Kit; Flex Side
16 Ring
17 Rotor
18 Vane & Insert
19 Plate; Inlet Support
20 Pin
21 Screw
22 Body; Inlet
23 Bolt
24 Screw
25 Pin
26 Pack Seal
27 Plate Kit; Flex Side
28 Ring
29 Plate; Inlet Support
30 Rotor
31 Kit; Vane
32 Plate; Outlet Support
33 O-ring
34 Ring; Seal
35 O-ring
36 U-ring
37 Cover; Rear Flange
38 Bolt
39 Cartridge Kit, Center
40 Cartridge Kit, Shaft End
Reference
Number
Description
IMPORTANT
During handling and shipping of precision machined cartridge parts, it is possible to raise burrs
on the sharp edges. All sharp edges on parts of a new cartridge kit should be stoned before
installation.