S0605050K
Page 23
Air Conditioner
Return to Master Table of Contents
3. Using a refrigerant leak detector or soapy
water check each joint for leakage.
4. If a leak is detected, check for O-ring
damage or correct tightening torque and
replace or repair as necessary.
5. If no leaks are detected, proceed with the
charging process.
REFRIGERANT CHARGING
1. Perform the vacuuming procedure, vacuum holding and leaking tests as described in the proceeding
headings.
NOTE:
First charge the refrigerant system with 100 g (3.5 ounces) of refrigerant with the engine
off. Then using the manifold gauges as a guide fully charge the system with the engine
running.
When exchanging refrigerant containers, press the manifold gauge low side valve to
eliminate air from the charging hose.
2. Charge the system by opening the manifold
gauge low side valve.
Initial charge amount: 100 g (3.5 ounces).
Reference
Number
Description
1
Refrigerant Leak
Detection Device
WARNING!
For accurate refrigerant leak
detection, perform leak detection
procedure in a well-ventilated area.
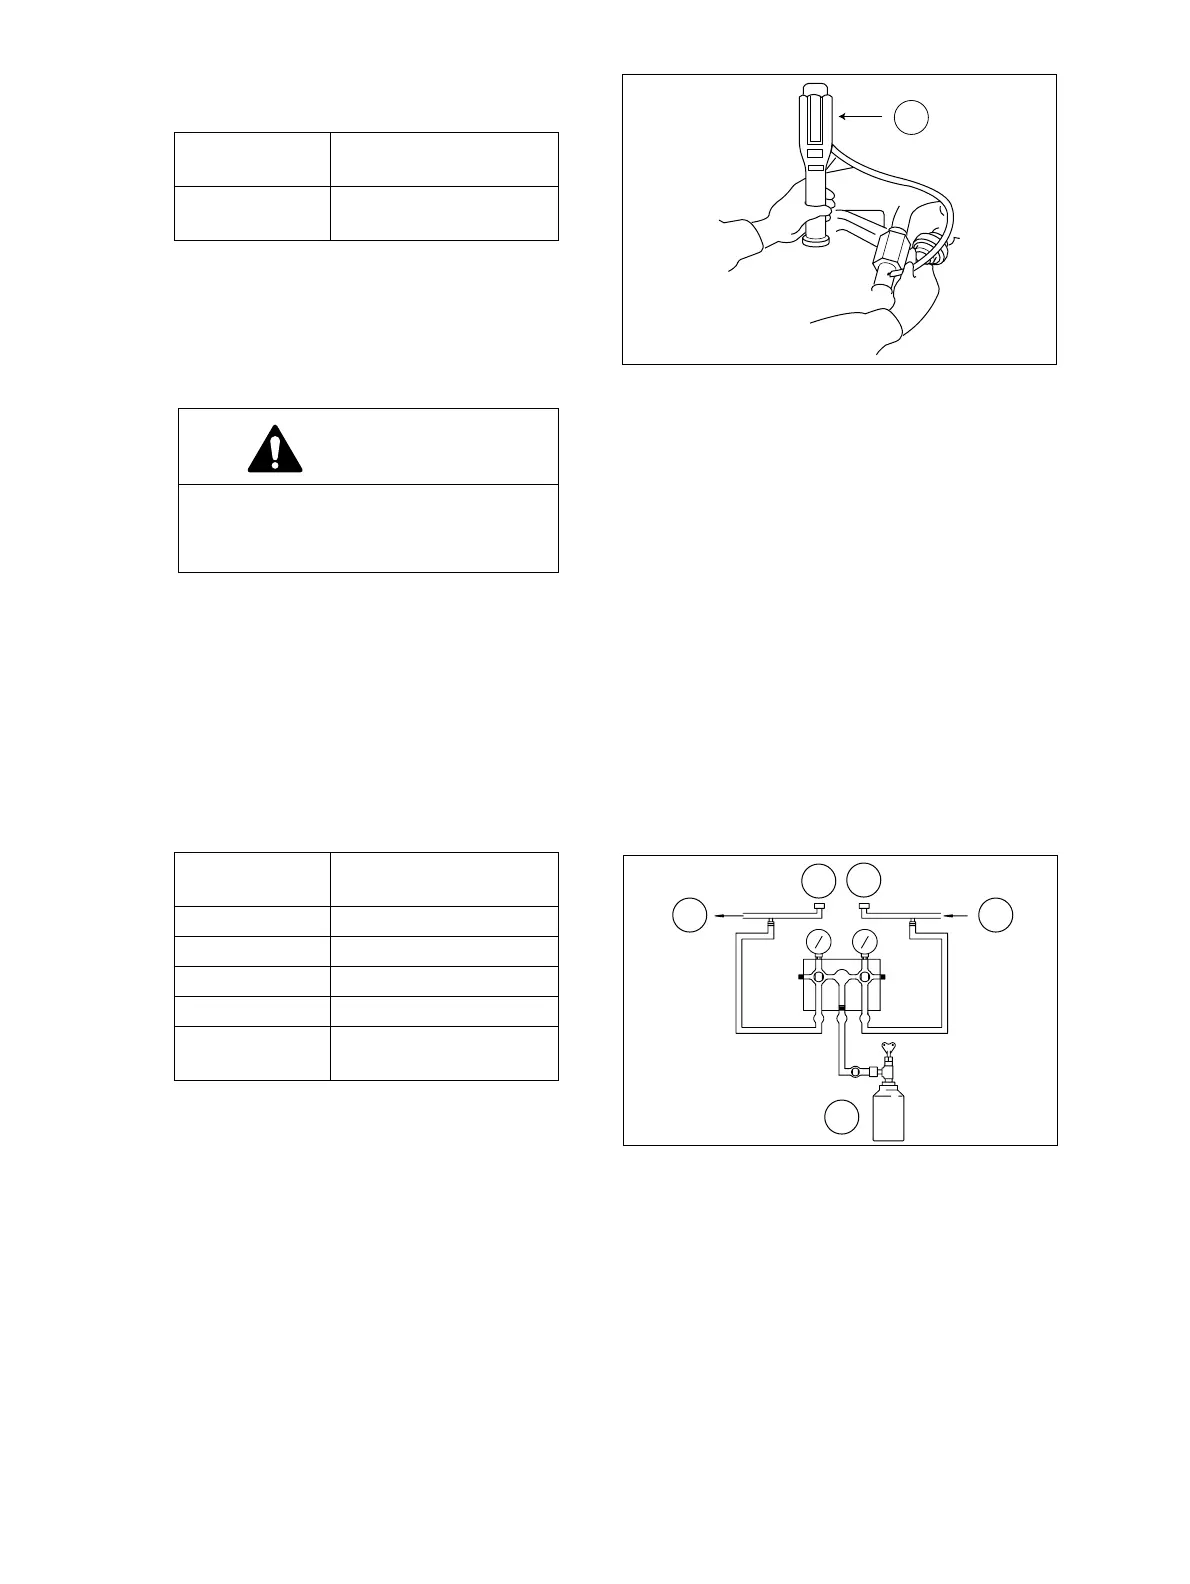
Reference
Number
Description
1 To Compressor
2 Low Pressure Side
3 High Pressure Side
4 From Receiver
5 Refrigerant Supply
Container
1
HDA6071L
Figure 20
1
2
3
4
5
HDA6072L
Figure 21