ELECTRICAL INSTALLATION
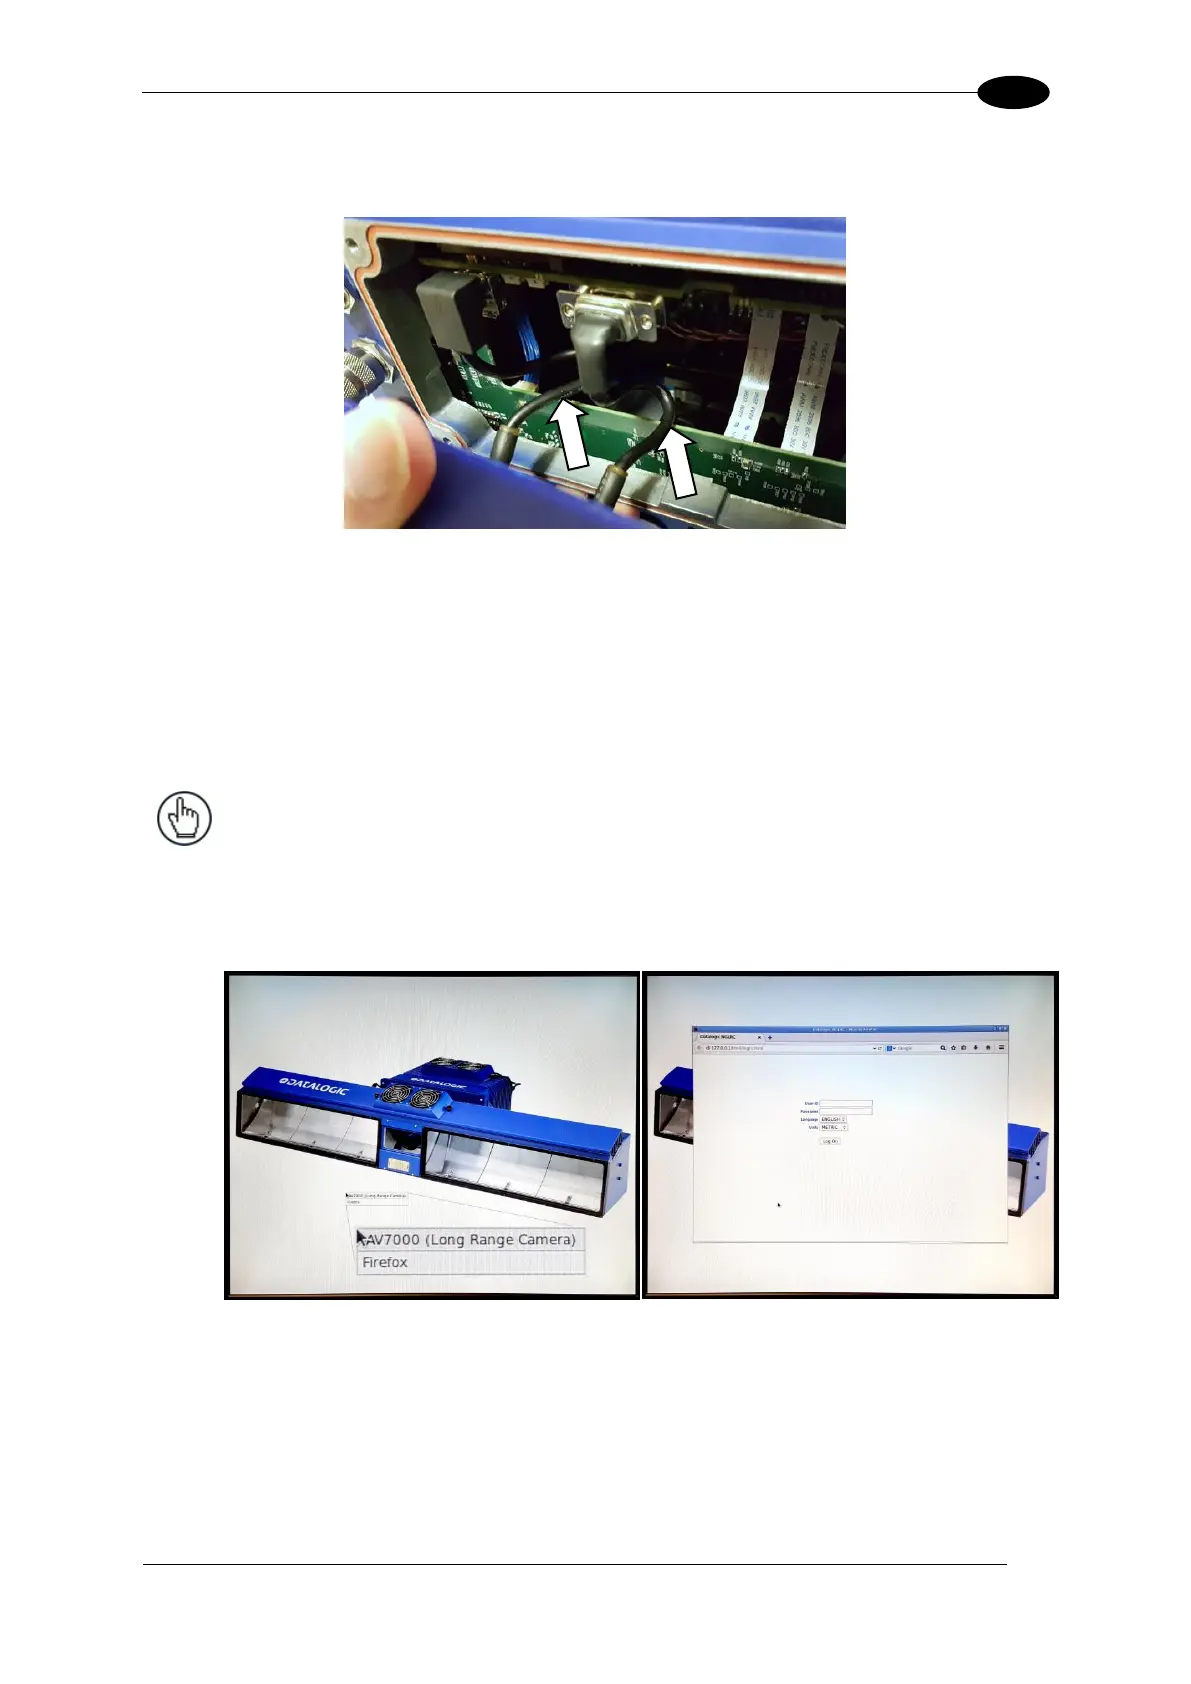
6. Carefully push the USB and VGA cables into the camera housing above the circuit board
as shown below.
Figure 93: Carefully positioning the USB and VGA cables
7. Carefully position the VGA / USB Interface Panel Kit cover and tighten the four screws at
its corners.
8. Attach the monitor to the VGA port and the combination keyboard/mouse to the USB port
(MONITOR/KEYBRD/BRKT/USB HUB KIT, 93ACC0126).
9. Reapply power to the AV7000 Camera.
NOTE: When the camera is powered on, the monitor will come on after several
seconds and display an image of the AV7000 camera system.
To access a browser (Firefox), right click with the mouse on the monitor window. A
drop-down list appears. Select Firefox to open the browser to the e-Genius Log On
window (see 4.1.2).
Figure 94: Right click for browser drop-down
3.14 CHECK AV7000 INSTALLATION
After completing the installation, confirm that the AV7000 reader(s) and CBX connection box
have been properly installed mechanically and electrically. Use the Installation Sequence at
the beginning of this chapter and your application specifications to check your installation.
 Loading...