IMAGING FEATURES
7. Place the replacement camera on a flat surface, and remove the back access panel.
8. Insert the memory card firmly into the card slot in the replacement camera.
9. Reattach the back access panels and secure it with the retaining screws.
10. Attach the replacement camera assembly to the illumination. Lift the camera into place,
inserting the lens through the lens hole and the Locator Pin into the Locator Pin Hole (see
section 2.4.11).
11. Screw the mounting bolts in place to secure the camera
12. Reattach the cables to the camera in their original locations.
13. Apply power to the AV7000 Camera.
5.6 REPLACING AN AV7000 CAMERA WITH A FAILED MEMORY CARD
Sometimes a failed memory card can cause a Camera Assembly to fail. In this case
replacing the camera assembly and transferring its memory card to a replacement unit will
not resolve the problem. In these situations, you need to replace an AV7000 Camera with a
failed Memory Card.
This procedure works for both a controller and a client in a tunnel/array. A standalone unit
will be handled differently.
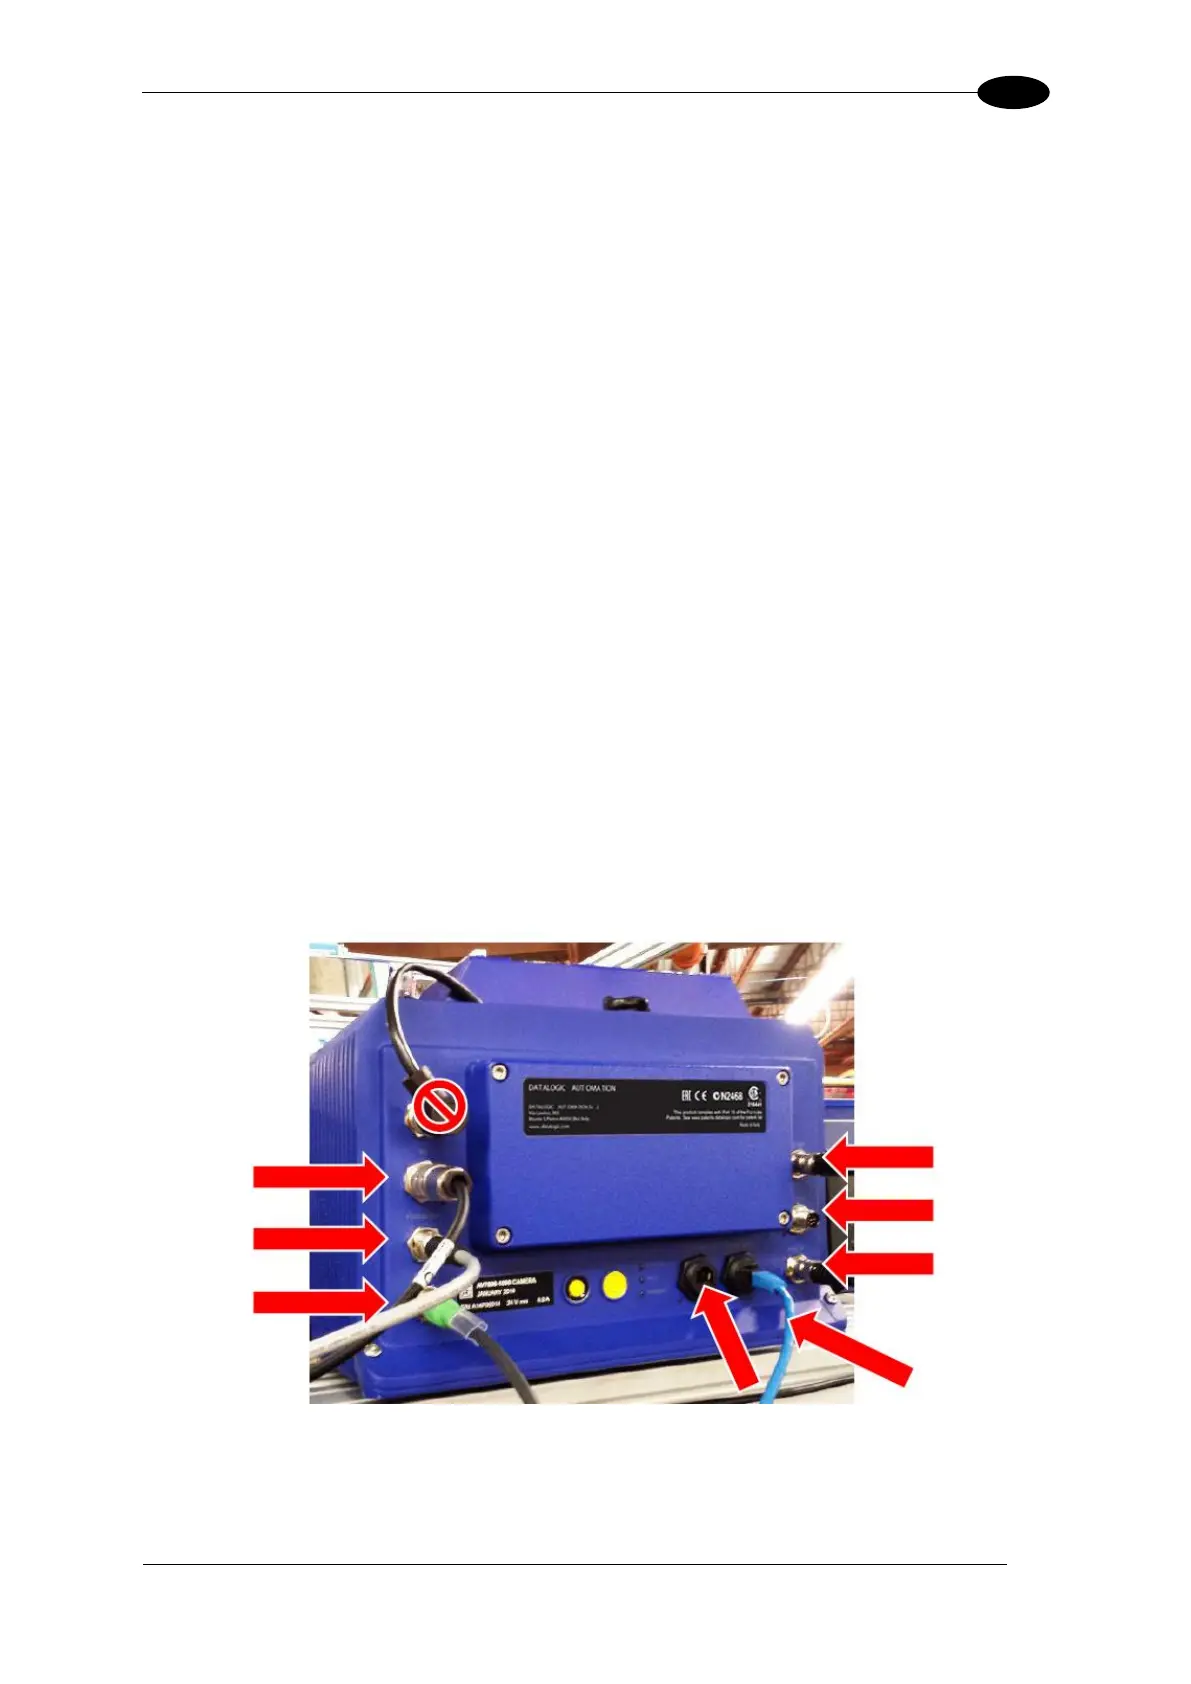
1. Disconnect the power source from the camera.
2. Disconnect all the cables except for the fan cable from the camera.
Figure 126: Remove the cables
3. Remove the camera from the illumination assembly by unscrewing the four (4) mounting
bolts.
 Loading...