IMAGING FEATURES
Calibrating Distance to Trigger Source (X)
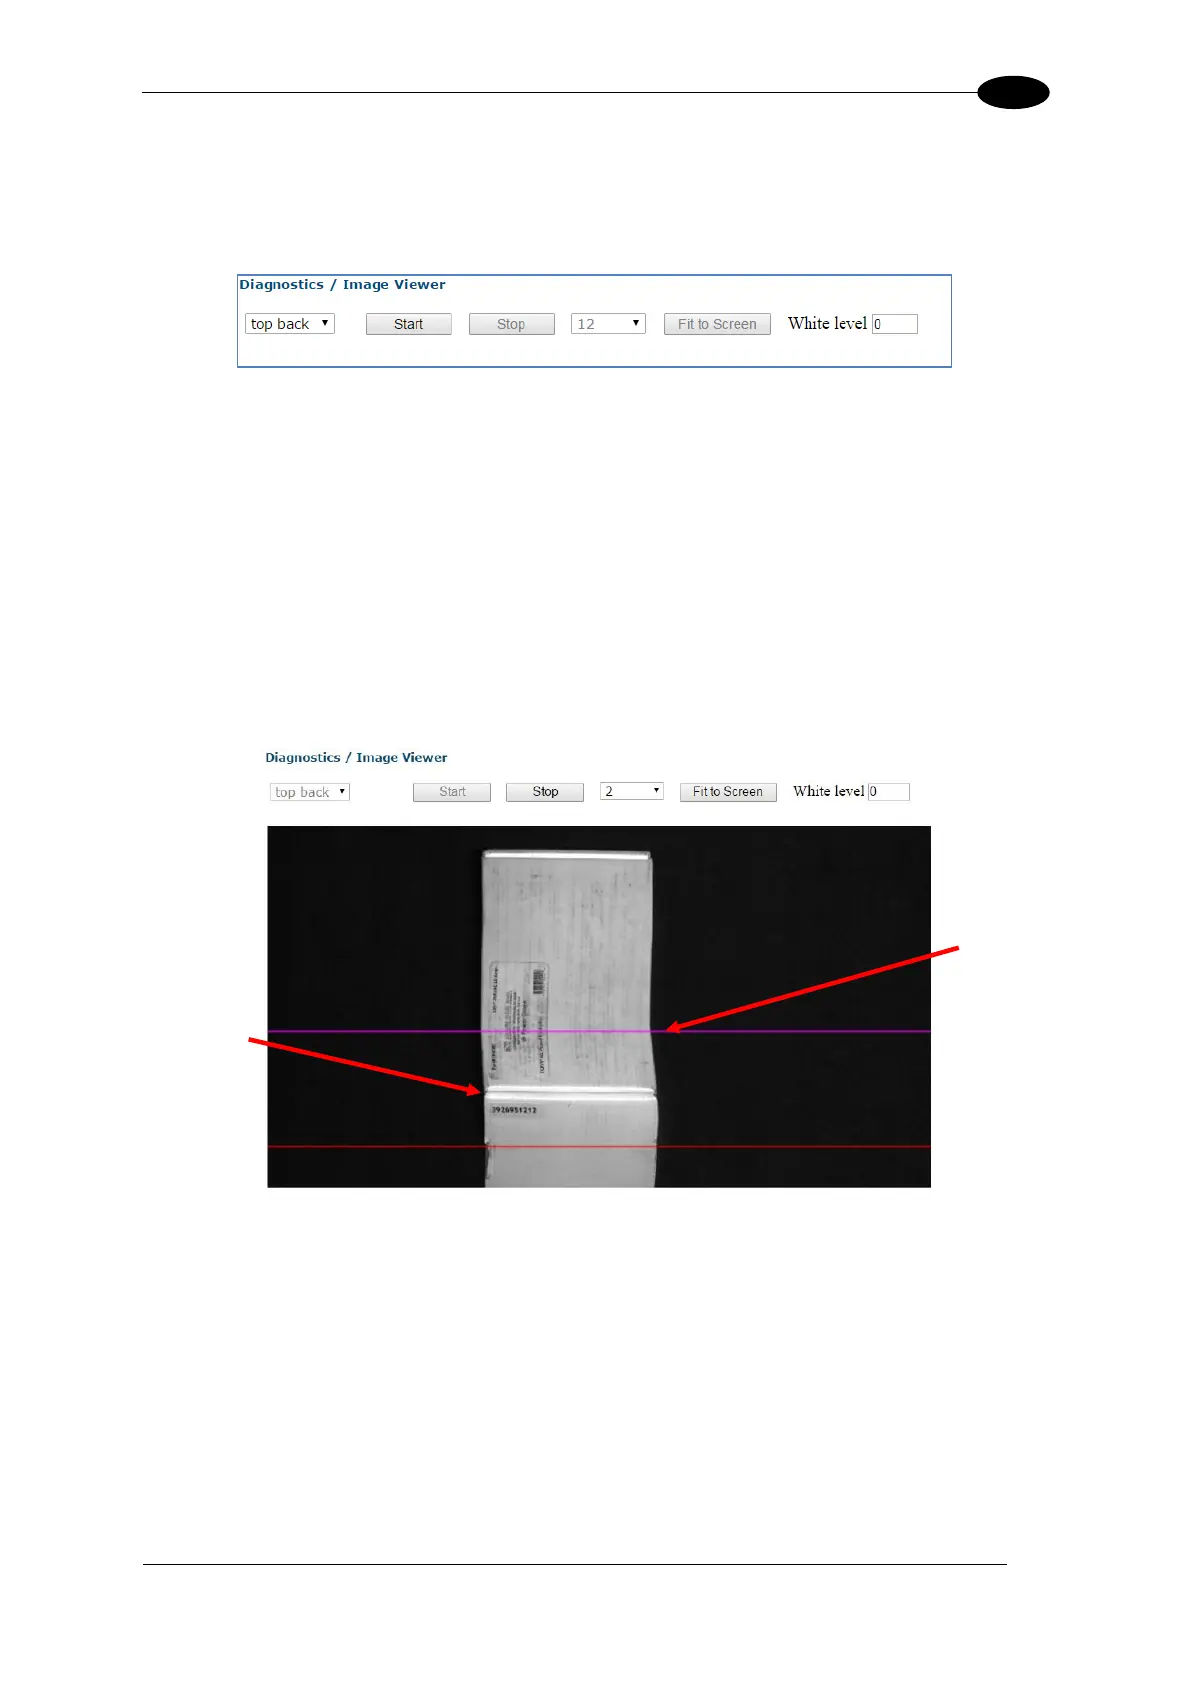
1. In e-Genius, navigate to Diagnostics | Image Viewer. The Image Viewer window
opens.
2. Select the camera to be calibrated from the first drop-down box.
3. Click Start.
4. Send a small box through the system (belt surface for top mount, and farthest distance
from camera for side mount).
The Image Viewer captures an image of the box. The purple line in the image indicates
the Focusing Data Transition Point, which should align with the corner of the box.
5. If the Focusing Data Transition Point (purple line) does not align with the leading
corner of the box, the Distance to Trigger Source (x) must be modified to align the
purple Focusing Data Transition Point line with the corner of the box.
6. In the menu tree, navigate to Modify Settings | Device Setting | Camera n (unit being
calibrated) | Mounting. The Mounting window opens.
Focusing
Data
Transition
Point
(purple line)
 Loading...