Alignment Adjustment Settings
621
Appendix
16
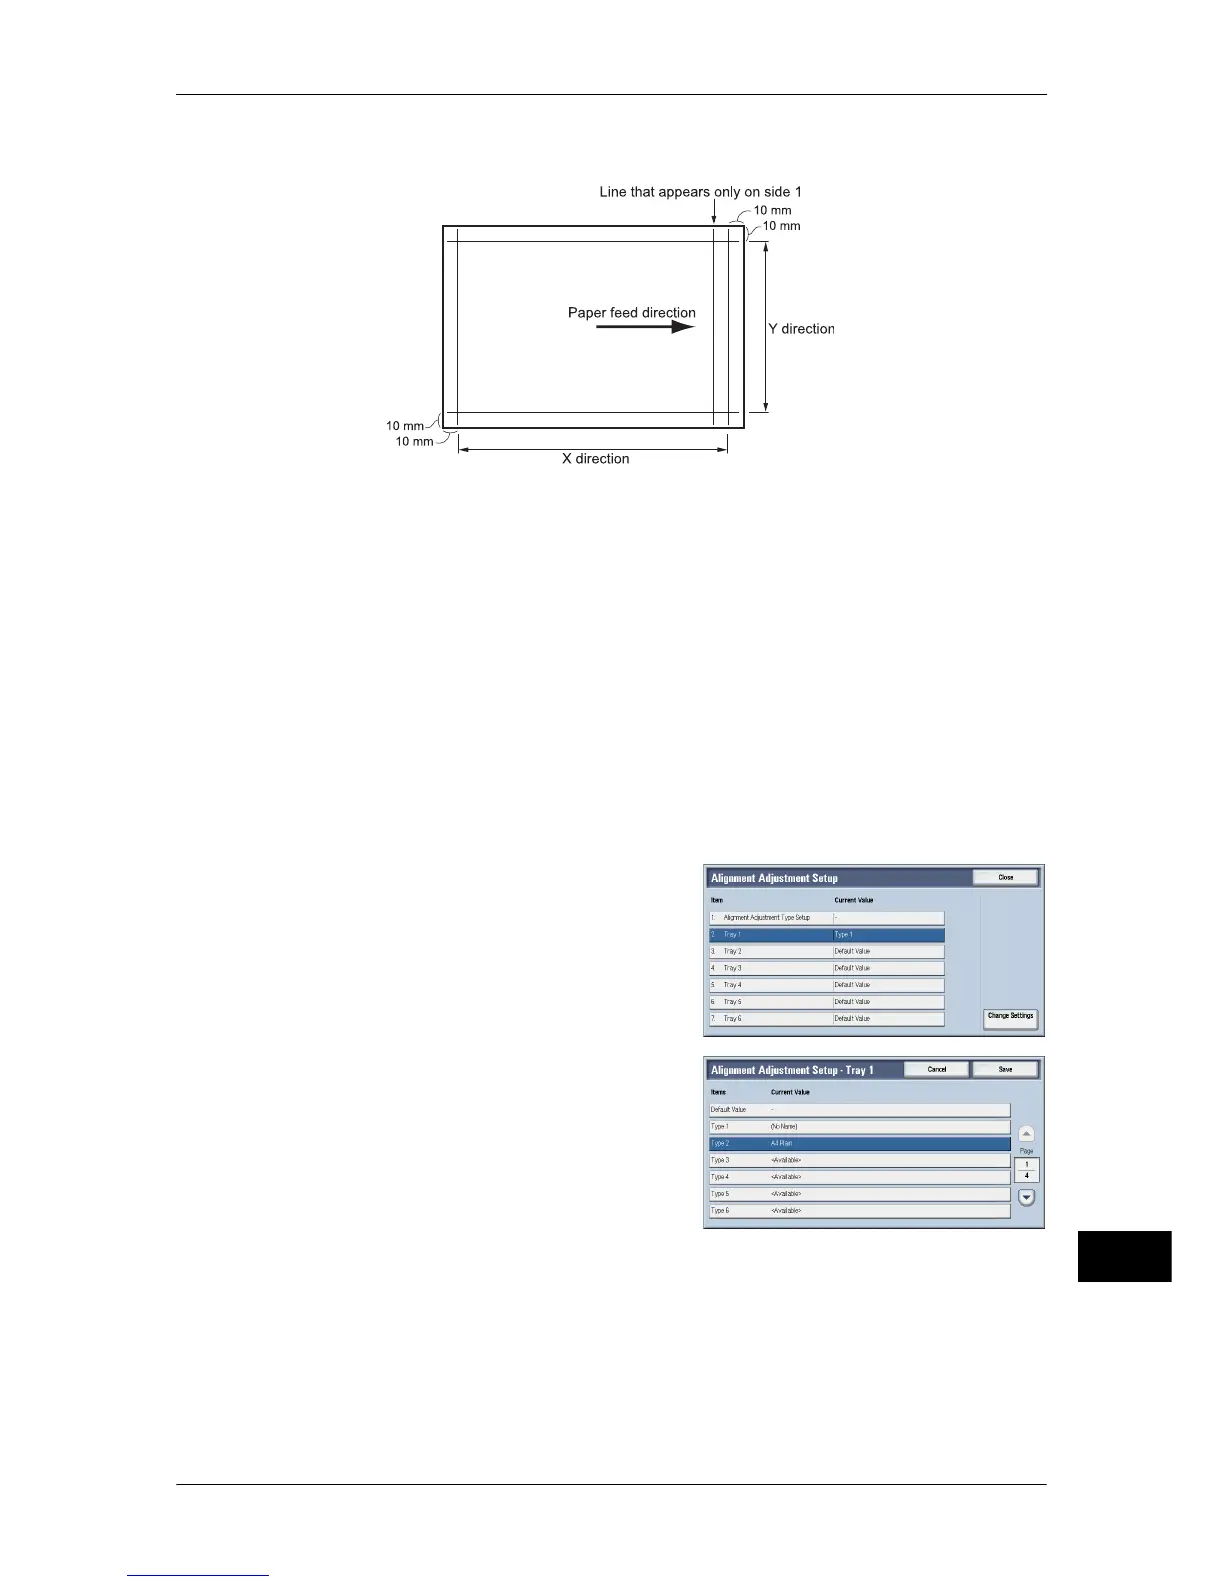
Note • Two lines are printed on the image of side 1 and one line is printed on the image of side 2 of
the sample printed with [Sample Printout] to indicate the paper feed direction.
14 Select [Save].
15 Check the sample printout, and adjust the position if it is misaligned.
For more information on each type of adjustment, refer to the following sections:
z
For perpendicularity adjustment, refer to "Perpendicularity Adjustment" (P.622).
z
For skew adjustment, refer to "Skew Adjustment" (P.623).
z
For scale position adjustment, refer to "Scale Adjustment" (P.624).
z
For print position adjustment, refer to "Print Position Adjustment" (P.625).
16 After you complete adjustment, print another sample printout with [Sample Printout]
and check the adjustment results.
17 Adjust the alignment again if necessary (step 13).
18 Select [Save].
19 Select [Close].
20 Select the tray to which to assign the set
type (the tray in which you loaded the paper
in step 1), and then select [Change
Settings].
21 Select the adjusted type, and then select
[Save].
 Loading...


