CHAPTER 3: INSTALLATION INSTALL SOFTWARE
D90
PLUS
LINE DISTANCE PROTECTION SYSTEM – INSTRUCTION MANUAL 65
The Site Device has now been configured for Ethernet communications. Proceed to the
Connect to the D90
Plus
section to begin communications.
Configure serial communication
You connect the cable, add the site, then the device. To use the RS485 port at the back of
the D90
Plus
, a GE Digital Energy F485 converter (or compatible RS232-to-RS485 converter)
is required. See the F485 instruction manual for details.
1. Connect the computer to the F485 and the F485 to the RS485 terminal on the back of
the D90
Plus
.
2. Select the “D90
Plus
” device from the EnerVista Launchpad to start EnerVista UR
Plus
Setup.
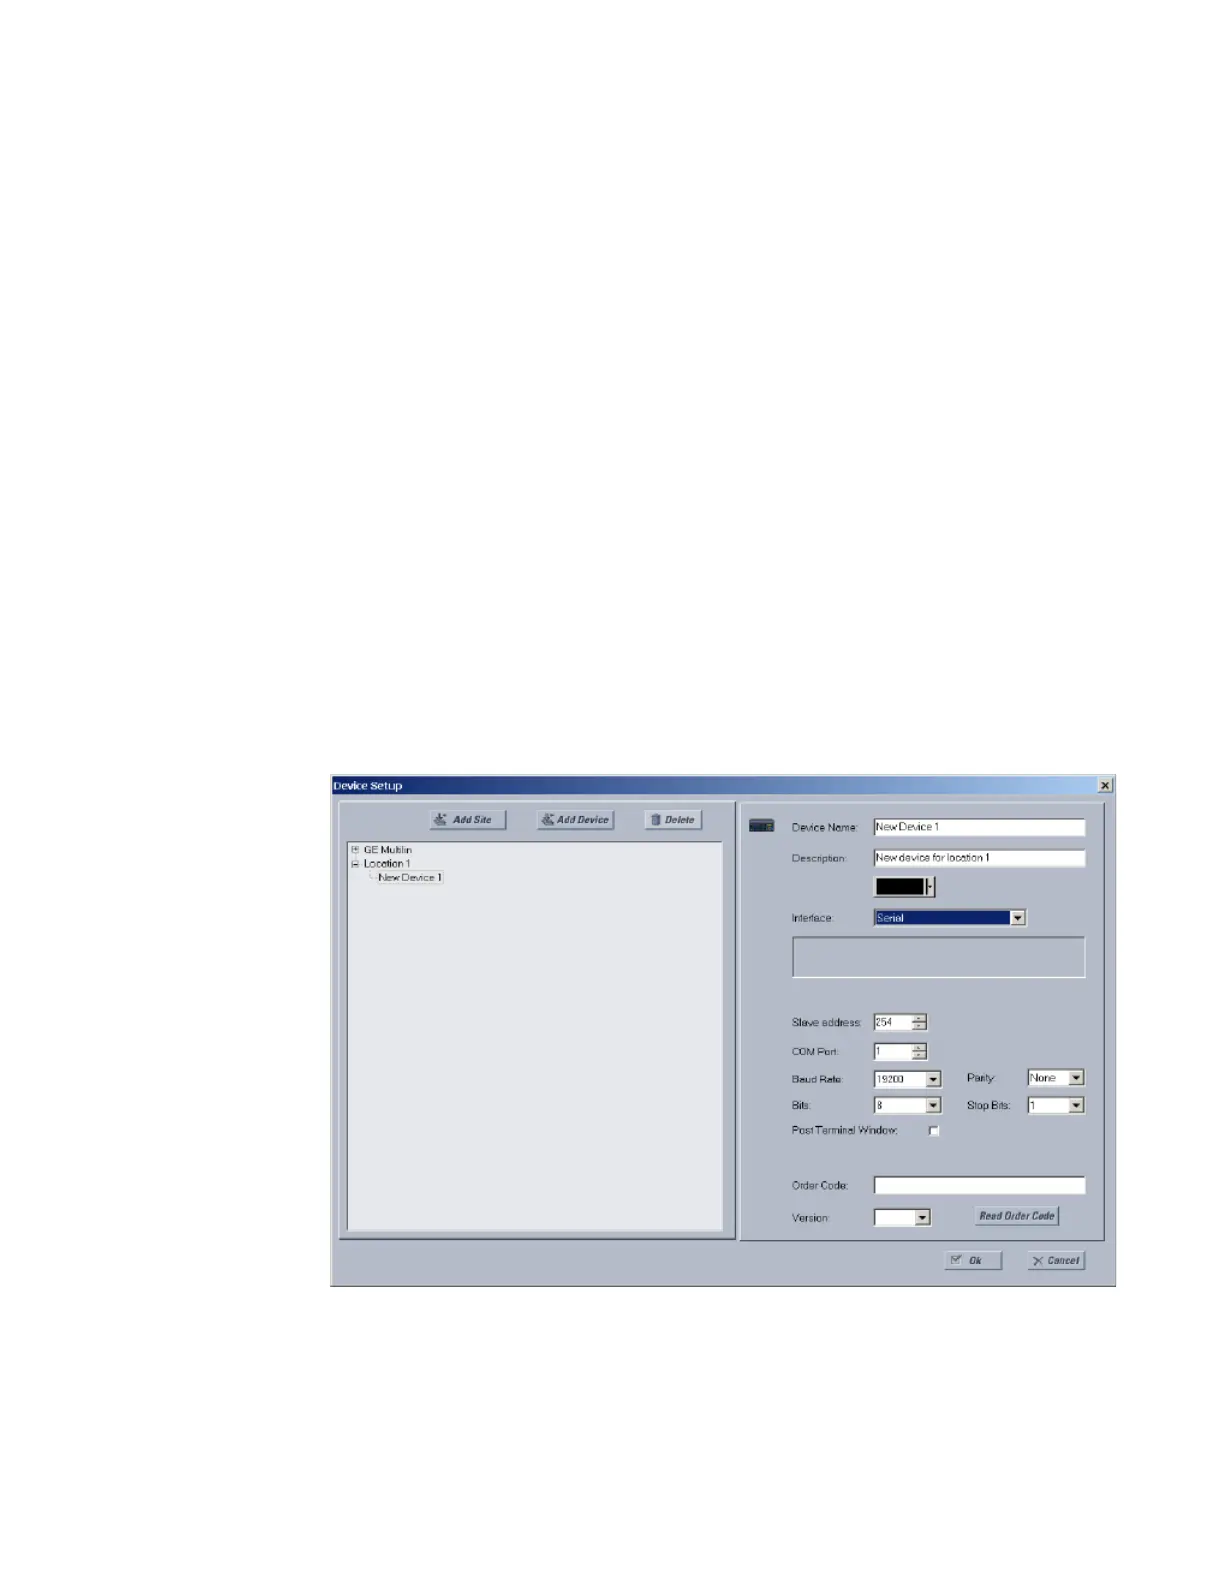
3. Click the Device Setup button to open the Device Setup window, and click the Add Site
button to define a new site.
4. Enter a site name in the “Site Name” field. Optionally add a short description of site
along with the display order of devices defined for the site. This example uses
“Location 1” as the site name. When done, click the OK button. The new site appears in
the upper-left list in the EnerVista UR
Plus
Setup window.
5. Click the Device Setup button, then select the new site to re-open the Device Setup
window.
6. Click the Add Device button to define the new device.
7. Enter a name in the “Device Name” field and a description (optional) of the site.
8. Select “Serial” from the Interface drop-down list. This displays a number of interface
parameters that must be entered for serial communications.
9. Enter the relay slave address, COM port, baud rate, and parity settings from the
Settings > Communications > Serial Ports menu in their respective fields.
10. Click the Read Order Code button to connect to the D90
Plus
device and upload the
order code to the software. If a communications error occurs, ensure that the
EnerVista UR
Plus
Setup serial communications values entered in the previous step
correspond to the relay setting values.