401
CUSTOM SETS - Tone Wheel
t Footages and Notes
TRY THIS:
1. Make sure all the Drawbars are “OFF” (pushed in).
2. Press the MANUAL button. This will allow you to start from a “zero” position - no
Combinations or Patches will be active.
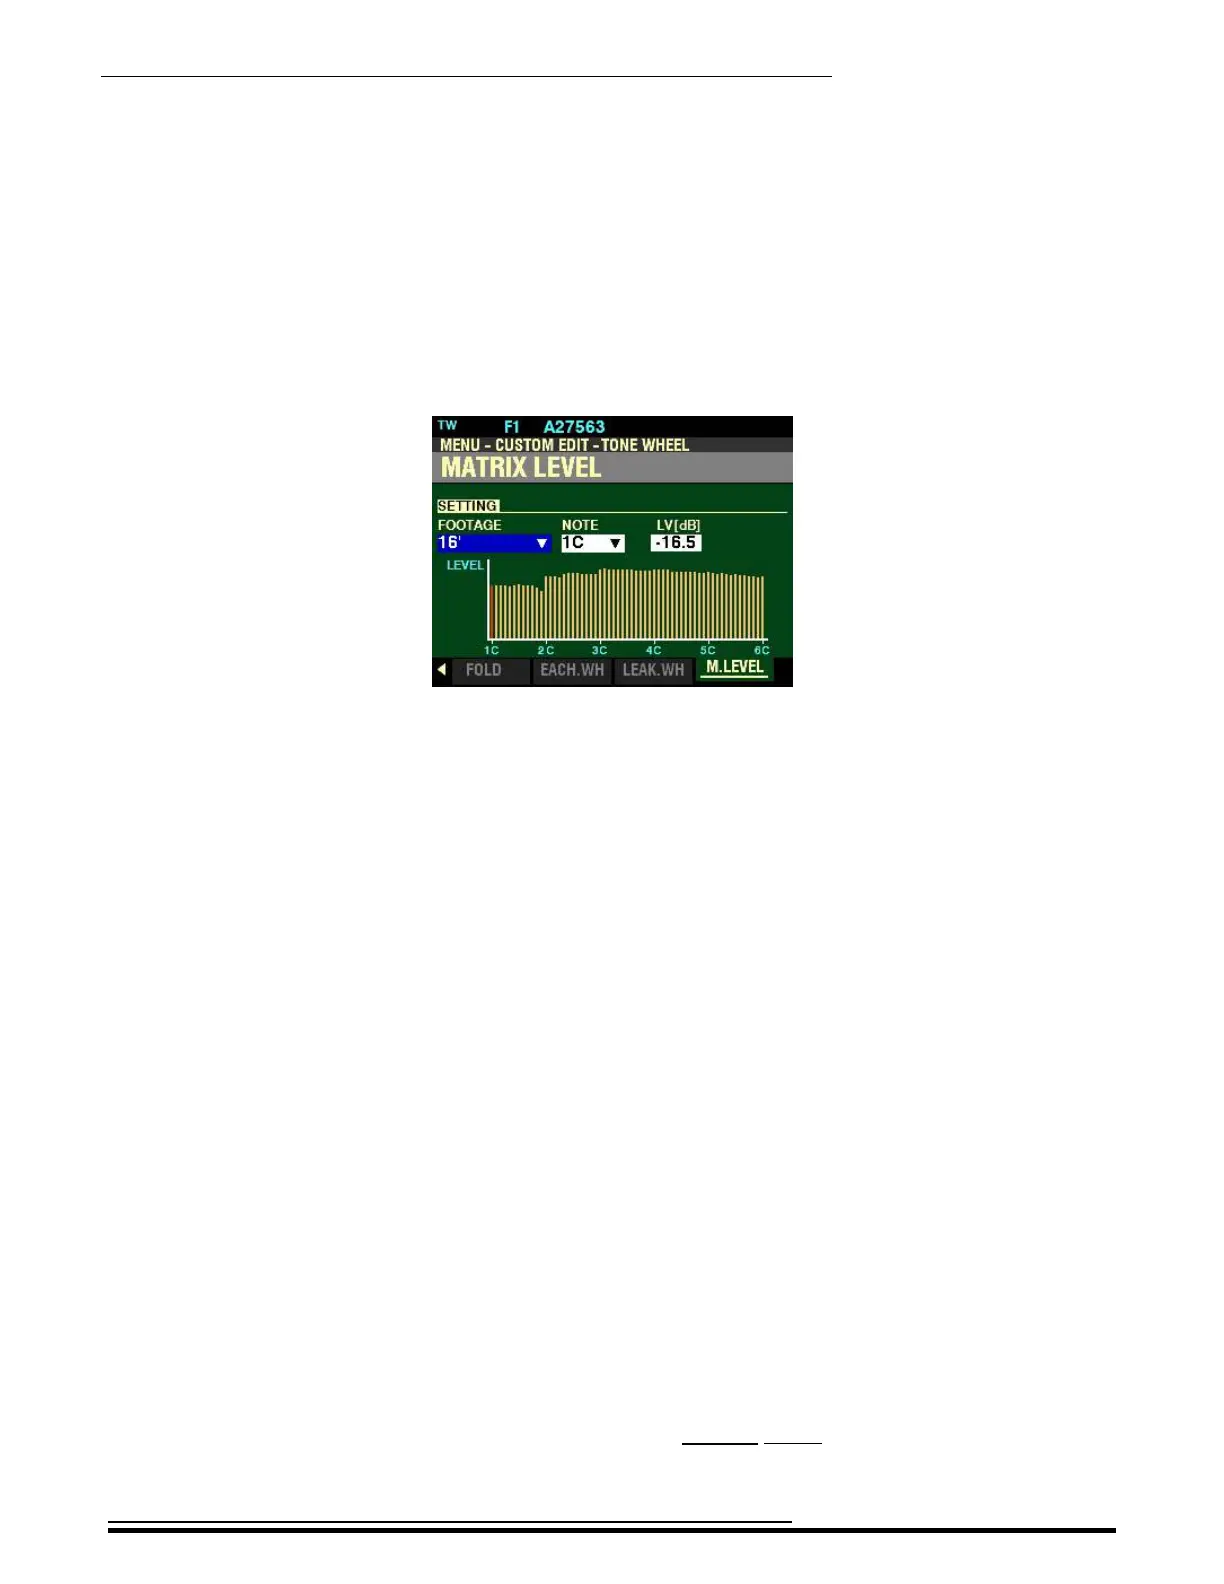
3. Make sure the Information Center Display shows Page 5 of the CUSTOM EDIT -TONE WHEEL
FUNCTION Mode. The Information Center Display should look similar to this:
Notice that the number on the left below “FOOTAGE” is highlighted. This number represents
the currently selected Matrix.
4. Press and Hold a key on either Keyboard.
5. While holding down a key, move a Drawbar - for example, the first white (8’) Drawbar.
NOTE: Make sure to move a Drawbar associated with the key you are holding. For example, if
you are holding a key on the LOWER Keyboard, move one of the LOWER Drawbars.
6. While holding the key down, move another Drawbar - for example, the second white (4')
Drawbar. Notice the “LV(dB) box on the right. You will see the level change even though the
note shown in the “NOTE” box remains the same.
7. Try moving other Drawbars while still holding down the key. Notice the value shown in the
“LV(dB)” box will change each time a different Drawbar is moved. This means the same note
will sound at a different level for different Drawbars. The paragraphs below explain this in
more detail.
Due to an anomaly of the human ear whereby “high” and “low” frequencies appear to be at different sound
pressure levels, vintage Hammond Organs used different methods to compensate for this idiosyncrasy by
adjusting or “tapering” frequencies so that they all will be perceived by the ear as sounding at the same
level, particularly if more harmonics are added to the registration.
Early models accomplished this by carefully adjusting the distance between the tone wheels and the
magnets so that “low” and “high” frequencies sounded at different levels. Later instruments such as B-3/C-
3/A-100 use varying lengths of resistance wire connected from the keyboard terminals to the terminals on
the generator in order to “taper” the frequencies.
The SKX PRO recreates this characteristic by means of the MATRIX LEVEL Parameters, which are explained
in more detail starting on the next page.
HA<O> SKX PRO Reference Guide



 To Next Page