8-108
Removal and Installation
HP Designjet 4000/4020 Printer Series Service Manual
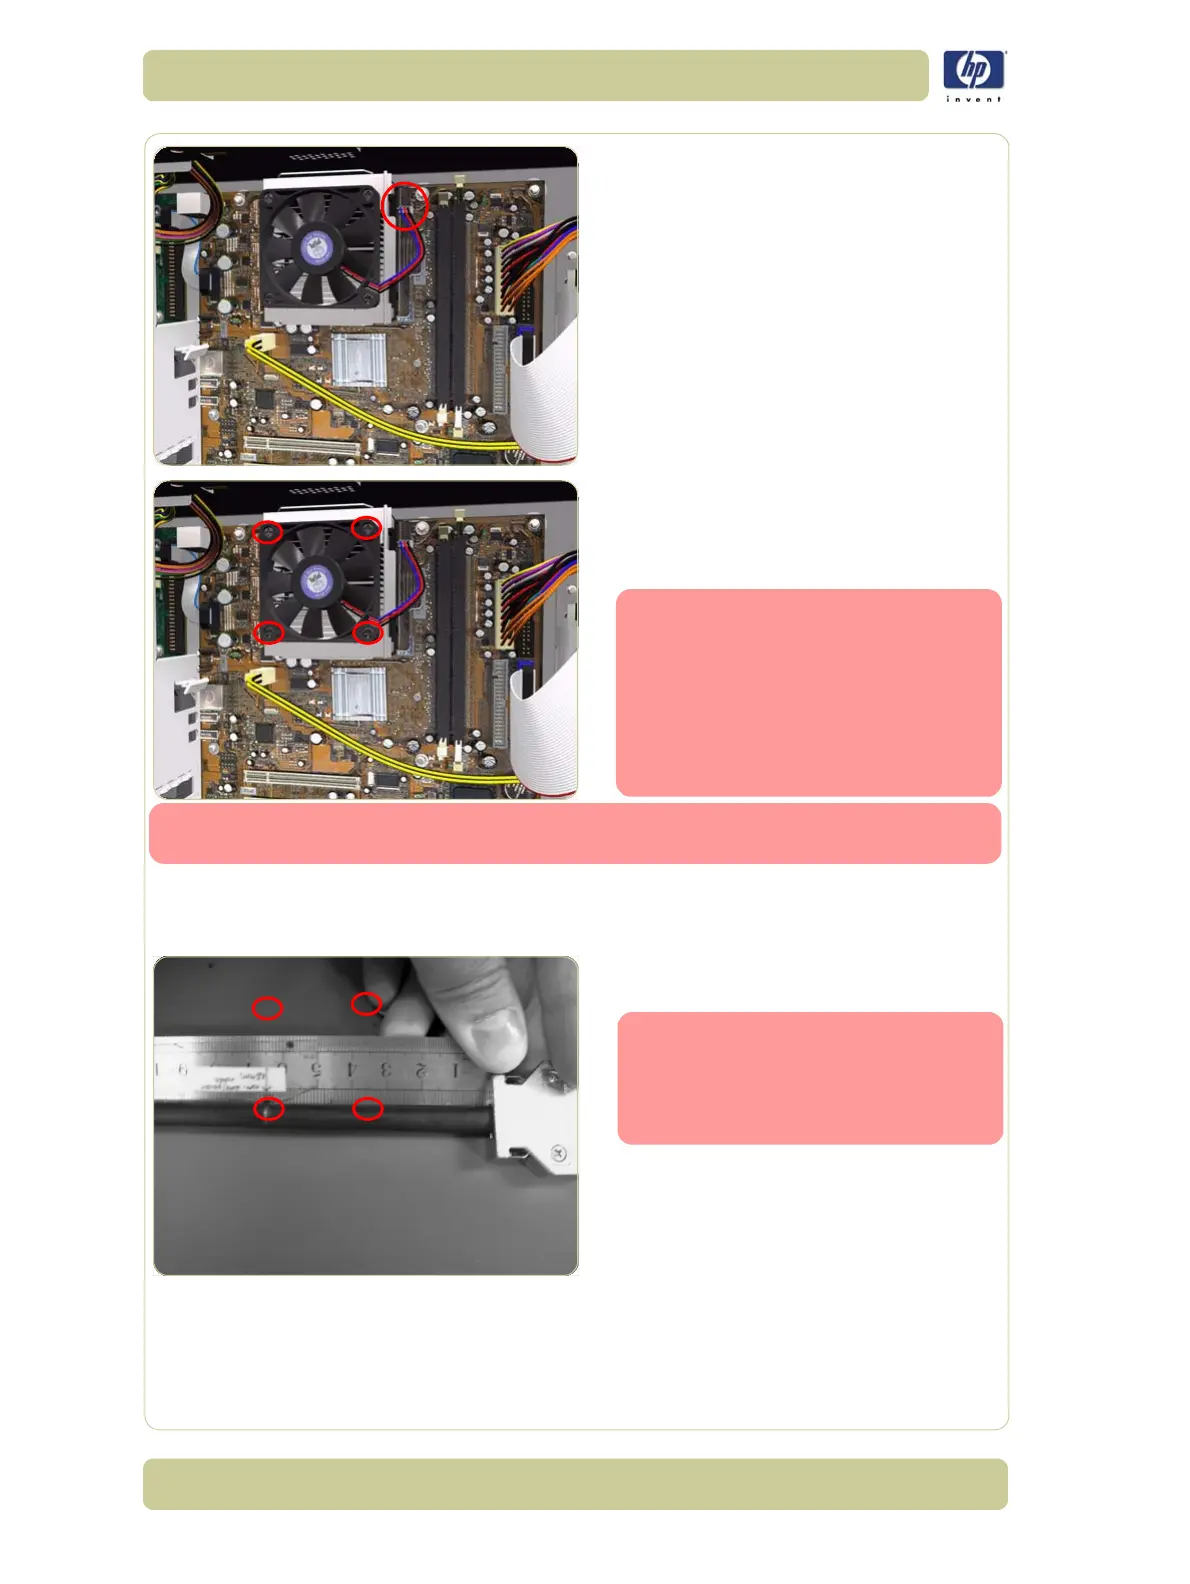
4. Disconnect the CPU Fan cable from the
Formatter PCA.
5.
Remove four T10 screws from the CPU Fan
and remove the Fan.
6.
Remove the CPU Fan . Older printers may
have four washers behind it.
Make sure that the four washers
that may be behind the CPU Fan
do not fall into the body of the
printer when the Fan is removed.
Place your hand under the Fan as
you remove it. Discard the four
washers as they are no longer
required
The installation procedure for the new CPU fan will depend of the
manufacturer of the fan. There are two types available:
Delta Fan Installation
1.
Install four cross-head screws into the CPU
Fan and into the Formatter PCA.
To ensure the correct orientation
of the Delta CPU Fan in the
Electronics Module, make sure the
CE label of the fan faces towards
the printer
2. The rest of the installation procedure is the
same as the removal procedurem, but in
reverse.