6-9
Print Quality
HP Designjet 4000/4020 Printer Series Service Manual
Troubleshooting Banding Problems
If banding does not occur in ALL the colors, then it is more than likely a
Printhead problem. In this case, try the following:
1
Check that the appropriate print quality settings are being used. Refer to
Page 6-3 for further information on choosing the correct Print Quality settings.
2 Recover the printheads using the option through the Front Panel (Ink Menu/
Printheads/Recover Printheads). Reprint the Diagnostic Print or the print file
and if the problem persists:
As there are two Printheads for each color, check exactly which Printhead
is causing the problem ? Page 6-9.
If the problem continues, replace the faulty Printhead.
If banding does occur in ALL the colors, then it is more than likely a Paper
Advance problem:
If the bands are light, it means that the paper has advanced too much.
If the bands are dark, it means that the paper hasn’t advanced enough.
In high quality modes, graininess in ALL colors can indicate problems
either with alignment or Paper Advance.
There is a high chance of seeing dark banding in the black
bars of the Diagnostic Print when printing with optimized for
drawings/text. This is NOT caused by a black Printhead issue
as we described previously.
In order to solve any of these problems, try the following:
1 Check that the appropriate print quality settings are being used.
2 If the customer is using low quality paper, try recommending better quality
paper (preferable HP paper). Printer performance can only be guaranteed
by using recommended papers.
3 Perform the Paper Advance Calibration using the same type of paper that
will be used for the final print.
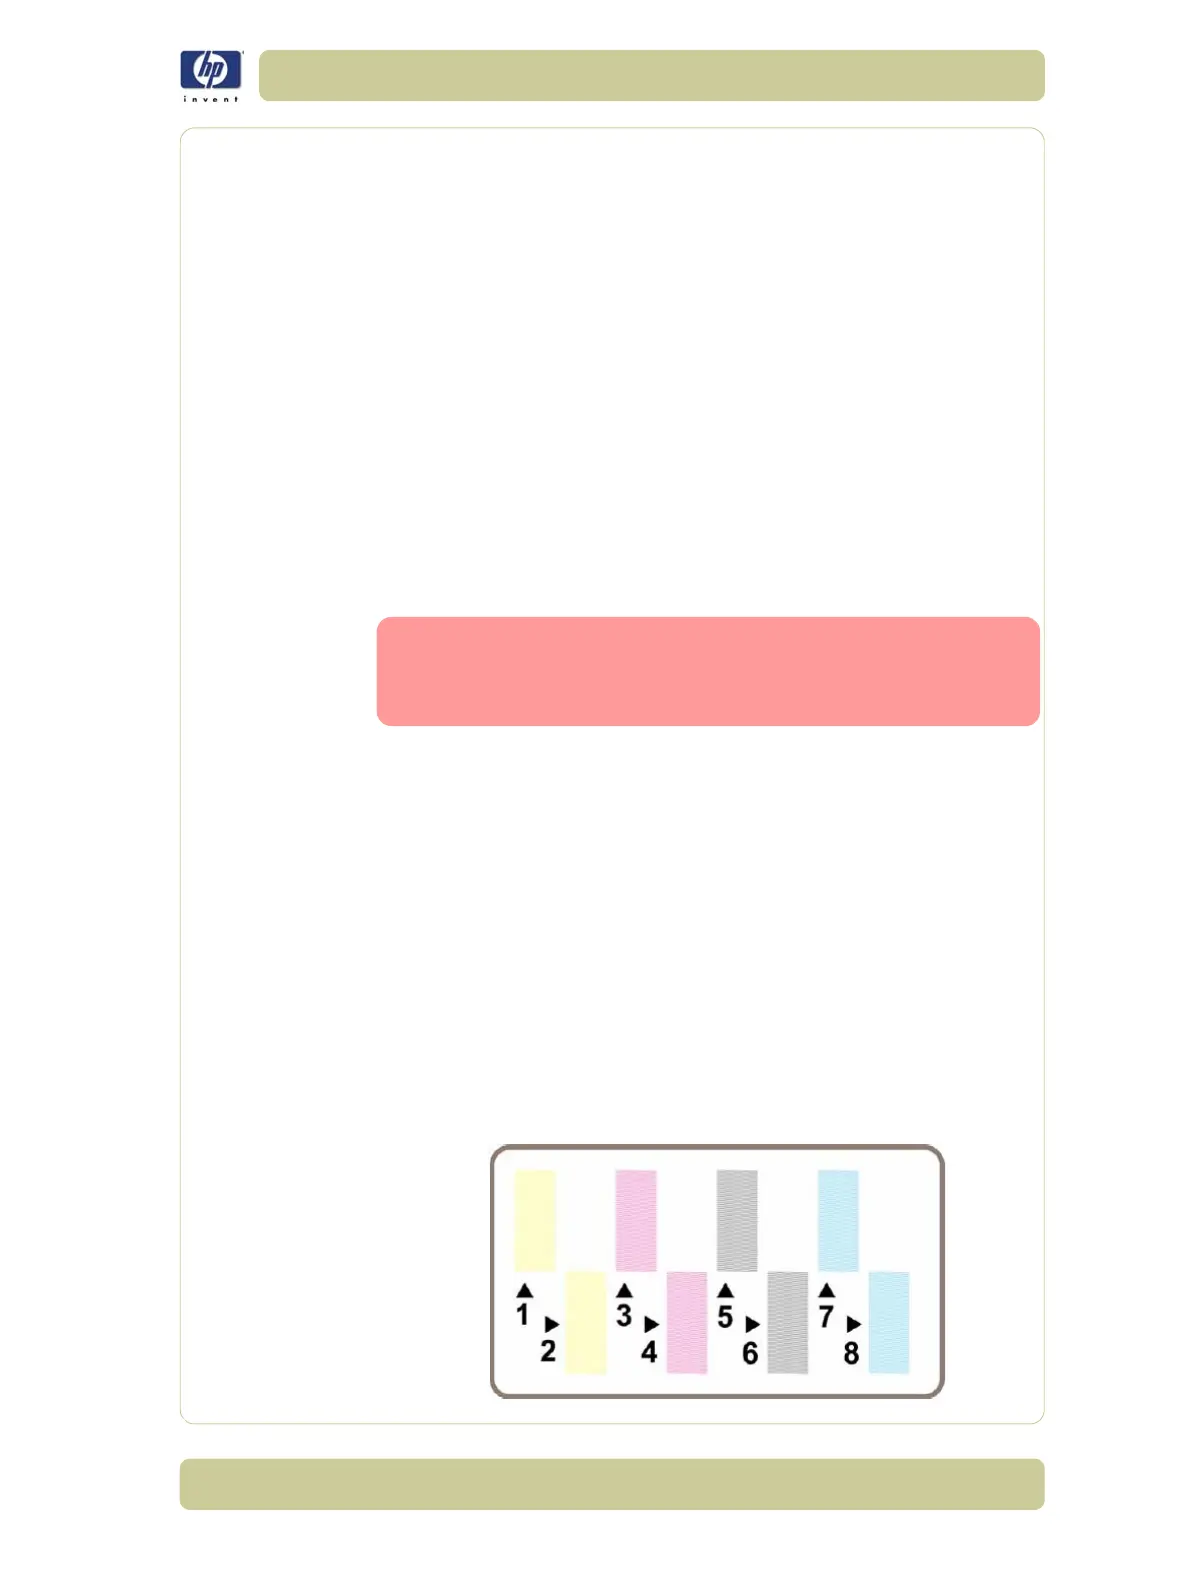
Diagnostic Part 3: Printhead Problems
If part 2 revealed a Printhead problem, then the purpose of part 3 is to
identify exactly which Printhead is faulty. Each rectangle in this part is
identified with the number of the Printhead that produced it.
If ALL the Printheads are printing perfectly, part 3 of the Diagnostic print will
look like this: