ADF and scanner removals
• “ADF/scanner assembly removal” on page 445
• “ADF removals” on page 448
• “Flatbed scanner removals” on page 497
ADF/scanner assembly removal
1 Remove the left cover. See “Left cover removal (MX71x)” on page 301.
2 Remove the rear lower door. See “Rear lower door removal (MX81x)” on page 310.
3 Remove the right cover. See “Right cover removal (MX71x)” on page 311.
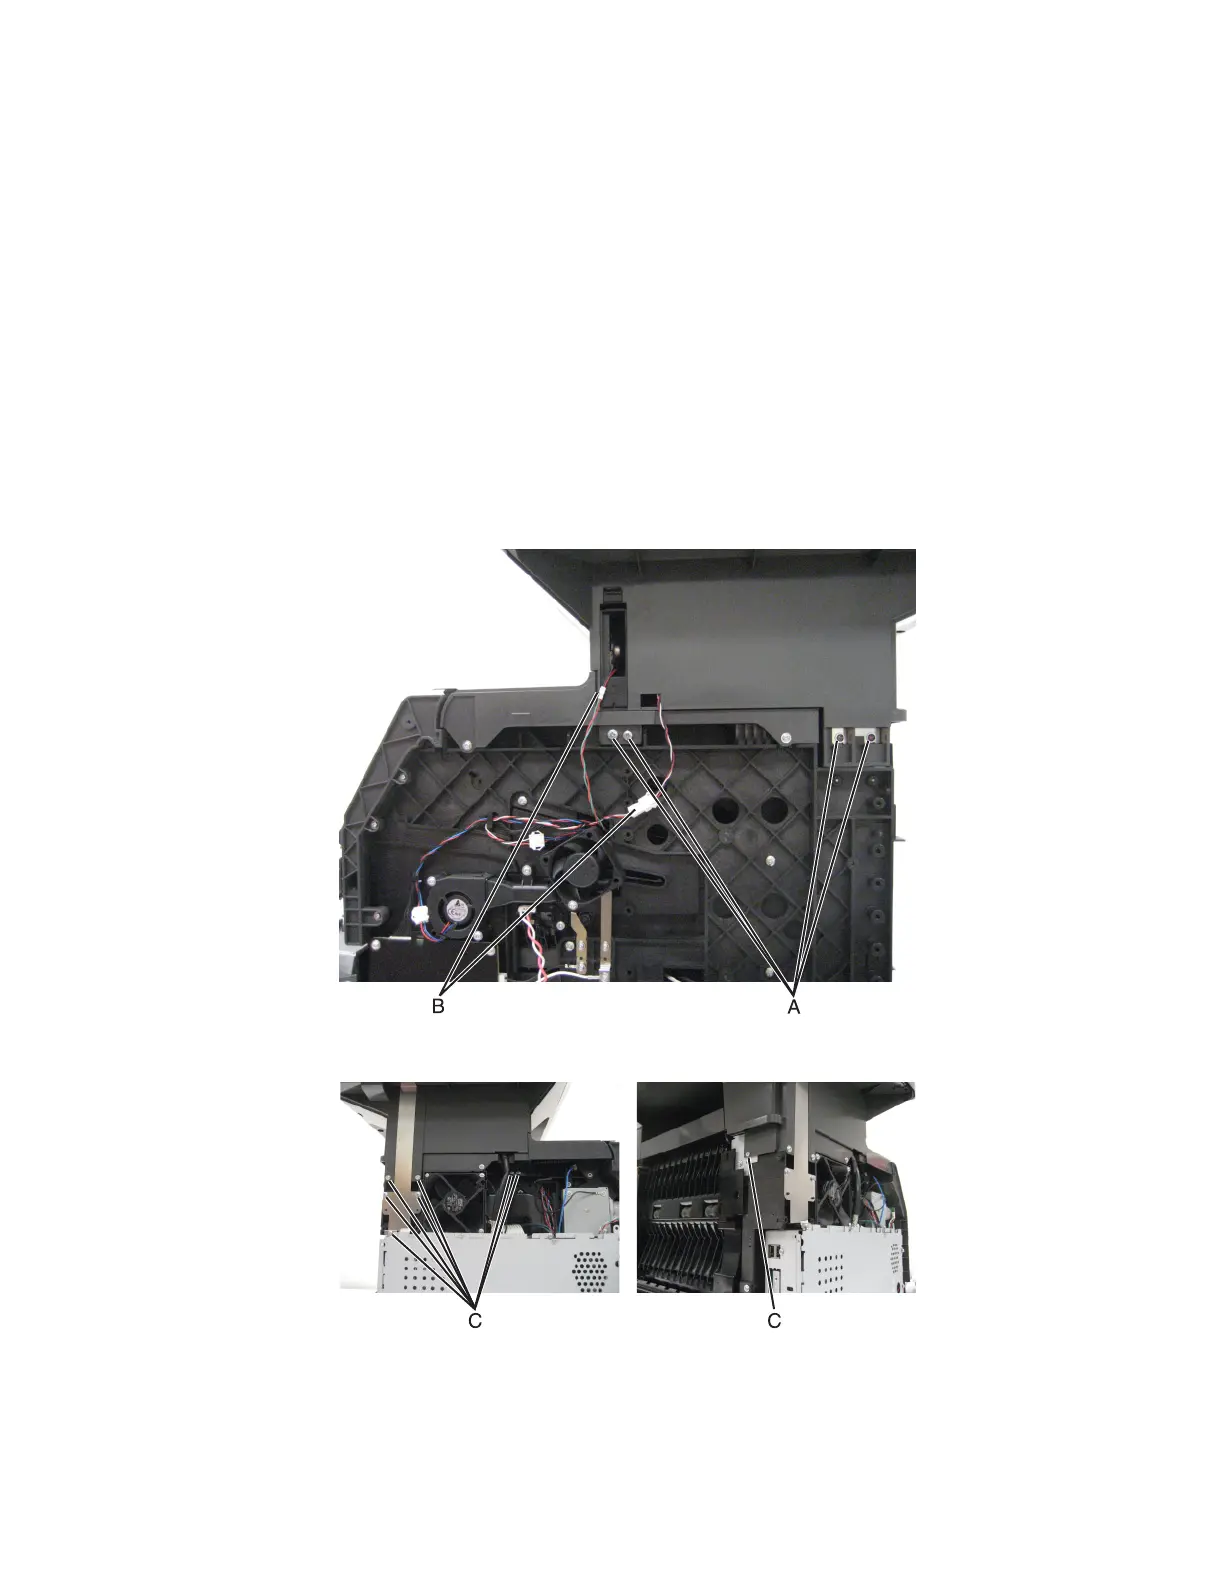
4 On the right side of the machine, remove the four (A) screws securing the ADF/scanner assembly to the machine.
5 Disconnect the two cables (B).
6 On the left side of the machine, remove the eight (C) screws securing the ADF/scanner assembly to the machine.
7463
Repair information
445

 Loading...