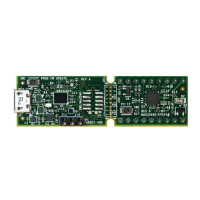
MAX32660 User Guide
Maxim Integrated Page 144 of 195
The required steps for implementing TX FIFO Preloading in an application are as follow:
1. Set I2Cn_TXCTRL1.txrdy to 0
2. Enable TX FIFO Preloading by setting I2Cn_TXCTRL1.txpreld to 1.
3. If the TX FIFO Lockout Flag (I2Cn_INTFL0.txloi) is set to 1, write 1 to clear the flag and enable writes to the TX FIFO.
4. Enable DMA or Interrupts if required.
5. Load the TX FIFO with the data to send when the Master sends the next read request.
6. Set I2Cn_TXCTRL1.txrdy to 1 to automatically let the hardware send the preloaded FIFO on the next read from a
Master.
7. I2Cn_TXCTRL1.txrdy is cleared by hardware when a read occurs, and data is transmitted from the TX FIFO.
a. Once cleared, the application firmware may repeat the Preloading process or disable TX FIFO Preloading.
Note: The TX FIFO Lockout flag is set if an error condition occurs while TX FIFO Preloading is enabled.
12.15 Master Mode Receiver Operation
When in Master Mode, initiating a Master Receiver operation begins with the following sequence:
1. Write the number of data bytes to receive to the I
2
C Receive Count field (I2Cn_RXCTRL1.rxcnt).
2. Write the Slave Address to the TX FIFO with the R/W bit set to 1
3. Send a START condition by setting I2Cn_MSTR_MODE.start = 1
4. The slave address is transmitted by the controller from the TX FIFO.
5. The I
2
C controller receives an ACK from the slave and the controller sets address ACK field
(I2Cn_INTFL0.adracki = 1).
6. The I
2
C controller receives data from the slave and automatically ACKs each byte.
7. Once I2Cn_RXCTRL1.rxcnt data bytes have been received, the I
2
C controller sends a NACK to the slave and sets the
Transfer Done Interrupt Status Flag (I2Cn_INTFL0.donei = 1).
8. If I2Cn_MSTR_MODE.restart or I2Cn_MSTR_MODE.stop is set, then the I
2
C controller sends a repeated START or
STOP, respectively.
12.16 I
2
C Registers
The I2C0 base peripheral address is 0x4001 D000. The I2C1 base peripheral address is 0x4001 E000. Refer to Table 3-1: APB
Peripheral Base Address Map for the addresses of all APB mapped peripherals.
Table 12-3: I
2
C Registers
 Loading...