STONEX R2
② Turn the leveling screw C to move the bubble to the center of the circular vial.
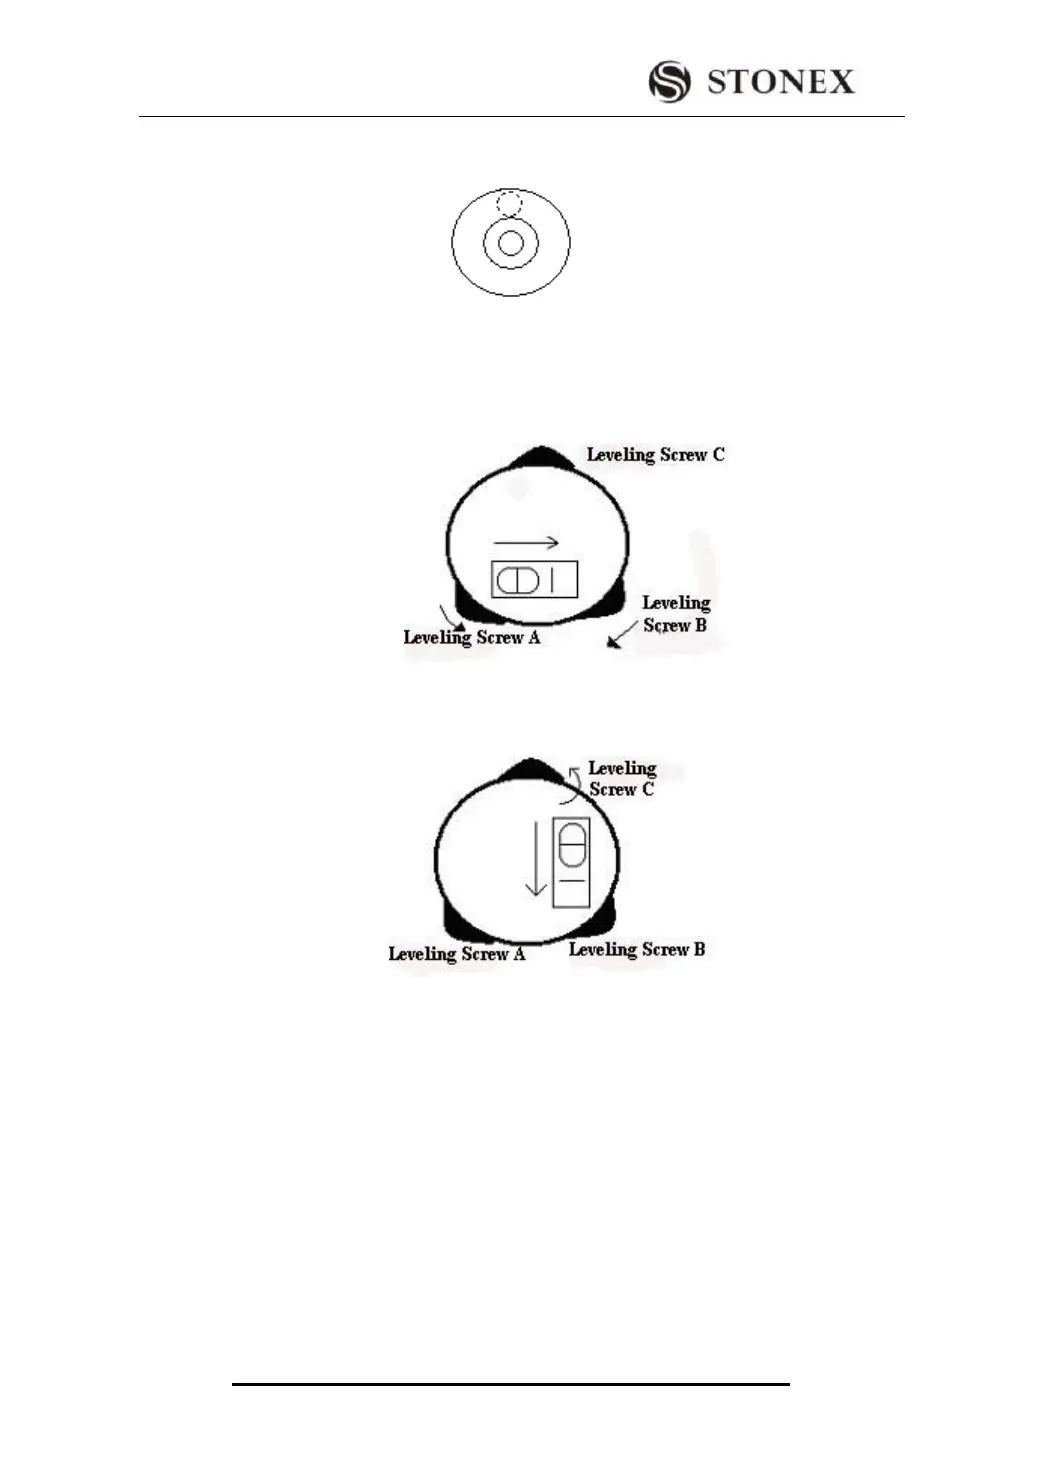
4) Precisely leveling by using the plate vial
① Rotate the instrument horizontally by loosening the Horizontal Clamp Screw and
place the plate vial parallel to the line connecting leveling screw A and B, and then bring
the bubble to the center of the plate vial by turning the leveling screws A and B.
② Rotate the instrument 90º(100g) around its vertical axis and turn the remaining
leveling screw or leveling C to center the bubble once more.
③Repeat the steps ①② for each 90º(100g) rotation of the instrument and check whether
the bubble is correctly centered in all directions.
2 Centering by using the optical plummet
1) Set tripod
Lift tripod to suitable height, ensure equal length of three legs, spread and make tripod
head parallel to the ground, and place it right above the measurement station point. Prop
up tripod on the ground and fix one leg.
2) Install instrument and collimate the point
Set instrument carefully on tripod, tighten the central connecting screw and adjust