STONEX R2
5.2.3 Inputting Coordinate Manually
STEPS: 1.Press [ENH] to display the Input Coordinate menu.
2. Input PtID and coordinate.
3. Press [SAVE] to save the station coordinate. Then input instrument height.
If no station was set or no application started and if in “Measure” [All] or [REC] was
activated, then the last station is set as the current station.
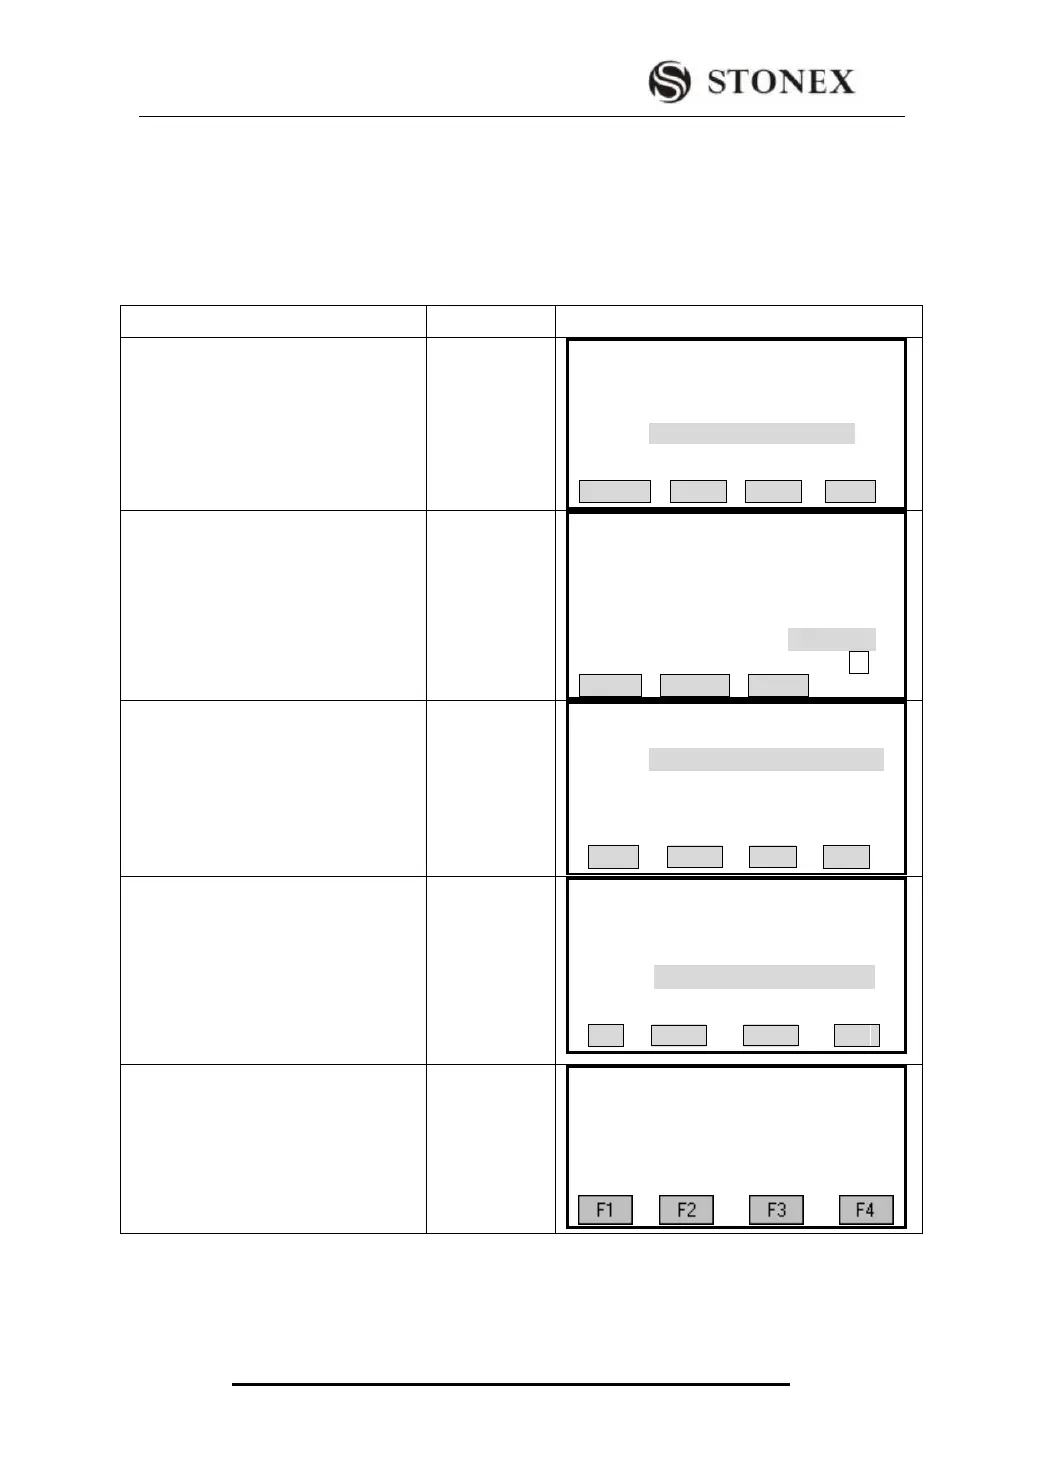
① Press [F3] (ENH) in Setting Station
menu.
Setting Station
Input Station Pt. ID!
StnPt: ----.----
SEARCH LIST ENH . .
② Input PtID and coordinate. After
finishing one setting, press [ENT] to
move on to the next item.
Input PtID and
coordinate
+
[ENT]
【Coordinate Input】
Job : STONEX
Pt. ID : OCC1
X/N : 100.000 m
Y /E : 100.000 m
H/Z : ----.---- m
01
INSERT DELETE CLEAR
③Press [F4] to save station coordinate.
【Setting Station】
Job : STONEX
Pt. ID: OCC1
X/N : 100.000 m
Y /E : 100.000 m
H : 0.000m
BACK SAVE
④ When the screen displays “Data
Save!”, input the instrument height and
press [ENT].
Input
instrument
height
+
[ENT]
Setting Station
Input INS.HT !
INS.HT: 1.000 m
PtID OK
⑤The screen returns to Setting Meas
menu. Settings that are made will
display “*” in the front.
【Setting Meas】
[*]F1 Setting Job (1)
[*]F2 Setting Station (2)
[ ] F3 Set Orientation (3)
F4 Start (4)
5.3 SETTING ORIENTATION
With the orientation, HZ-direction can be input manually or set by points with