STONEX R2
13. CHECK AND ADJUSTMENT
This instrument has undergone a strict process of checking and adjustment, which ensures
that it meets quality requirement. However, after long periods of transport or under a
changing environment, there may be some influences on the internal structure. Therefore,
before the instrument is used for the first time, or before precise surveys, user should
launch check and adjustment introduced in this chapter to ensure the precision of the job.
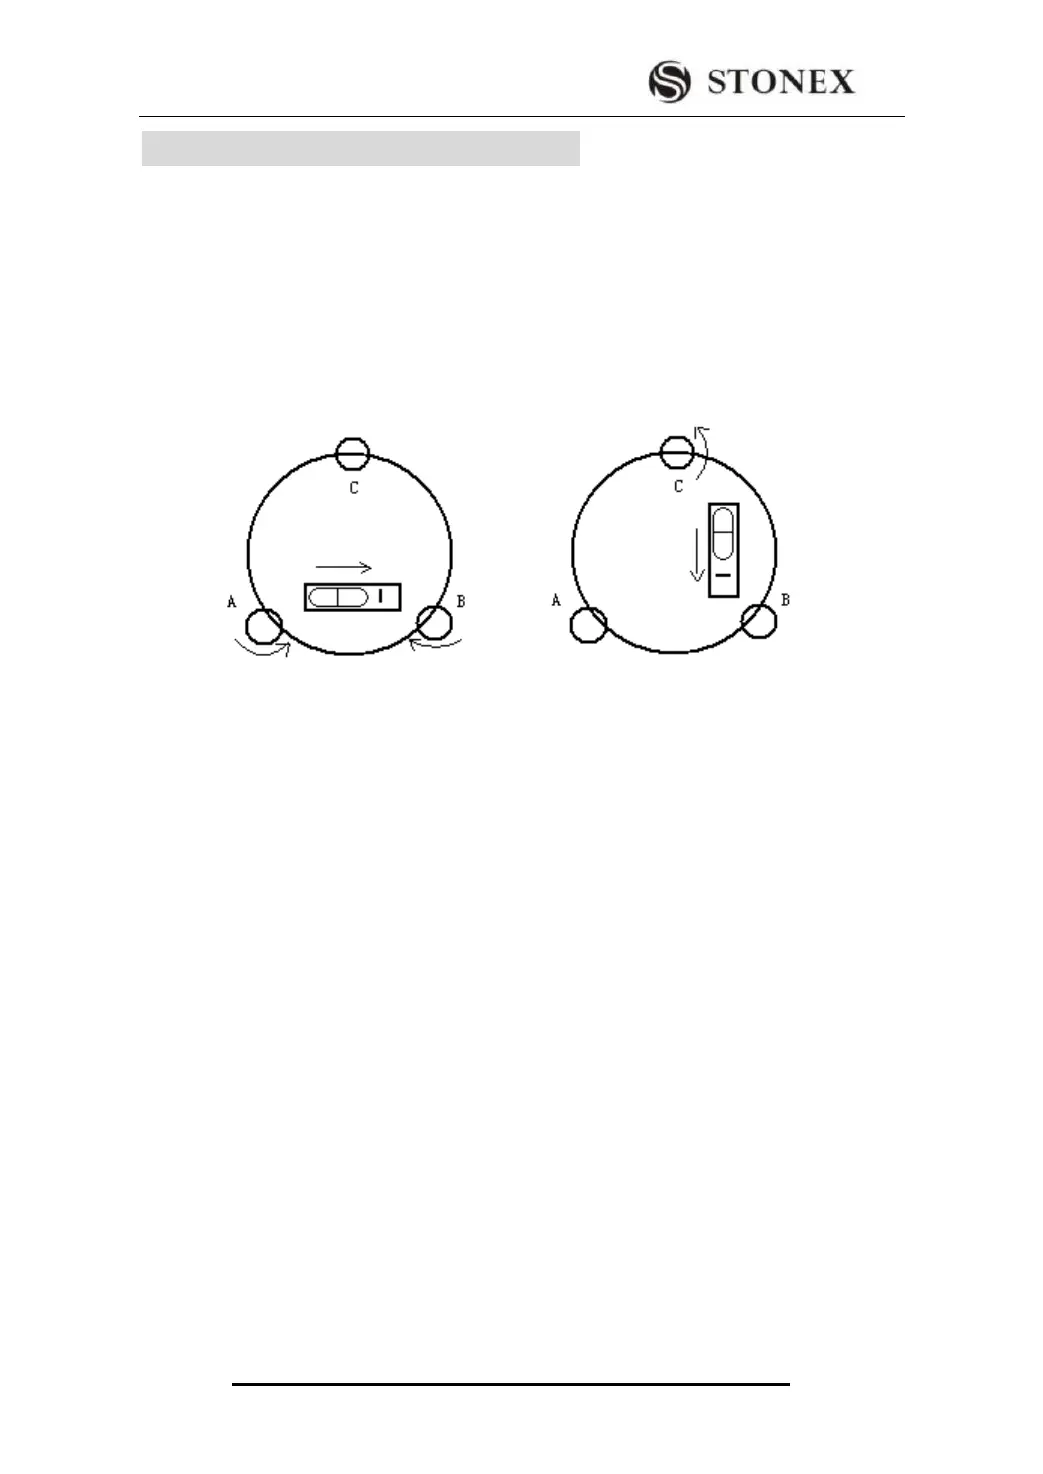
13.1 PLATE VIAL
Check
Please refer to Chapter 3.2 “Leveling by Using Plate Vial”
Adjust
1. Adjust leveling screws, make plate bubble centered;
2. Rotate the instrument 180°; watch the offset of plate level;
3. Tweak adjustment screws (on the right of the plate vial) with the correction pin to make
plate bubble to move half of the offset back;
4. Rotate the instrument 180°, check adjustment result;
5. Repeat the steps above until the plate level is centered in all directions.
13.2 CIRCULAR VIAL
Check:
No adjustment is required if the bubble of circular vial is in the center after checking and
adjustment of the plate vial.
Adjust
1. Adjust circular bubble after plate bubble is centered.
2. Loosen the screw (one or two) opposite with bubble deflective direction;
3. Tighten the screw on the direction accordant deflective until circular
bubble is centered;