Network eManager®
Features of Network eManager
Strata CIX Programming Vol.1 12/09 2-19
Network eManager®
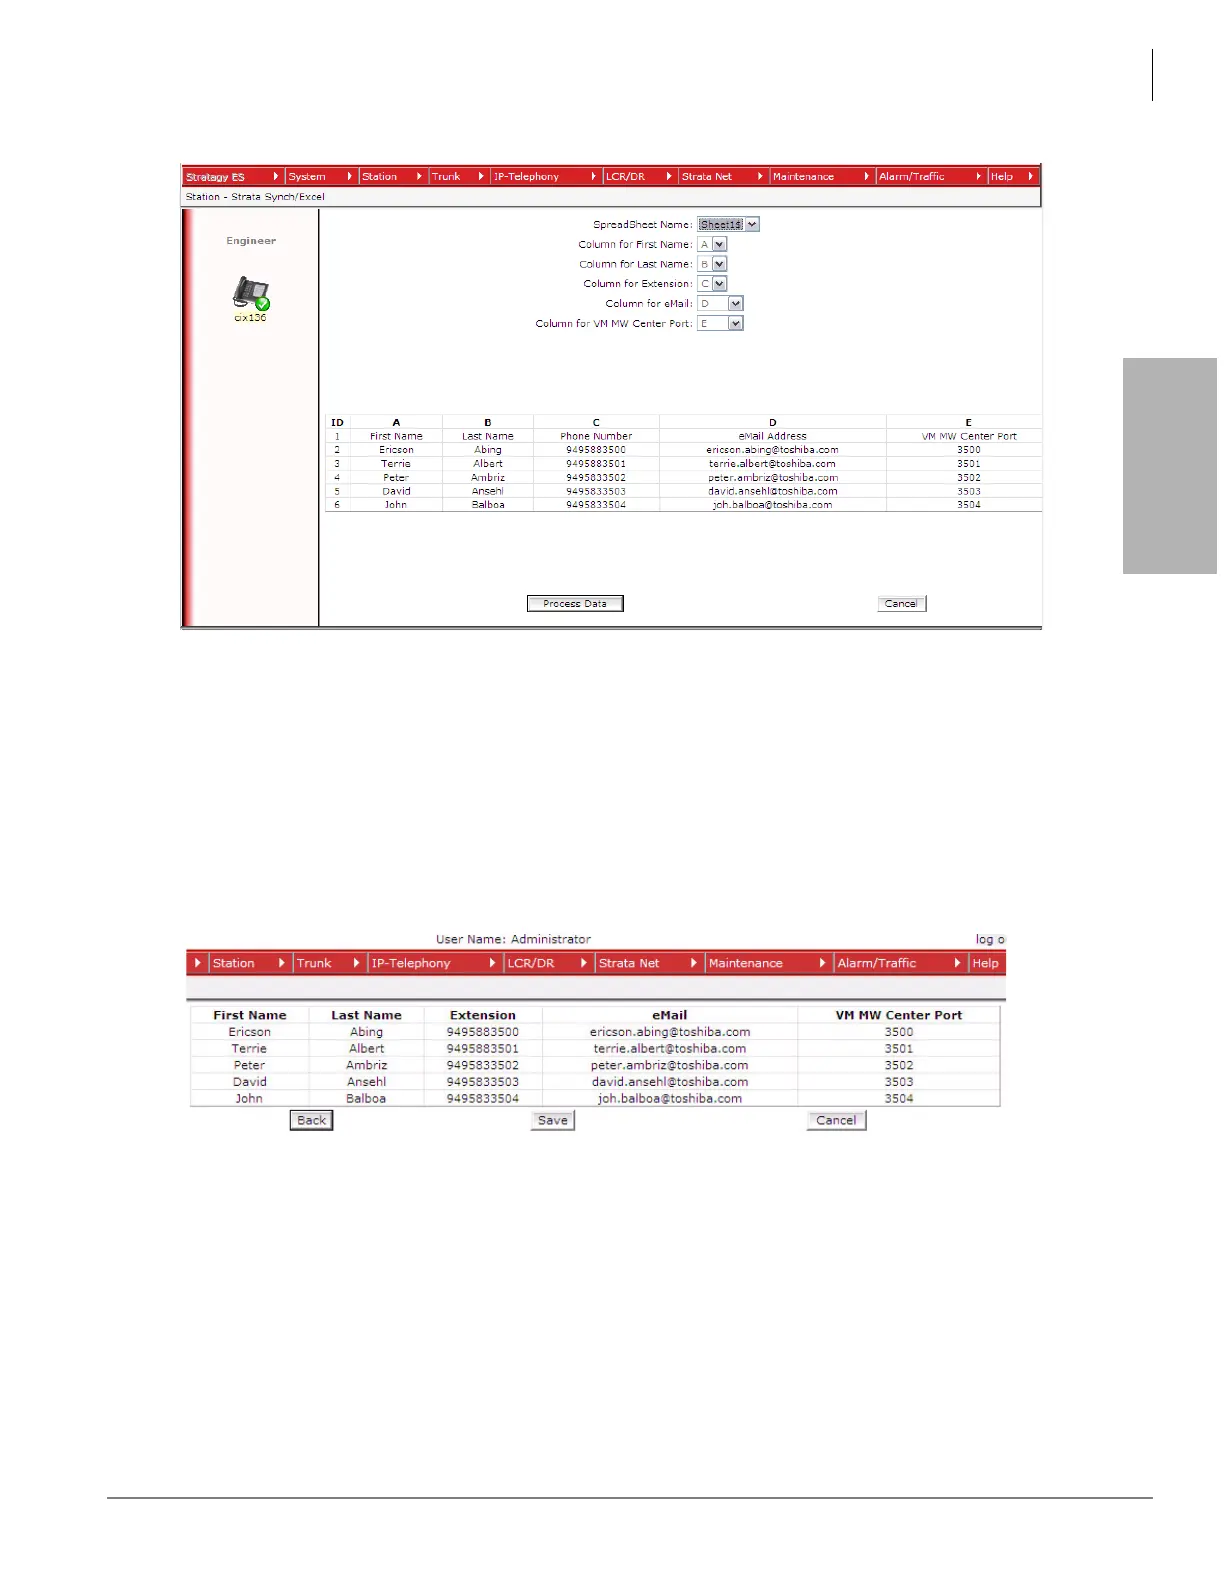
Figure 2-5. Data Definition Screen
5. Step 5 – Verify the data
- Figure 2-6 is the verification screen. This screen allows the technician to make sure field
names correspond with the data. Clicking the Back button on this screen takes the technician
back to the screen shown in Figure 2-5 and modify the columns, if necessary. Clicking the
Cancel button allows the technician to cancel the entire process and return to Figure 2-1.
- Click the Save button to continue with the import process and save the .xls file to the Network
eManager PC as shown on Figure 2-6.
Figure 2-6. Verification Screen
6. Start the import
- Figure 2-7 shows that the spreadsheet has been parsed and verified by Network eManager
and is now ready for importing.
- If this is the very first time the Excel import utility has been executed, click the Initial Install
button.
- The Delete button is simply used to delete the previously uploaded spreadsheet file.