1.
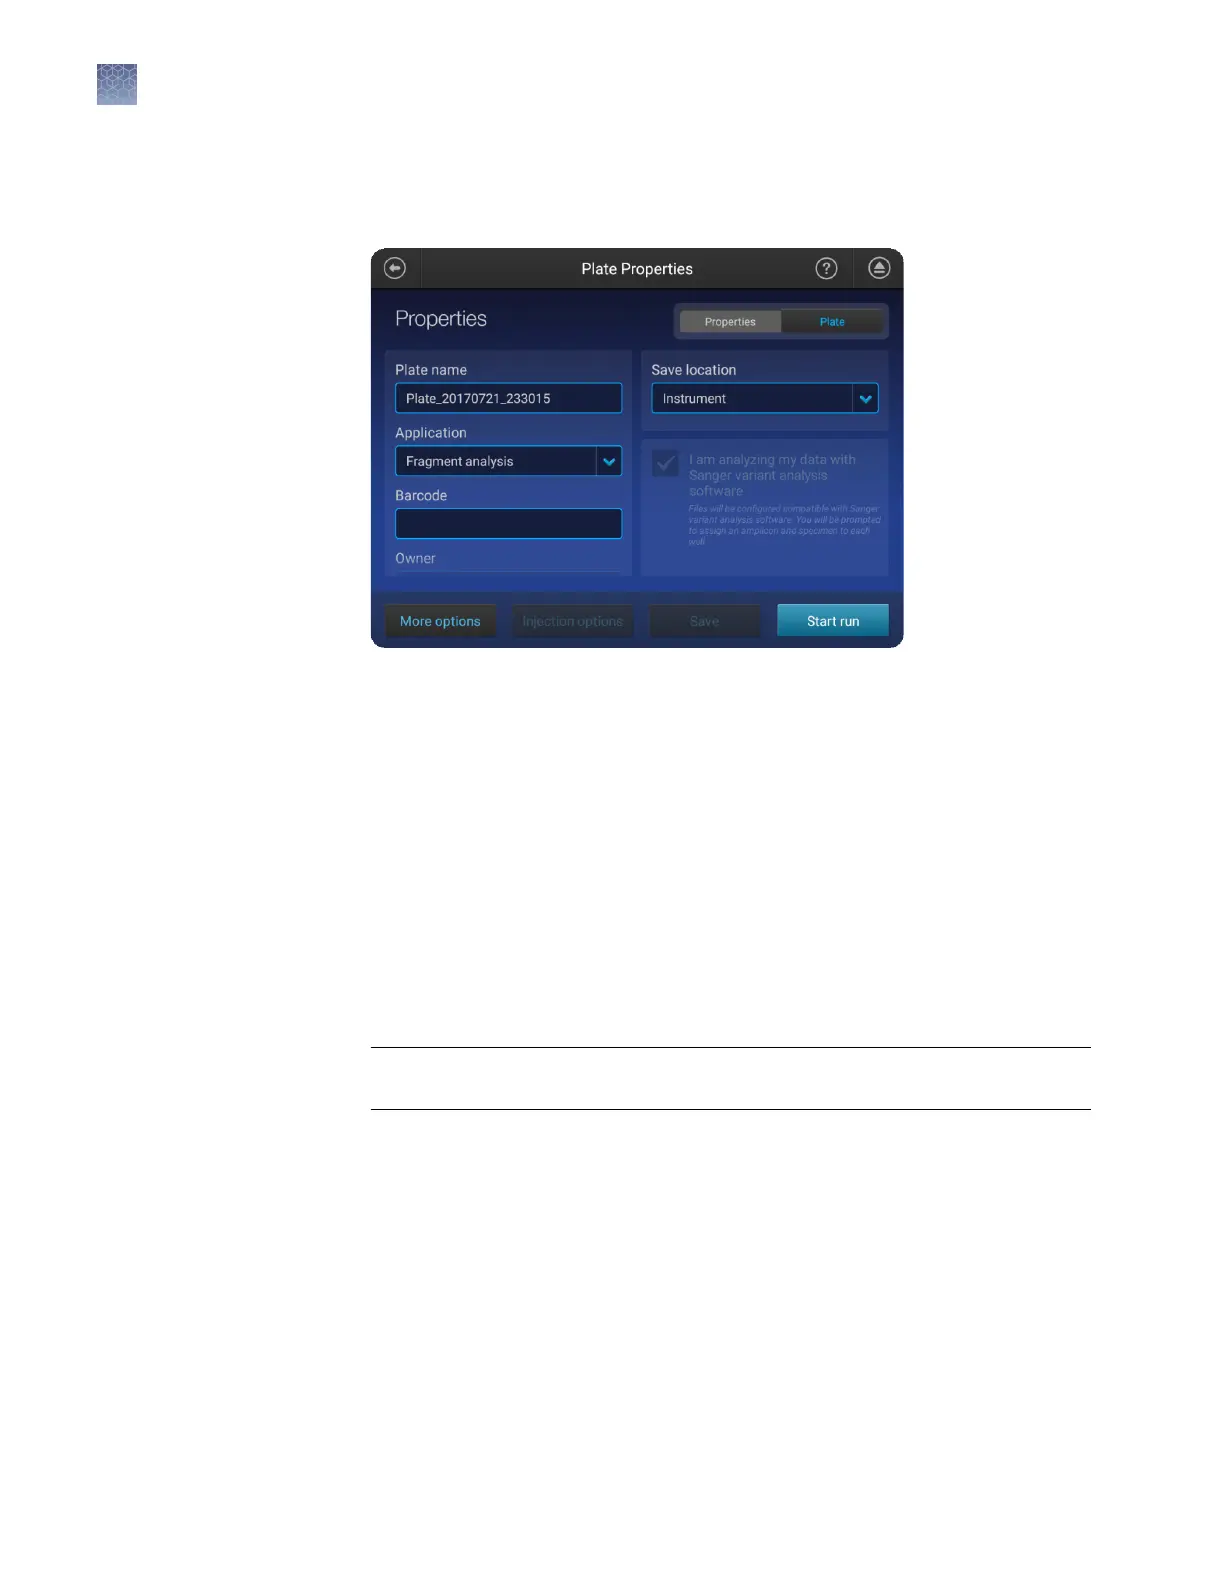
At the top-right of the Plate properties screen, touch the Properties tab.
2.
Touch the Plate name eld, then enter the plate name.
3.
Touch Applications, then select Sequencing, Fragment analysis, HID, or Mixed
plate (allows you to specify fragment analysis and sequence analysis seings on
the same plate).
4.
(Optional) Touch the Barcode eld, then use a scanner to scan the barcode.
5.
(Optional) Touch the Owner eld, then enter the plate owner name.
6.
(Optional) Touch More options to check other seings (for example, Plate setup
security, Analysis seings, and File name convention).
7.
(Optional) Touch Save location, then select a location for the plate setup.
The plate setup is always saved to the instrument. In addition, you can save the
plate to the Connect cloud-based platform, a network, or a USB, which will auto
export the sample data les.
IMPORTANT! To view analyzed data in the Remote Monitoring App on the
Connect platform, you must save the plate setup to the Connect platform.
Note: (Sequencing and Fragment analysis) If you save a plate setup to the Connect
cloud-based platform, a network, or a USB, then access the plate setup at a later
time when the instrument is not linked to the Connect platform, a network, or a
USB, the save location is displayed with strikethrough text.
Enter plate
properties
Chapter 6 Create or modify a plate setup from the instrument
Set up a plate using default settings (instrument)
6
82
SeqStudio
™
Genetic Analyzer Instrument and Software User Guide