Service Parts Disassembly 8-41
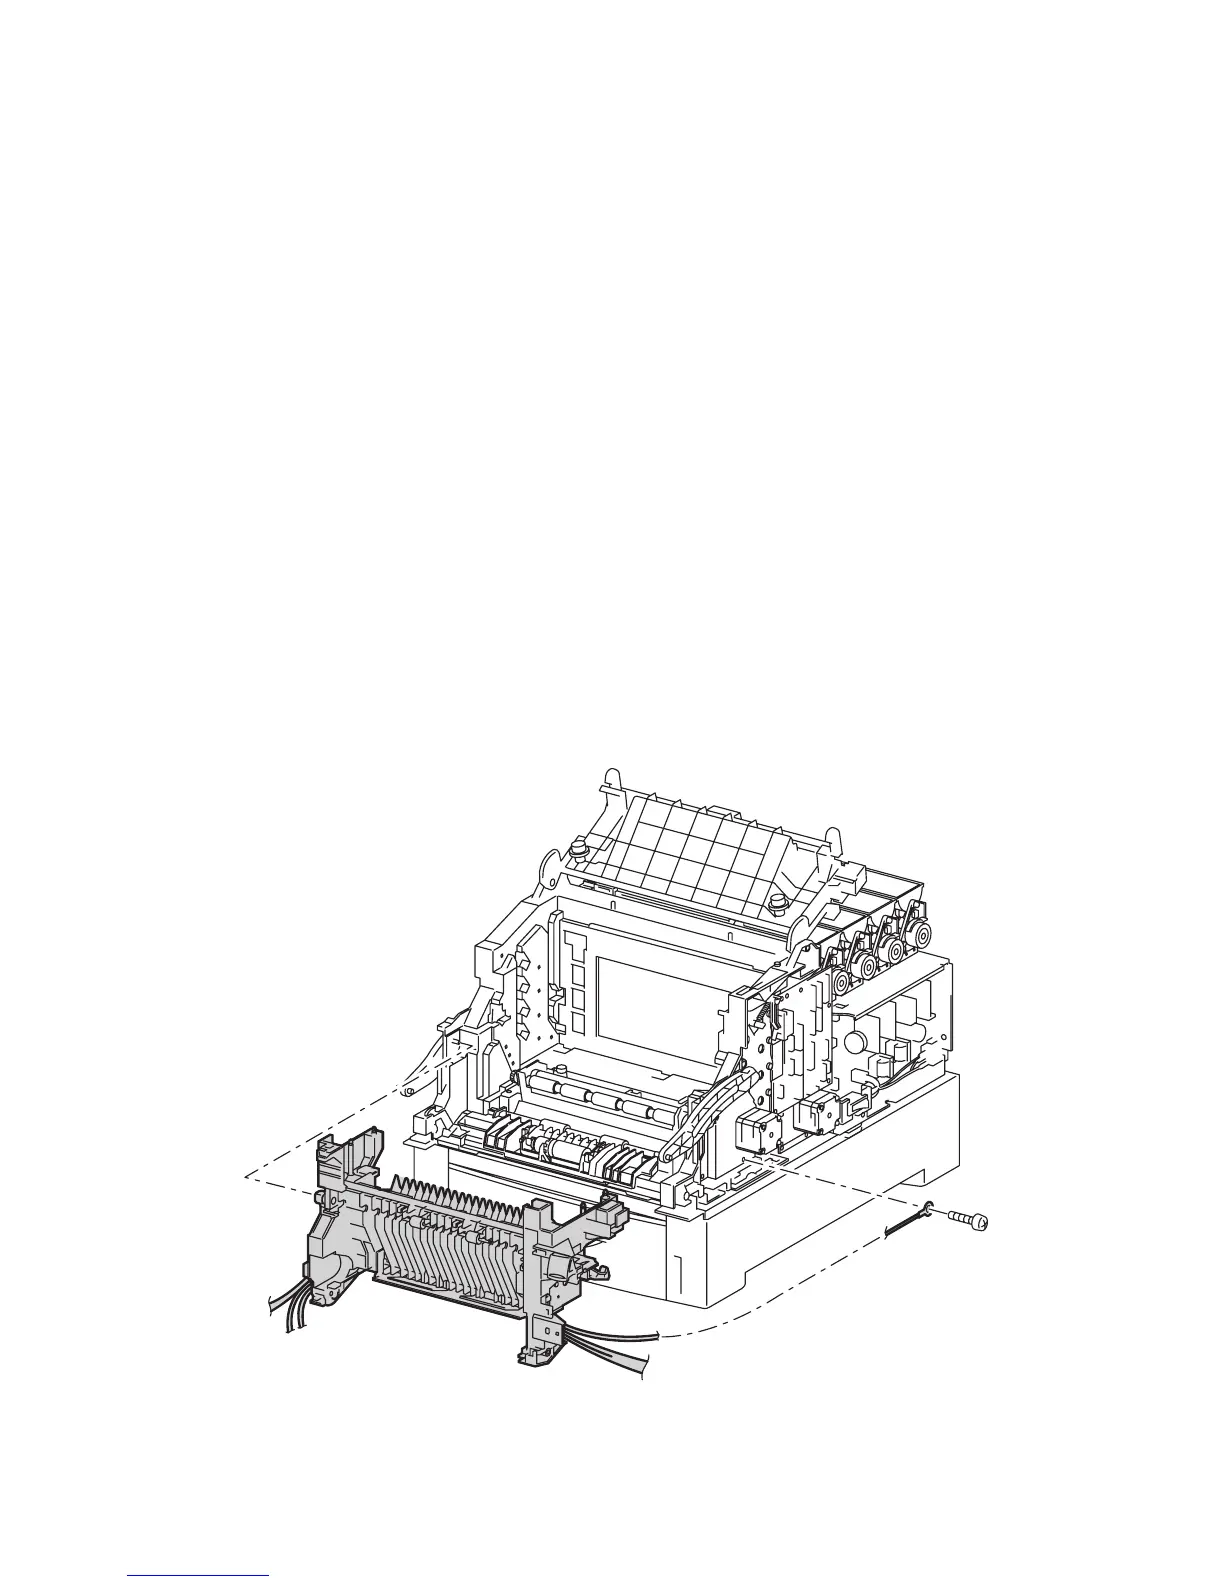
Chute Assembly In
Chute Assembly In (PL 5.1.1)
1. Remove the Chute Assembly Out (page 8-47).
Note
P/J162 is located behind the Motor Driver Board cable retainer. Release the
retainer from the chassis to access the connector.
2. On the right side, remove P/J162 from the LVPS board‘.
3. Remove 1 screw securing the ground wire (green) to the right side of the chassis.
4. Carefully remove the harness items in the previous Steps from the wire guides
along the bottom right side of the chassis.
Caution
Remove the Chute Assembly In slowly and carefully, ensuring that the
wiring harness does not catch and sustain damage during removal.
5. Release latch A (Door A) and pull the Chute Assembly In forward to remove it
from the printer chassis.
6250-169

 Loading...


