Service Parts Disassembly 8-85
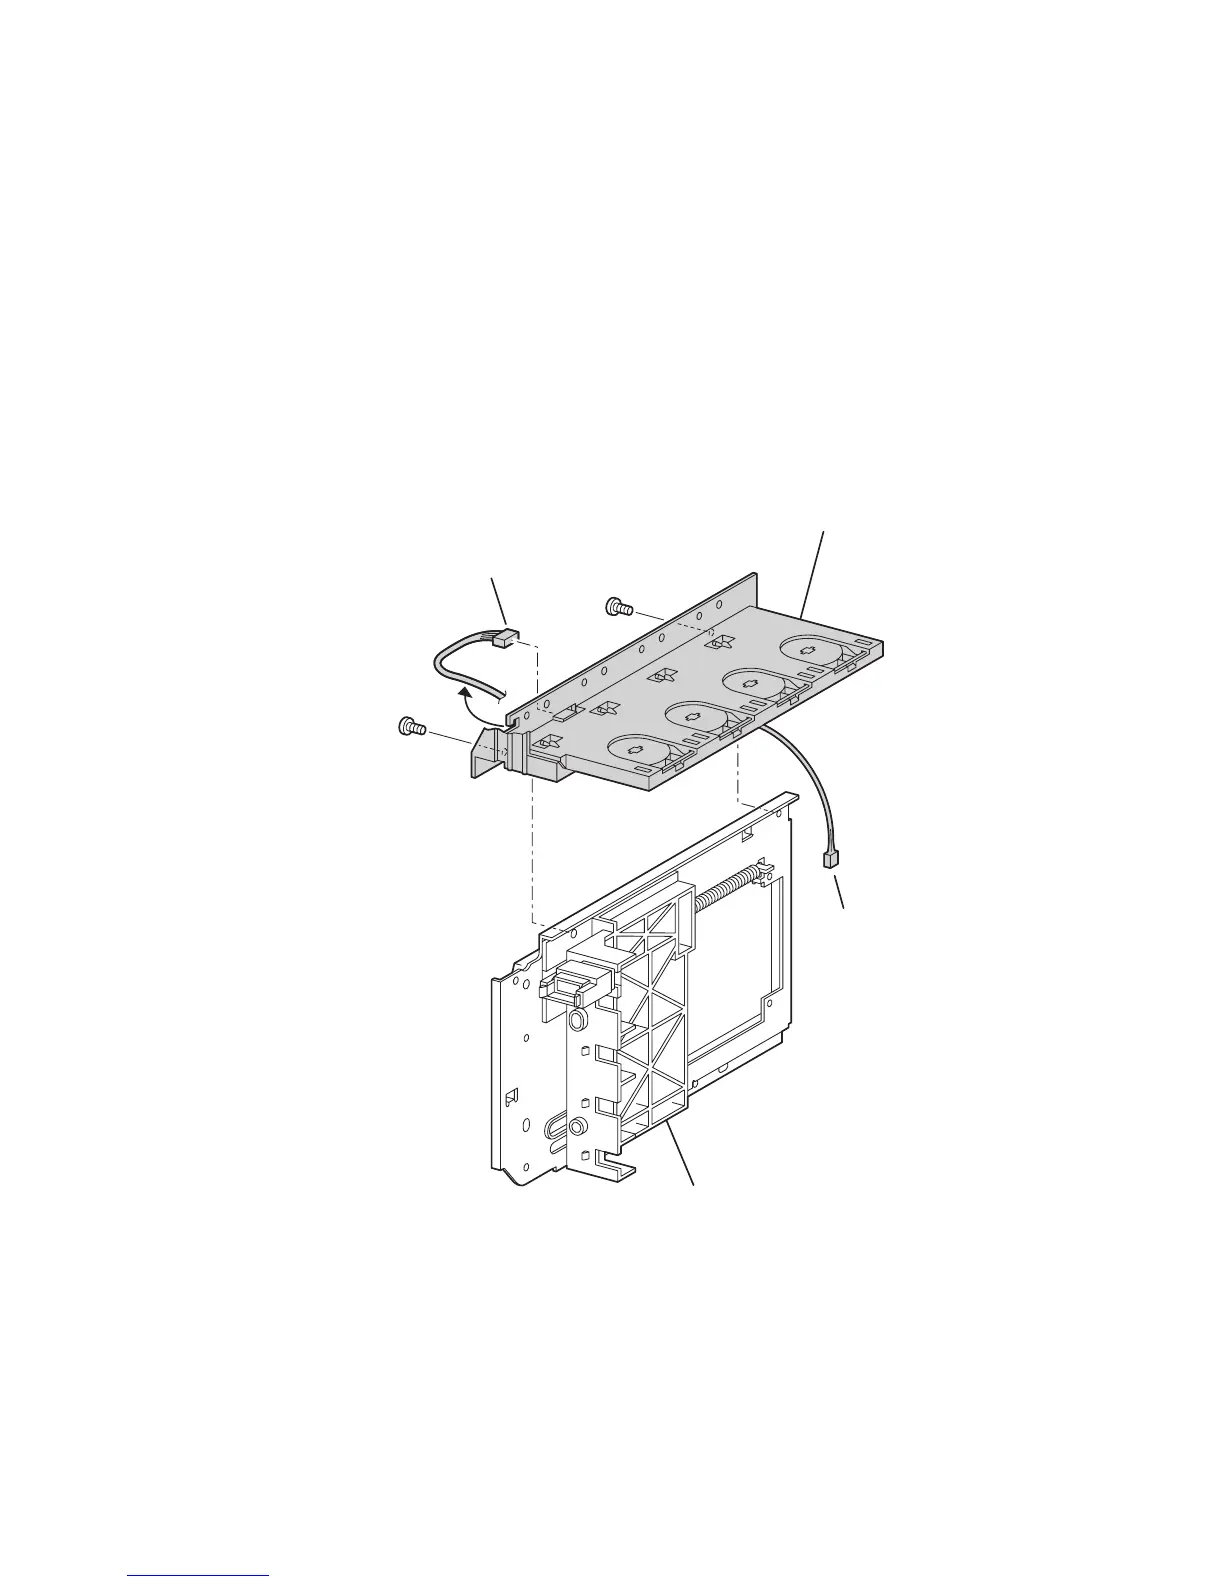
CRUM Reader Box Assembly (PL 10.1.21)
1. Remove the Top Main Cover (page 8-9).
2. Remove the Right and Left Side Covers (page 8-11).
3. Remove the Rear Cover (page 8-12).
4. Disconnect P/J 342 and P/J 3411 from the CRUM Reader Box Assembly and
remove the wires from the cable holders.
5. Remove the 7 screws securing the CRUM Reader Box Assembly (item #1) to the
printer; 4 underneath the cartridge holders, 2 connecting the bottom of the
CRUM to the Dispenser Plate (item #2), and 1 inserted vertically through the
front of the CRUM.
6. Push in slightly on the Dispenser Plate to disengage the locator pins, lift the
CRUM slightly and slide it out to the left rear.
Replacement Notes
Note
Support the CRUM Reader from underneath and slide it into position.
Position each cartridge holder, working from Yellow to Black and slide the
CRUM to the right to lock the cartridge holders in place.
1
J342
J3411
2
6350-492

 Loading...


