8-68 Phaser 6250 Color Laser Printer Service Manual
Xerographics
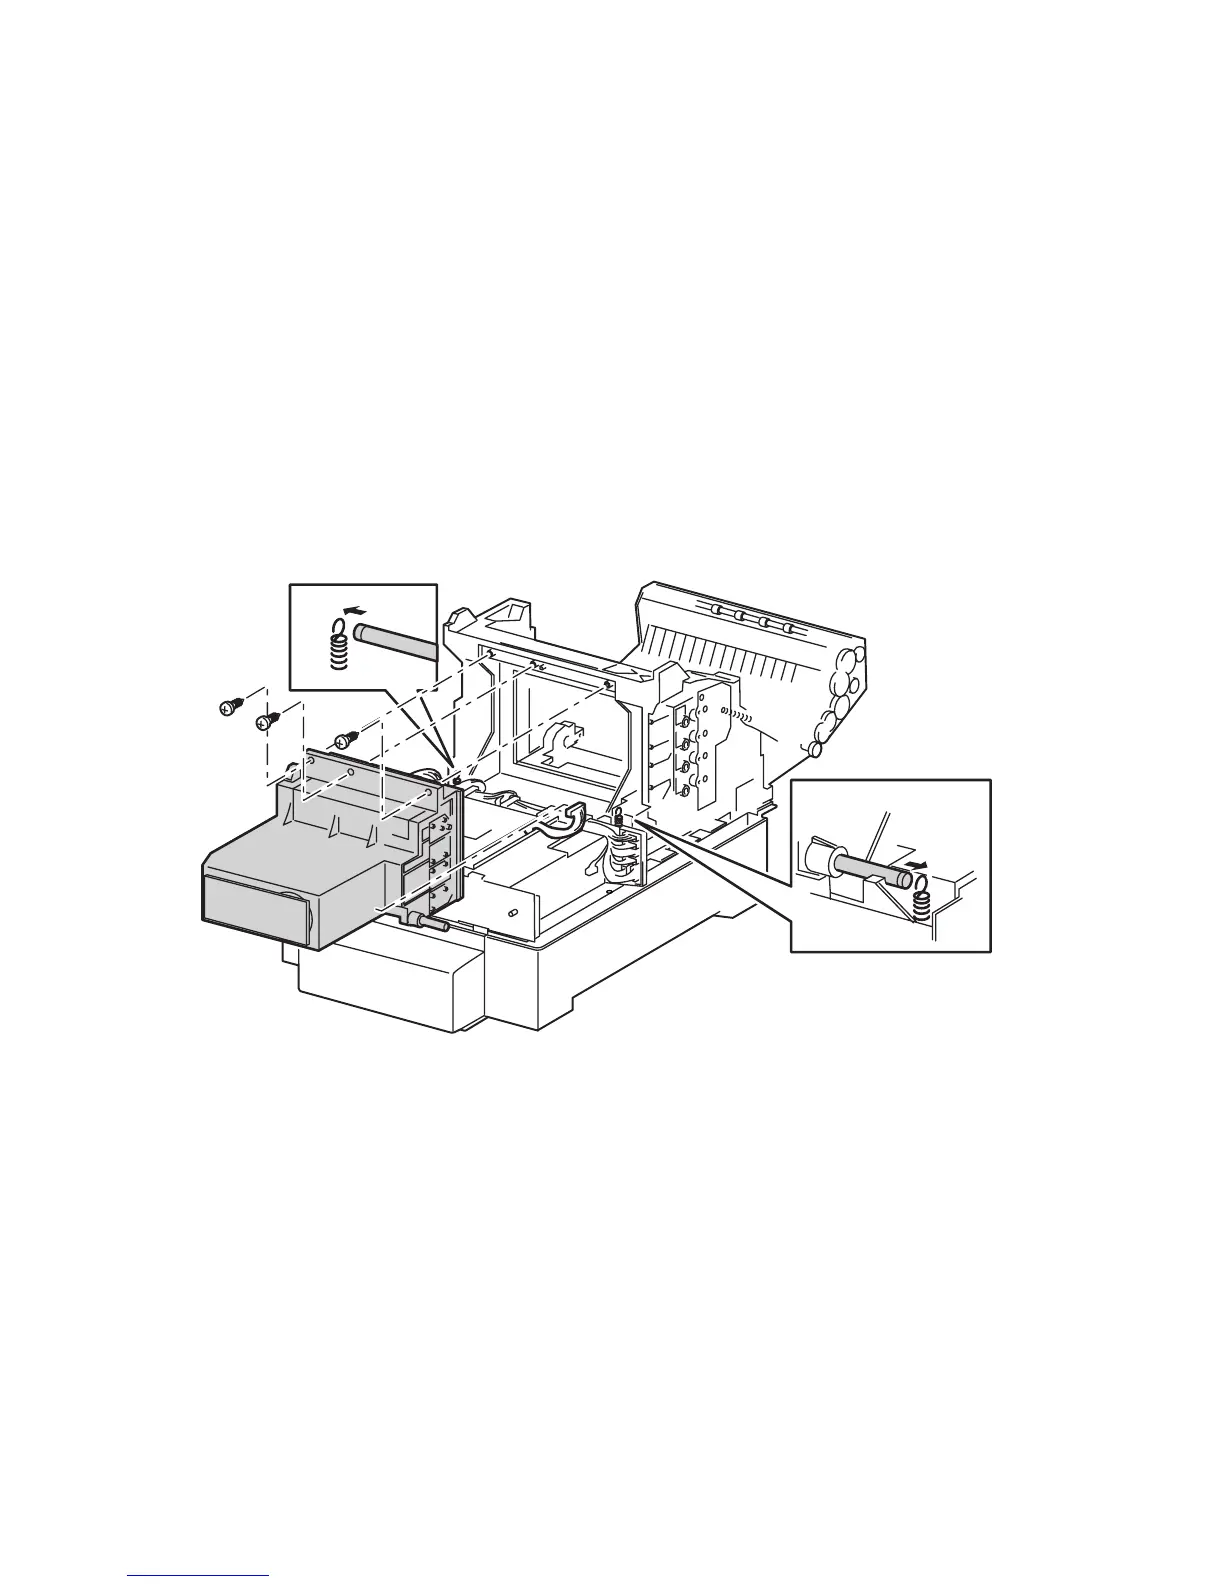
Laser Unit (PL 9.1.1)
1. Remove the Toner Cartridge Holder Unit Assembly (page 8-77).
2. Remove the Rear Fan (page 8-102).
3. Disconnect P/J151 from the Laser Unit.
4. Unhook the springs from the left and right ends of the shaft.
Caution
Handle the Laser Unit carefully; avoid bumping or jarring the unit.
5. Remove 3 screws securing the Laser Unit to the printer and slide the unit back to
remove the assembly.
Replacement Notes
1. Align the Laser Unit with the printer (locator stud in the oval hole on the unit).
2. Replace the hook on each Laser Spring in the notch at each end of the shaft.
3. Replace the 3 screws that secure the Laser Unit to the printer.
4. Reconnect P/J151.
Note
Perform the Color Registration procedure after replacing the Laser Unit.
6250-203

 Loading...


