EasyManuals Logo
Home>Xerox>Printer>PHASER 6250

Xerox PHASER 6250 Service Manual

Xerox PHASER 6250
474 pages
To Next Page IconTo Next Page
To Previous Page IconTo Previous Page
Page #285 background imageLoading...
Page #285 background image
Service Parts Disassembly 8-59
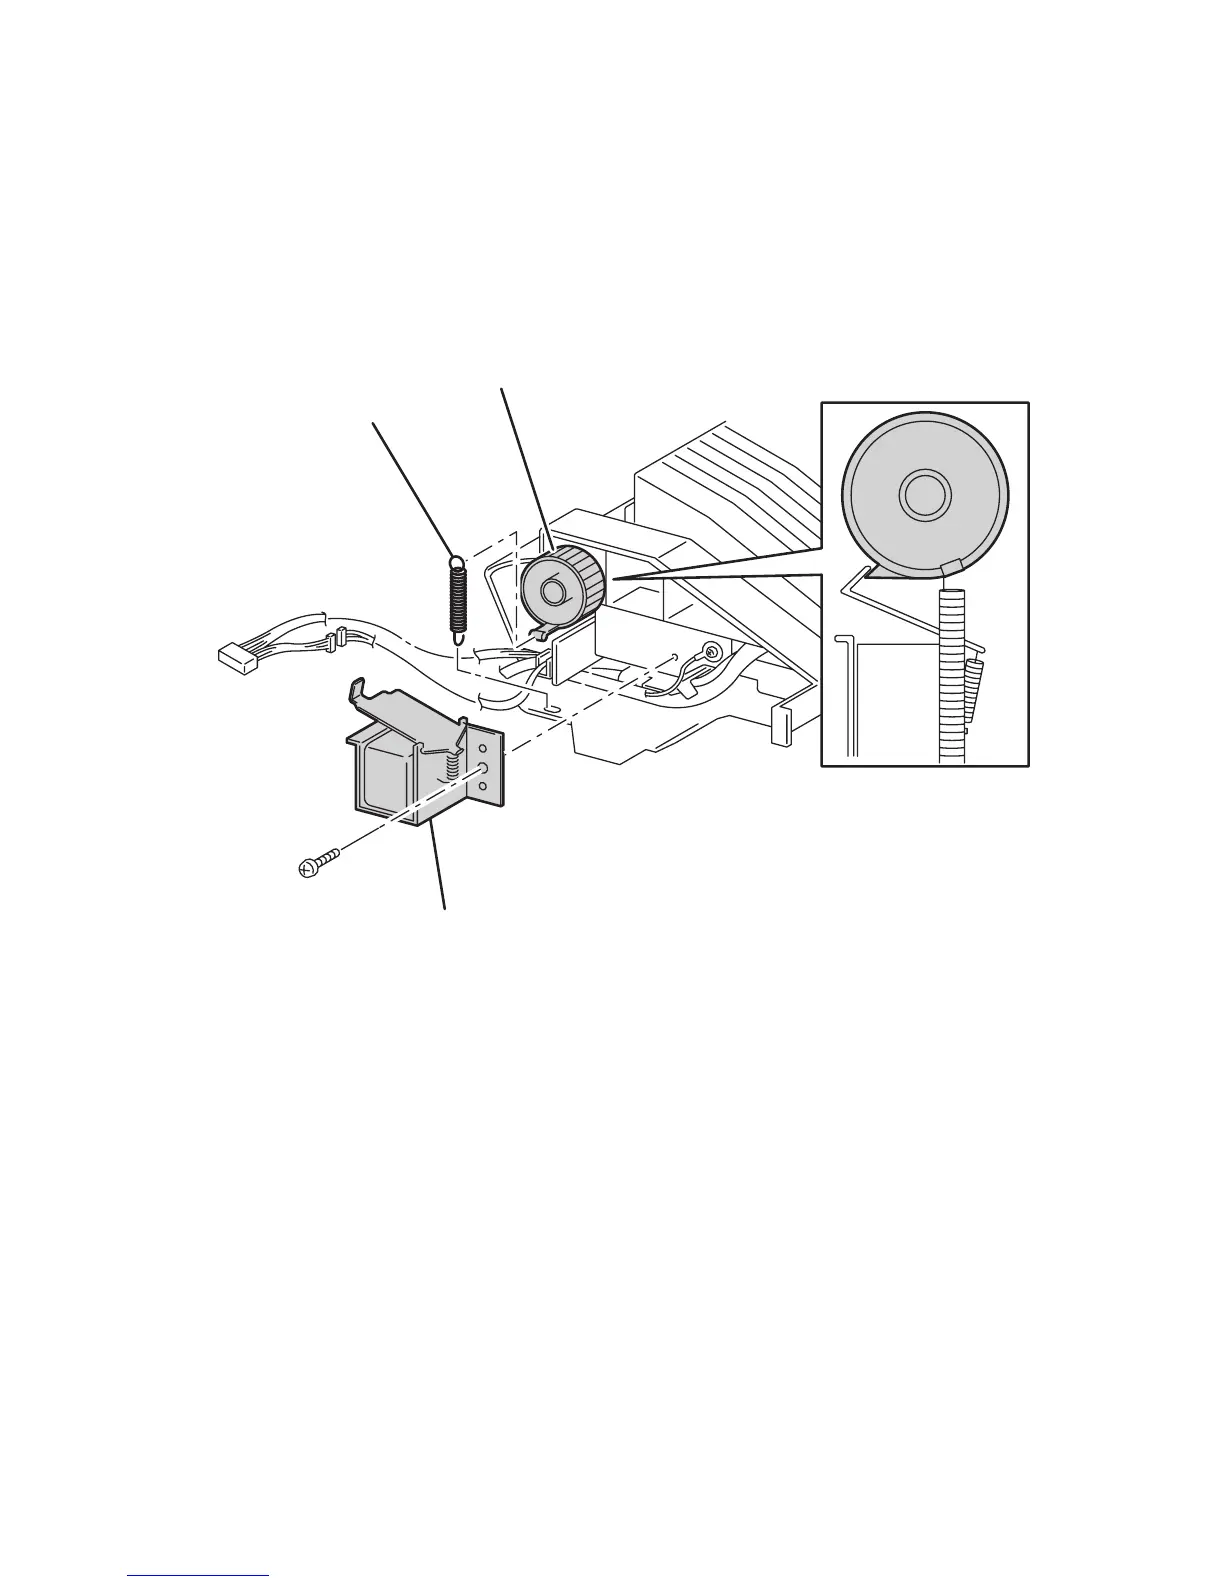
Tray 1 Feed Solenoid (PL 6.1.40)
1. Remove the Chute Assembly Out (page 8-47).
2. Unhook the N/F Tray 1 spring (item #1) from the Solenoid Stopper (item #2).
3. Disconnect P/J132 (orange wires) from the Solenoid and shift the wires out of the
cable guides on the Chute Assembly Out.
4. Remove 1 screw securing the Feed Solenoid (item #3) to the Chute Assembly
Out and remove.
Reassembly Notes
Note
Make sure the solenoid seats properly on the aligning pins. The pins are
plastic.
6250-189
1
2
3

Table of Contents

Other manuals for Xerox PHASER 6250

Questions and Answers:

Question and Answer IconNeed help?

Do you have a question about the Xerox PHASER 6250 and is the answer not in the manual?

Xerox PHASER 6250 Specifications

General IconGeneral
BrandXerox
ModelPHASER 6250
CategoryPrinter
LanguageEnglish

Related product manuals